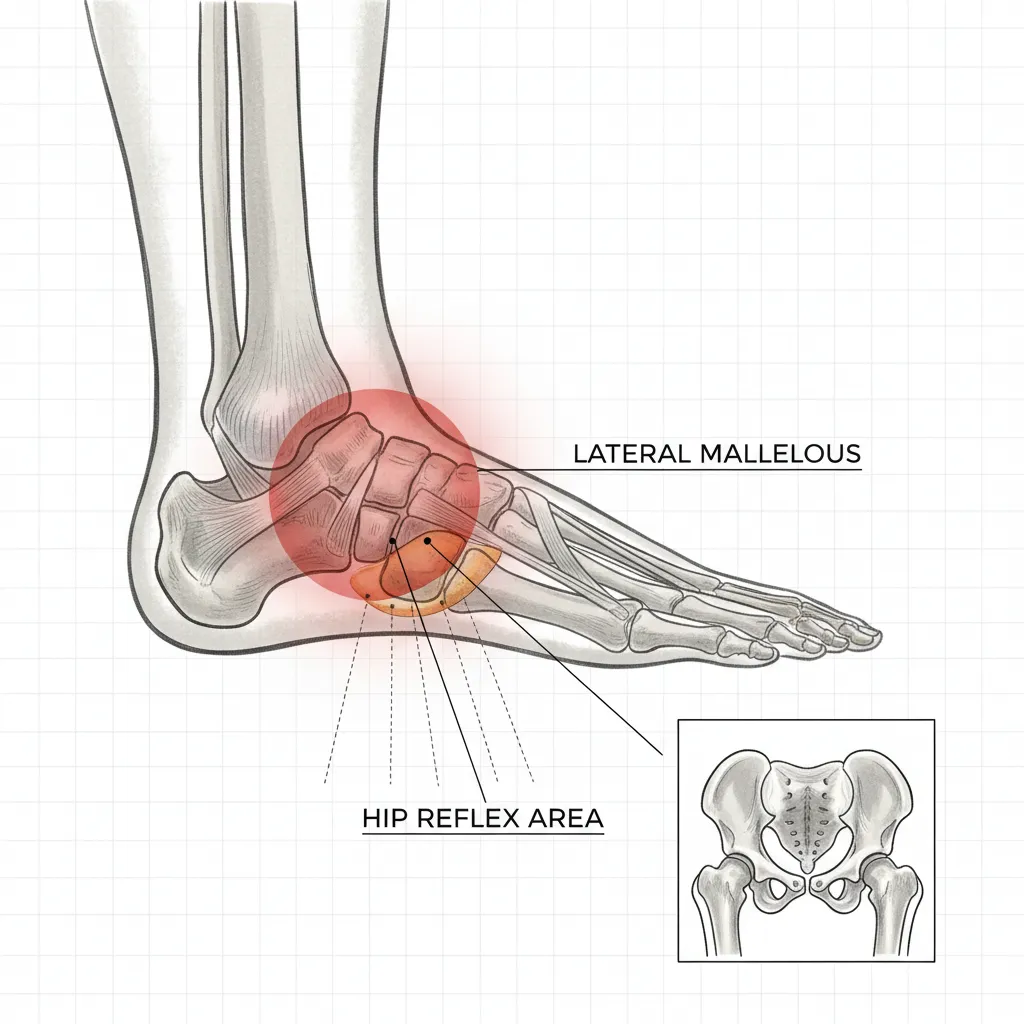
Reflexology points for hip pain are primarily located on the lateral aspect of the foot, nestled in the crescent-shaped groove directly beneath the outer ankle bone (lateral malleolus). Stimulating this specific area, alongside the sciatic nerve reflex found across the heel, effectively targets hip tension, alleviates inflammation, and improves overall joint mobility.
Hip pain can be debilitating, affecting everything from your gait to your ability to sleep comfortably. While conventional medicine often turns to anti-inflammatories or physical therapy, reflexology offers a powerful, non-invasive complementary therapy. By accessing specific nerve endings in the feet that correspond to the pelvic region, you can signal the body to release tension, increase blood flow, and reduce pain signals originating from the hip joint.
This guide serves as a comprehensive resource for utilizing reflexology to manage hip discomfort. Whether you are suffering from chronic tightness, acute bursitis, or post-exercise fatigue, understanding the precise mapping of the foot allows you to facilitate healing from the ground up. To learn more about the broader principles, consider reading Understanding Reflexology: A Comprehensive Guide.
Understanding the Foot-Hip Connection
Reflexology is based on the premise that the feet are microcosms of the entire body. The principle of “zone therapy” divides the body into ten vertical zones, five on each side. The hips, being lateral structures located on the outer edges of the torso, correspond to the lateral (outer) edges of the feet. This anatomical mirroring is why the primary treatment area for hip issues is found on the outside of the ankle, rather than the arch or the toes.
When the hip joint is inflamed or tight, crystalline deposits—often referred to as “crunchies” by reflexologists—can accumulate in the corresponding reflex area of the foot. These deposits are believed to be waste products like uric acid or calcium. By breaking down these deposits through massage and pressure, we clear the energy pathways (or meridians) and encourage the body to send healing resources to the actual hip joint.
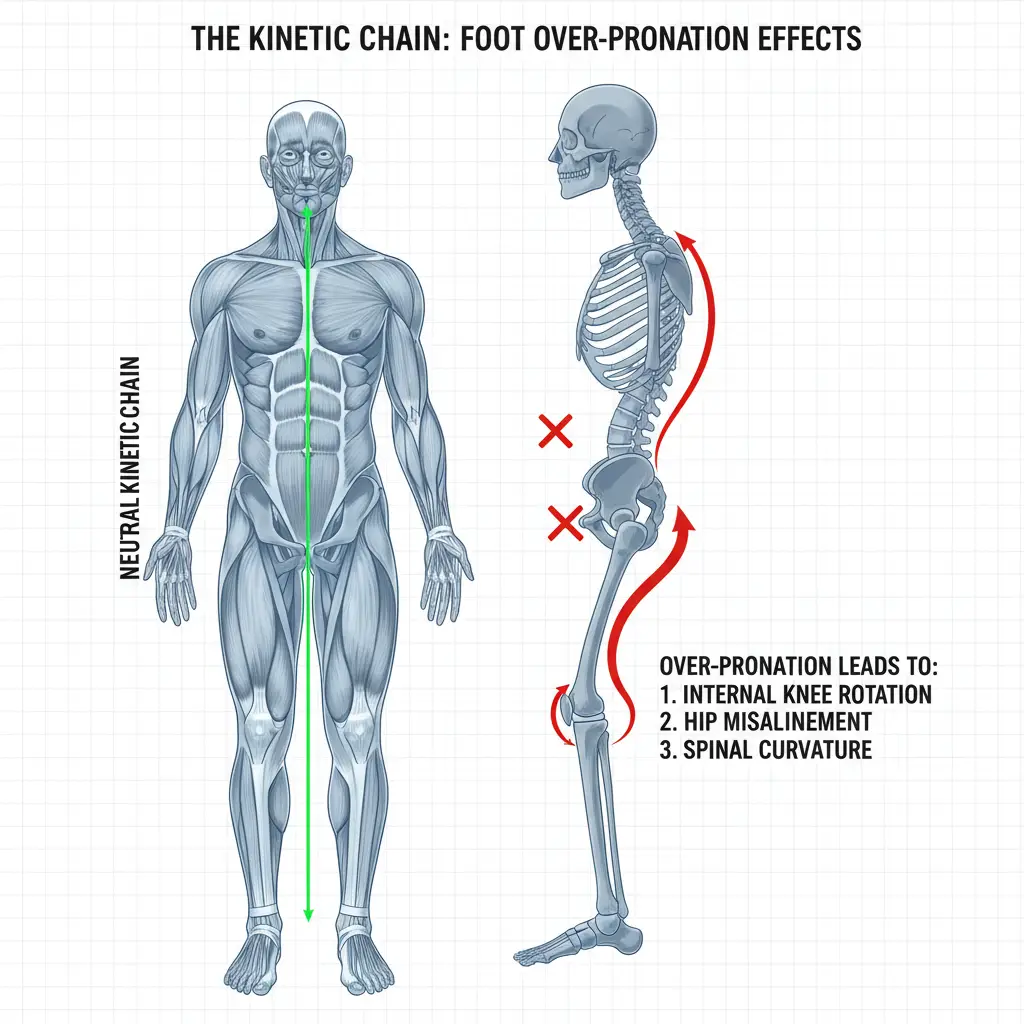
Furthermore, the hip does not operate in isolation. It is mechanically linked to the lower back (lumbar spine) and the sciatic nerve. Therefore, a holistic reflexology session for hip pain must also address the spine reflex (along the medial arch) and the sciatic loop (across the heel) to be truly effective.
Locating the Primary Reflexology Points for Hip Pain
Precision is key in reflexology. Missing the point by even half an inch can result in stimulating the wrong organ or muscle group. To effectively target the hip, you must locate the primary hip reflex with accuracy.
The Lateral Ankle Crescent
The most critical point for hip pain relief is the Hip/Sciatic Reflex. Here is how to locate it step-by-step:
- Identify the Malleolus: Feel for the large, bony protrusion on the outside of your ankle. This is the lateral malleolus.
- Find the Groove: Slide your finger directly down from the bottom of the ankle bone. You will fall into a soft, semi-circular depression or groove that curves around the bottom of the bone.
- Trace the Line: This groove, extending from the front of the ankle bone to the back towards the Achilles tendon, represents the hip and pelvic region.
If you are currently experiencing hip pain, this area on the foot is likely to feel tender, sensitive, or “gritty” to the touch. This sensitivity is a diagnostic indicator in reflexology, confirming congestion in the corresponding body part.
The Sciatic Nerve Loop
The sciatic nerve runs through the hip and down the leg. Impingement here often mimics or exacerbates hip pain. The reflex for this nerve is located as a “strap” running across the bottom of the heel and up the back of the ankle (the Achilles area). Working this zone is essential for radiating hip pain.
Techniques for Relieving Bursitis and Tightness
Bursitis occurs when the fluid-filled sacs (bursae) that cushion the hip joint become inflamed. This creates a sharp, burning pain. Reflexology can assist by promoting lymphatic drainage and reducing systemic inflammation. The technique used here should be gentler than the technique used for muscular tightness.
The Thumb-Walking Technique
For general tightness and bursitis, do not press and hold statically. Instead, use the “thumb-walking” method:
- Position: Support the foot with one hand. Place the thumb of your working hand at the front edge of the hip reflex groove (under the ankle bone).
- Action: Bend and unbend your thumb joint, inching your way along the groove towards the heel. Think of it as a caterpillar crawling.
- Pressure: Apply firm but tolerable pressure. If you encounter a painful spot (an active reflex), lighten the pressure but continue working the area for 15–30 seconds to encourage blood flow without causing further trauma.
Rotational Friction for Chronic Stiffness
If the hip feels “locked” or chronically stiff (common in arthritis), use rotational friction:
- Place your index finger or thumb on the most tender part of the hip reflex.
- Apply steady pressure and rotate the finger in a small circular motion.
- Rotate clockwise for 10 seconds, then counter-clockwise. This helps break down the crystalline deposits mentioned earlier.
Improving Range of Motion and Flexibility
Restricted range of motion often stems from a combination of tight hip flexors and a stiff lower back. To improve mobility, you must expand your reflexology routine beyond just the ankle point.
The Iliopsoas Point
The iliopsoas muscle is the primary hip flexor. When it is tight, it pulls the pelvis out of alignment. The reflex point for the iliopsoas is located on the sole of the foot, in the instep area, roughly aligned with the second toe but significantly lower, near the highest point of the arch. Deep pressure here can trigger a release in the front of the hips.
Connecting the Spine
The medial (inner) edge of the foot corresponds to the spine. The heel represents the sacrum and coccyx, while the arch represents the lumbar spine. To improve hip mobility:
- Thumb-walk up the inner edge of the foot, starting from the heel and moving toward the big toe.
- Pay special attention to the area where the heel meets the arch; this is the sacral/lumbar junction, a common source of referred pain to the hips.
According to research highlighted by institutions like the National Center for Biotechnology Information (NCBI), reflexology can significantly reduce pain intensity and improve physiological parameters, suggesting its validity in managing musculoskeletal conditions affecting mobility.
Post-Run Recovery: A Protocol for Runners
Runners frequently suffer from tight hips, IT band syndrome, and runner’s knee, all of which stem from pelvic instability. A post-run reflexology routine can accelerate recovery by flushing out lactic acid and resetting muscle tone.
The IT Band Reflex
The Iliotibial (IT) band runs down the outside of the thigh. Its reflex area is located along the lateral edge of the foot (the blade of the foot), extending from the base of the little toe down to the heel. Rubbing this entire outer edge vigorously helps relax the lateral thigh muscles that pull on the hip.
The Knee-Hip Connection
Because the hip and knee are mechanically coupled, runners should also work the knee reflex. This is located on the lateral side of the foot, just below the hip reflex groove. It often feels like a small bony ridge. Working the hip and knee reflexes together ensures the entire kinetic chain is addressed.
Runner’s Protocol:
- Step 1: Warm up the foot with general massage.
- Step 2: Aggressively thumb-walk the lateral edge (IT Band) from heel to toe.
- Step 3: Spend 2 minutes working the crescent groove under the ankle (Hip).
- Step 4: Finish with the Sciatic loop across the heel to prevent nerve tightness.
Complementary Reflex Points for Total Hip Health
To achieve the “definitive” results promised by this guide, one must look at the endocrine system. Chronic pain often involves the adrenal glands, which produce cortisol (the stress hormone) and manage inflammation.
The Adrenal Reflex
The adrenal reflex is located slightly inward from the ball of the foot, roughly under the big toe tendon but deep in the solar plexus zone. Pressing this point promotes relaxation and helps the body manage the inflammatory response associated with hip pain. For specific techniques on managing stress and anxiety, you might find Calming Anxiety Attacks useful.
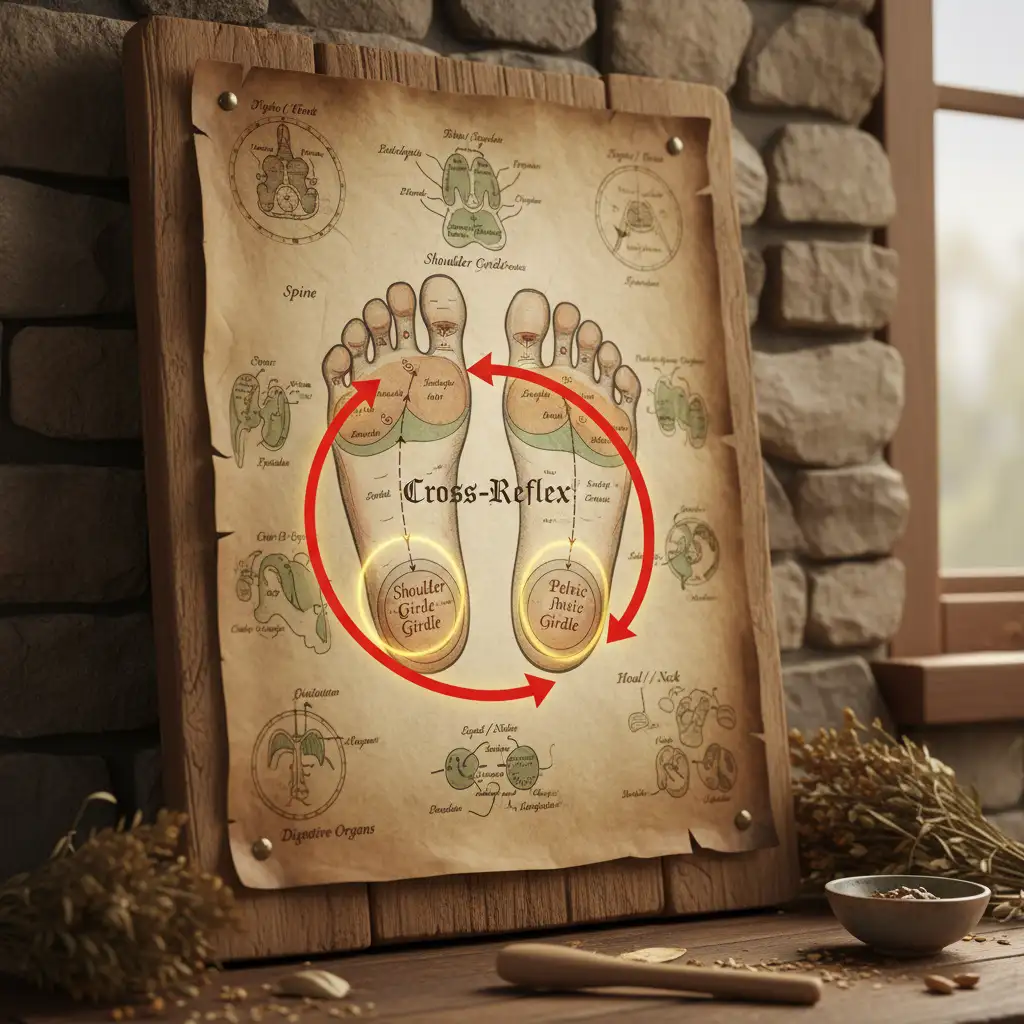
Shoulder Reflexes
In the theory of “cross-reflexes,” the hips correspond to the shoulders. The right hip relates to the right shoulder, and the left to the left. Often, tension in the shoulder girdle locks the hips. The shoulder reflex is located on the ball of the foot, just below the little toe. Working this area can surprisingly release stubborn hip tension through cross-body signaling.
Best Practices and Precautions
While reflexology is generally safe, there are protocols to follow to ensure safety and efficacy. For detailed information on the professional standards and ethical guidelines for practitioners, refer to Regulation of Reflexology in New Zealand: Ensuring Safe and Ethical Practice. For more information on the safety and application of complementary therapies, reputable sources like the Mayo Clinic offer extensive overviews on what to expect during a session.
- Hydration: Reflexology stimulates the elimination of toxins. You must drink a large glass of water after a session to flush these metabolic wastes from your system. Failure to do so can result in a headache or sluggishness.
- Contraindications: If you have a foot fracture, open wounds on the foot, or active gout, avoid working the affected area directly. Additionally, pregnant women should consult a specialist, as some reflex points around the ankles can stimulate uterine contractions.
- Consistency: One session will not permanently cure chronic hip pain. A consistent routine—10 minutes daily or three times a week—yields the best cumulative results.
Frequently Asked Questions
Below are answers to common questions regarding the application of reflexology for hip issues.
Where is the pressure point for hip pain?
The primary pressure point for hip pain is located on the outside of the ankle. It is found in the depression directly below the lateral malleolus (ankle bone), curving around the bottom of the bone towards the heel.
Can reflexology help with hip bursitis?
Yes, reflexology can help hip bursitis by improving blood circulation and lymphatic drainage around the hip joint. Gentle stimulation of the hip reflex point on the ankle helps reduce local inflammation and fluid buildup.
How often should I do reflexology for hip pain?
For chronic hip pain, performing self-reflexology for 10 to 15 minutes daily is recommended. For general maintenance or mild discomfort, 2 to 3 times a week is sufficient to maintain mobility and reduce tension.
What foot reflex corresponds to the sciatic nerve?
The sciatic nerve reflex is located across the bottom of the heel (running horizontally) and extends up the back of the leg via the Achilles tendon area. Stimulation here helps relieve radiating hip and leg pain.
Why does my foot hurt when I press the hip reflex point?
Tenderness or pain in a reflex point usually indicates congestion, tension, or imbalance in the corresponding body part. If the hip reflex on the foot is painful, it suggests inflammation or tightness in the actual hip joint.
Can I use a massage ball for hip reflexology?
Yes, a small firm ball (like a lacrosse or tennis ball) can be used. Rolling the outer edge of the foot and the heel over the ball can effectively stimulate the hip and sciatic reflexes if you cannot use your hands.