- Location and Technique:
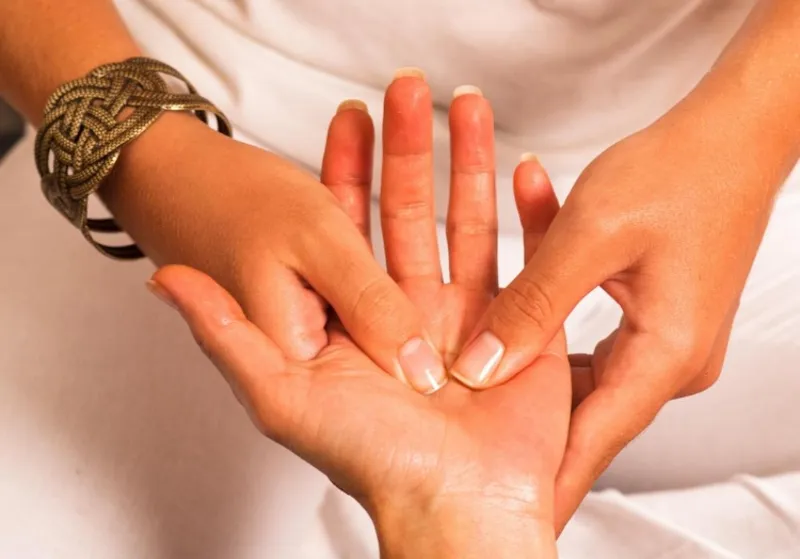
- Located at the base of the index finger, this point can be stimulated by pressing with the thumb and index finger of the opposite hand.
- Benefits:
- This reflex area is linked to the chest and respiratory system. Stimulating this point can aid in easing breathing difficulties, clearing chest congestion, and potentially providing relief from conditions like colds or bronchitis.
3. Center of the Palm:
- Location and Technique:
- The center of the palm acts as a reflex point for the stomach. Use the thumb of your opposite hand to apply a steady, firm pressure or perform a gentle rotating motion to stimulate this area.
- Benefits:
- This point is ideal for addressing issues related to digestion. It can help in soothing stomach pain, promoting better digestion, and alleviating symptoms of indigestion or bloating.
These reflex points are accessible and easy to work on, making them perfect for DIY hand reflexology sessions. By regularly stimulating these points, you can harness the potential benefits of reflexology to manage everyday ailments and enhance your health. Remember to approach reflexology with care and consult a professional if you have specific health conditions or concerns.
Tips for a Successful DIY Hand Reflexology Session
Hand reflexology is a flexible and easily accessible form of self-care that you can perform at home. To make the most out of your DIY hand reflexology sessions and ensure they are effective and enjoyable, follow these practical tips:
1. Start with Light Pressure and Adjust as Needed:
- Begin each session by applying gentle pressure to the reflex points. This helps your body to adjust without causing discomfort.
- Gradually increase the pressure as per your comfort level. It’s important to listen to your body and avoid applying too much force, which could lead to discomfort or pain.
2. Duration of Each Session:
- A standard hand reflexology session can be as short or as long as you prefer, typically lasting between 5 to 30 minutes.
- If you’re just starting out, begin with shorter sessions to see how your body responds before gradually increasing the duration.
- Even a few minutes can be beneficial, especially if you are dealing with stress or need a quick break to rejuvenate.
3. Regular Practice for Optimal Benefits:
- Consistency is key in reflexology. Aim to practice hand reflexology 2-3 times a week to maximize the health benefits.
- Regular sessions can help in maintaining improved circulation, stress relief, and better overall health.
4. Create a Relaxing Environment:
- Enhance your reflexology experience by creating a calming atmosphere. This could involve dimming the lights, playing soft music, or using aromatherapy with essential oils to help relax your mind and body.
- Make sure the room is at a comfortable temperature and that you won’t be disturbed during your session.
5. Hydrate and Reflect Post-Session:
- Drinking water after a reflexology session can help flush out toxins that are released during the process. Stay hydrated to support your body’s natural detoxification.
- Take a few minutes after your session to reflect on how you feel. This can help you better understand your body’s responses to different reflex points and tailor future sessions to your specific needs.
By following these tips, your DIY hand reflexology sessions can become a cherished part of your wellness routine, offering a simple yet effective way to enhance your health and well-being from the comfort of your home.
Safety Considerations and When to Avoid DIY Hand Reflexology
While hand reflexology is a generally safe practice that can offer numerous health benefits, there are certain situations and conditions where it should be approached with caution or avoided altogether. Being aware of these safety considerations can help prevent complications and ensure that reflexology is a beneficial addition to your wellness routine.
1. Hand Injuries or Conditions:
- Avoid practicing hand reflexology if you have any active injuries, infections, or severe conditions affecting your hands such as severe arthritis, fractures, or wounds. These conditions can be exacerbated by the pressure and manipulation involved in reflexology.
2. Acute or Severe Illnesses:
- If you are experiencing acute illnesses, such as severe infections or inflammation, reflexology might not be advisable. Wait until you have recovered or consult with your healthcare provider before starting reflexology.
3. Chronic Conditions:
- For individuals with chronic conditions such as heart disease, diabetes, or cancer, reflexology should be approached with caution. These conditions can be affected by the systemic changes that reflexology might promote, such as increased circulation and relaxation which can alter blood pressure and glucose levels.
- Always consult with a healthcare provider before beginning any new therapy, including reflexology, especially if you have any serious health conditions or are under medical treatment.
4. Pregnancy:
- Reflexology can sometimes stimulate labor, so pregnant women, especially those in high-risk categories or with complications, should consult their healthcare provider before engaging in reflexology.
5. After Surgery:
- Avoid reflexology immediately after surgery as it may affect the healing process or interfere with post-operative recovery. Always follow your doctor’s advice on when it is safe to resume such practices.
6. Varicose Veins and Blood Clot Risks:
- If you have varicose veins or a history of blood clots, consult with a healthcare provider before practicing reflexology. The pressure applied during reflexology could potentially dislodge a clot or worsen varicose veins.
Conclusion:
- Reflexology is intended to support and not replace traditional medical treatments. It’s important to use common sense and to consult healthcare professionals when considering reflexology, particularly if you have existing health issues or concerns. By adhering to these guidelines, you can enjoy the benefits of reflexology safely and effectively.
Conclusion
DIY hand reflexology is a powerful tool you can use to maintain health and relieve stress. By learning to apply these techniques, you can enjoy the benefits of reflexology from the comfort of your home.
Further Resources
For those interested in exploring more about hand reflexology and its various aspects, we recommend checking out the following resources on our website:
- Hand Reflexology: Delve deeper into the specific techniques and benefits of hand reflexology. This article provides a comprehensive overview, perfect for those looking to expand their understanding or practice at home.
- Reflexology Benefits: Discover the wide range of benefits that reflexology can offer for both physical and mental health. This resource explores how reflexology can be a key component of a holistic health regimen.
- Reflexology Cost: Learn about the factors that influence the cost of reflexology services, helping you to make informed decisions about incorporating this therapy into your health and wellness plans.
- Home: Visit our main page to learn more about Reflexology Auckland and our full range of services.
These articles provide valuable insights and detailed information to help you better understand the potential of reflexology and how you can integrate it into your health routine safely and effectively. Whether you’re new to reflexology or looking to deepen your knowledge, these resources are excellent starting points.
- Location and Technique:
- The base of the thumb corresponds to the head and neck area. You can apply pressure using the thumb of your opposite hand or perform gentle circular motions.
- Benefits:
- This point is especially beneficial for relieving headaches and reducing tension in the neck area. It can also be helpful in managing stress and fatigue that often accumulates in the head and neck.
2. The Index Finger Base:
- Location and Technique:
- Located at the base of the index finger, this point can be stimulated by pressing with the thumb and index finger of the opposite hand.
- Benefits:
- This reflex area is linked to the chest and respiratory system. Stimulating this point can aid in easing breathing difficulties, clearing chest congestion, and potentially providing relief from conditions like colds or bronchitis.
3. Center of the Palm:
- Location and Technique:
- The center of the palm acts as a reflex point for the stomach. Use the thumb of your opposite hand to apply a steady, firm pressure or perform a gentle rotating motion to stimulate this area.
- Benefits:
- This point is ideal for addressing issues related to digestion. It can help in soothing stomach pain, promoting better digestion, and alleviating symptoms of indigestion or bloating.
These reflex points are accessible and easy to work on, making them perfect for DIY hand reflexology sessions. By regularly stimulating these points, you can harness the potential benefits of reflexology to manage everyday ailments and enhance your health. Remember to approach reflexology with care and consult a professional if you have specific health conditions or concerns.
Tips for a Successful DIY Hand Reflexology Session
Hand reflexology is a flexible and easily accessible form of self-care that you can perform at home. To make the most out of your DIY hand reflexology sessions and ensure they are effective and enjoyable, follow these practical tips:
1. Start with Light Pressure and Adjust as Needed:
- Begin each session by applying gentle pressure to the reflex points. This helps your body to adjust without causing discomfort.
- Gradually increase the pressure as per your comfort level. It’s important to listen to your body and avoid applying too much force, which could lead to discomfort or pain.
2. Duration of Each Session:
- A standard hand reflexology session can be as short or as long as you prefer, typically lasting between 5 to 30 minutes.
- If you’re just starting out, begin with shorter sessions to see how your body responds before gradually increasing the duration.
- Even a few minutes can be beneficial, especially if you are dealing with stress or need a quick break to rejuvenate.
3. Regular Practice for Optimal Benefits:
- Consistency is key in reflexology. Aim to practice hand reflexology 2-3 times a week to maximize the health benefits.
- Regular sessions can help in maintaining improved circulation, stress relief, and better overall health.
4. Create a Relaxing Environment:
- Enhance your reflexology experience by creating a calming atmosphere. This could involve dimming the lights, playing soft music, or using aromatherapy with essential oils to help relax your mind and body.
- Make sure the room is at a comfortable temperature and that you won’t be disturbed during your session.
5. Hydrate and Reflect Post-Session:
- Drinking water after a reflexology session can help flush out toxins that are released during the process. Stay hydrated to support your body’s natural detoxification.
- Take a few minutes after your session to reflect on how you feel. This can help you better understand your body’s responses to different reflex points and tailor future sessions to your specific needs.
By following these tips, your DIY hand reflexology sessions can become a cherished part of your wellness routine, offering a simple yet effective way to enhance your health and well-being from the comfort of your home.
Safety Considerations and When to Avoid DIY Hand Reflexology
While hand reflexology is a generally safe practice that can offer numerous health benefits, there are certain situations and conditions where it should be approached with caution or avoided altogether. Being aware of these safety considerations can help prevent complications and ensure that reflexology is a beneficial addition to your wellness routine.
1. Hand Injuries or Conditions:
- Avoid practicing hand reflexology if you have any active injuries, infections, or severe conditions affecting your hands such as severe arthritis, fractures, or wounds. These conditions can be exacerbated by the pressure and manipulation involved in reflexology.
2. Acute or Severe Illnesses:
- If you are experiencing acute illnesses, such as severe infections or inflammation, reflexology might not be advisable. Wait until you have recovered or consult with your healthcare provider before starting reflexology.
3. Chronic Conditions:
- For individuals with chronic conditions such as heart disease, diabetes, or cancer, reflexology should be approached with caution. These conditions can be affected by the systemic changes that reflexology might promote, such as increased circulation and relaxation which can alter blood pressure and glucose levels.
- Always consult with a healthcare provider before beginning any new therapy, including reflexology, especially if you have any serious health conditions or are under medical treatment.
4. Pregnancy:
- Reflexology can sometimes stimulate labor, so pregnant women, especially those in high-risk categories or with complications, should consult their healthcare provider before engaging in reflexology.
5. After Surgery:
- Avoid reflexology immediately after surgery as it may affect the healing process or interfere with post-operative recovery. Always follow your doctor’s advice on when it is safe to resume such practices.
6. Varicose Veins and Blood Clot Risks:
- If you have varicose veins or a history of blood clots, consult with a healthcare provider before practicing reflexology. The pressure applied during reflexology could potentially dislodge a clot or worsen varicose veins.
Conclusion:
- Reflexology is intended to support and not replace traditional medical treatments. It’s important to use common sense and to consult healthcare professionals when considering reflexology, particularly if you have existing health issues or concerns. By adhering to these guidelines, you can enjoy the benefits of reflexology safely and effectively.
Conclusion
DIY hand reflexology is a powerful tool you can use to maintain health and relieve stress. By learning to apply these techniques, you can enjoy the benefits of reflexology from the comfort of your home.
Further Resources
For those interested in exploring more about hand reflexology and its various aspects, we recommend checking out the following resources on our website:
- Hand Reflexology: Delve deeper into the specific techniques and benefits of hand reflexology. This article provides a comprehensive overview, perfect for those looking to expand their understanding or practice at home.
- Reflexology Benefits: Discover the wide range of benefits that reflexology can offer for both physical and mental health. This resource explores how reflexology can be a key component of a holistic health regimen.
- Reflexology Cost: Learn about the factors that influence the cost of reflexology services, helping you to make informed decisions about incorporating this therapy into your health and wellness plans.
- Home: Visit our main page to learn more about Reflexology Auckland and our full range of services.
These articles provide valuable insights and detailed information to help you better understand the potential of reflexology and how you can integrate it into your health routine safely and effectively. Whether you’re new to reflexology or looking to deepen your knowledge, these resources are excellent starting points.
- How to Perform:
- Identify a reflex point on your hand.
- Press down firmly with your thumb.
- Slowly rotate your thumb over this point, maintaining constant pressure.
- Benefits:
- The rotating motion helps to increase blood circulation and nerve activity in the area, enhancing the reflexology effects and promoting healing in the associated body parts.
By mastering these fundamental hand reflexology techniques, you can begin to explore the benefits of this practice at home, offering yourself a way to support your health in a direct and personal manner.
Common Hand Reflex Points and Their Corresponding Benefits
Hand reflexology provides a unique approach to health, where specific points on your hands are associated with different parts of your body. By applying pressure to these points, you can potentially alleviate various ailments and improve your overall well-being. Here are some key reflex points located on the hands and the benefits they can offer:
1. The Thumb Base:
- Location and Technique:
- The base of the thumb corresponds to the head and neck area. You can apply pressure using the thumb of your opposite hand or perform gentle circular motions.
- Benefits:
- This point is especially beneficial for relieving headaches and reducing tension in the neck area. It can also be helpful in managing stress and fatigue that often accumulates in the head and neck.
2. The Index Finger Base:
- Location and Technique:
- Located at the base of the index finger, this point can be stimulated by pressing with the thumb and index finger of the opposite hand.
- Benefits:
- This reflex area is linked to the chest and respiratory system. Stimulating this point can aid in easing breathing difficulties, clearing chest congestion, and potentially providing relief from conditions like colds or bronchitis.
3. Center of the Palm:
- Location and Technique:
- The center of the palm acts as a reflex point for the stomach. Use the thumb of your opposite hand to apply a steady, firm pressure or perform a gentle rotating motion to stimulate this area.
- Benefits:
- This point is ideal for addressing issues related to digestion. It can help in soothing stomach pain, promoting better digestion, and alleviating symptoms of indigestion or bloating.
These reflex points are accessible and easy to work on, making them perfect for DIY hand reflexology sessions. By regularly stimulating these points, you can harness the potential benefits of reflexology to manage everyday ailments and enhance your health. Remember to approach reflexology with care and consult a professional if you have specific health conditions or concerns.
Tips for a Successful DIY Hand Reflexology Session
Hand reflexology is a flexible and easily accessible form of self-care that you can perform at home. To make the most out of your DIY hand reflexology sessions and ensure they are effective and enjoyable, follow these practical tips:
1. Start with Light Pressure and Adjust as Needed:
- Begin each session by applying gentle pressure to the reflex points. This helps your body to adjust without causing discomfort.
- Gradually increase the pressure as per your comfort level. It’s important to listen to your body and avoid applying too much force, which could lead to discomfort or pain.
2. Duration of Each Session:
- A standard hand reflexology session can be as short or as long as you prefer, typically lasting between 5 to 30 minutes.
- If you’re just starting out, begin with shorter sessions to see how your body responds before gradually increasing the duration.
- Even a few minutes can be beneficial, especially if you are dealing with stress or need a quick break to rejuvenate.
3. Regular Practice for Optimal Benefits:
- Consistency is key in reflexology. Aim to practice hand reflexology 2-3 times a week to maximize the health benefits.
- Regular sessions can help in maintaining improved circulation, stress relief, and better overall health.
4. Create a Relaxing Environment:
- Enhance your reflexology experience by creating a calming atmosphere. This could involve dimming the lights, playing soft music, or using aromatherapy with essential oils to help relax your mind and body.
- Make sure the room is at a comfortable temperature and that you won’t be disturbed during your session.
5. Hydrate and Reflect Post-Session:
- Drinking water after a reflexology session can help flush out toxins that are released during the process. Stay hydrated to support your body’s natural detoxification.
- Take a few minutes after your session to reflect on how you feel. This can help you better understand your body’s responses to different reflex points and tailor future sessions to your specific needs.
By following these tips, your DIY hand reflexology sessions can become a cherished part of your wellness routine, offering a simple yet effective way to enhance your health and well-being from the comfort of your home.
Safety Considerations and When to Avoid DIY Hand Reflexology
While hand reflexology is a generally safe practice that can offer numerous health benefits, there are certain situations and conditions where it should be approached with caution or avoided altogether. Being aware of these safety considerations can help prevent complications and ensure that reflexology is a beneficial addition to your wellness routine.
1. Hand Injuries or Conditions:
- Avoid practicing hand reflexology if you have any active injuries, infections, or severe conditions affecting your hands such as severe arthritis, fractures, or wounds. These conditions can be exacerbated by the pressure and manipulation involved in reflexology.
2. Acute or Severe Illnesses:
- If you are experiencing acute illnesses, such as severe infections or inflammation, reflexology might not be advisable. Wait until you have recovered or consult with your healthcare provider before starting reflexology.
3. Chronic Conditions:
- For individuals with chronic conditions such as heart disease, diabetes, or cancer, reflexology should be approached with caution. These conditions can be affected by the systemic changes that reflexology might promote, such as increased circulation and relaxation which can alter blood pressure and glucose levels.
- Always consult with a healthcare provider before beginning any new therapy, including reflexology, especially if you have any serious health conditions or are under medical treatment.
4. Pregnancy:
- Reflexology can sometimes stimulate labor, so pregnant women, especially those in high-risk categories or with complications, should consult their healthcare provider before engaging in reflexology.
5. After Surgery:
- Avoid reflexology immediately after surgery as it may affect the healing process or interfere with post-operative recovery. Always follow your doctor’s advice on when it is safe to resume such practices.
6. Varicose Veins and Blood Clot Risks:
- If you have varicose veins or a history of blood clots, consult with a healthcare provider before practicing reflexology. The pressure applied during reflexology could potentially dislodge a clot or worsen varicose veins.
Conclusion:
- Reflexology is intended to support and not replace traditional medical treatments. It’s important to use common sense and to consult healthcare professionals when considering reflexology, particularly if you have existing health issues or concerns. By adhering to these guidelines, you can enjoy the benefits of reflexology safely and effectively.
Conclusion
DIY hand reflexology is a powerful tool you can use to maintain health and relieve stress. By learning to apply these techniques, you can enjoy the benefits of reflexology from the comfort of your home.
Further Resources
For those interested in exploring more about hand reflexology and its various aspects, we recommend checking out the following resources on our website:
- Hand Reflexology: Delve deeper into the specific techniques and benefits of hand reflexology. This article provides a comprehensive overview, perfect for those looking to expand their understanding or practice at home.
- Reflexology Benefits: Discover the wide range of benefits that reflexology can offer for both physical and mental health. This resource explores how reflexology can be a key component of a holistic health regimen.
- Reflexology Cost: Learn about the factors that influence the cost of reflexology services, helping you to make informed decisions about incorporating this therapy into your health and wellness plans.
- Home: Visit our main page to learn more about Reflexology Auckland and our full range of services.
These articles provide valuable insights and detailed information to help you better understand the potential of reflexology and how you can integrate it into your health routine safely and effectively. Whether you’re new to reflexology or looking to deepen your knowledge, these resources are excellent starting points.
- How to Perform:
- Press your thumb or another finger into a specific reflex point.
- Apply steady pressure to go slightly deeper.
- Gently pull the finger backward without lifting the pressure.
- Benefits:
- This technique reaches deeper layers of hand tissue, stimulating reflex points that are more deeply embedded and enhancing the impact on the corresponding internal areas.
4. Press and Rotate:
- How to Perform:
- Identify a reflex point on your hand.
- Press down firmly with your thumb.
- Slowly rotate your thumb over this point, maintaining constant pressure.
- Benefits:
- The rotating motion helps to increase blood circulation and nerve activity in the area, enhancing the reflexology effects and promoting healing in the associated body parts.
By mastering these fundamental hand reflexology techniques, you can begin to explore the benefits of this practice at home, offering yourself a way to support your health in a direct and personal manner.
Common Hand Reflex Points and Their Corresponding Benefits
Hand reflexology provides a unique approach to health, where specific points on your hands are associated with different parts of your body. By applying pressure to these points, you can potentially alleviate various ailments and improve your overall well-being. Here are some key reflex points located on the hands and the benefits they can offer:
1. The Thumb Base:
- Location and Technique:
- The base of the thumb corresponds to the head and neck area. You can apply pressure using the thumb of your opposite hand or perform gentle circular motions.
- Benefits:
- This point is especially beneficial for relieving headaches and reducing tension in the neck area. It can also be helpful in managing stress and fatigue that often accumulates in the head and neck.
2. The Index Finger Base:
- Location and Technique:
- Located at the base of the index finger, this point can be stimulated by pressing with the thumb and index finger of the opposite hand.
- Benefits:
- This reflex area is linked to the chest and respiratory system. Stimulating this point can aid in easing breathing difficulties, clearing chest congestion, and potentially providing relief from conditions like colds or bronchitis.
3. Center of the Palm:
- Location and Technique:
- The center of the palm acts as a reflex point for the stomach. Use the thumb of your opposite hand to apply a steady, firm pressure or perform a gentle rotating motion to stimulate this area.
- Benefits:
- This point is ideal for addressing issues related to digestion. It can help in soothing stomach pain, promoting better digestion, and alleviating symptoms of indigestion or bloating.
These reflex points are accessible and easy to work on, making them perfect for DIY hand reflexology sessions. By regularly stimulating these points, you can harness the potential benefits of reflexology to manage everyday ailments and enhance your health. Remember to approach reflexology with care and consult a professional if you have specific health conditions or concerns.
Tips for a Successful DIY Hand Reflexology Session
Hand reflexology is a flexible and easily accessible form of self-care that you can perform at home. To make the most out of your DIY hand reflexology sessions and ensure they are effective and enjoyable, follow these practical tips:
1. Start with Light Pressure and Adjust as Needed:
- Begin each session by applying gentle pressure to the reflex points. This helps your body to adjust without causing discomfort.
- Gradually increase the pressure as per your comfort level. It’s important to listen to your body and avoid applying too much force, which could lead to discomfort or pain.
2. Duration of Each Session:
- A standard hand reflexology session can be as short or as long as you prefer, typically lasting between 5 to 30 minutes.
- If you’re just starting out, begin with shorter sessions to see how your body responds before gradually increasing the duration.
- Even a few minutes can be beneficial, especially if you are dealing with stress or need a quick break to rejuvenate.
3. Regular Practice for Optimal Benefits:
- Consistency is key in reflexology. Aim to practice hand reflexology 2-3 times a week to maximize the health benefits.
- Regular sessions can help in maintaining improved circulation, stress relief, and better overall health.
4. Create a Relaxing Environment:
- Enhance your reflexology experience by creating a calming atmosphere. This could involve dimming the lights, playing soft music, or using aromatherapy with essential oils to help relax your mind and body.
- Make sure the room is at a comfortable temperature and that you won’t be disturbed during your session.
5. Hydrate and Reflect Post-Session:
- Drinking water after a reflexology session can help flush out toxins that are released during the process. Stay hydrated to support your body’s natural detoxification.
- Take a few minutes after your session to reflect on how you feel. This can help you better understand your body’s responses to different reflex points and tailor future sessions to your specific needs.
By following these tips, your DIY hand reflexology sessions can become a cherished part of your wellness routine, offering a simple yet effective way to enhance your health and well-being from the comfort of your home.
Safety Considerations and When to Avoid DIY Hand Reflexology
While hand reflexology is a generally safe practice that can offer numerous health benefits, there are certain situations and conditions where it should be approached with caution or avoided altogether. Being aware of these safety considerations can help prevent complications and ensure that reflexology is a beneficial addition to your wellness routine.
1. Hand Injuries or Conditions:
- Avoid practicing hand reflexology if you have any active injuries, infections, or severe conditions affecting your hands such as severe arthritis, fractures, or wounds. These conditions can be exacerbated by the pressure and manipulation involved in reflexology.
2. Acute or Severe Illnesses:
- If you are experiencing acute illnesses, such as severe infections or inflammation, reflexology might not be advisable. Wait until you have recovered or consult with your healthcare provider before starting reflexology.
3. Chronic Conditions:
- For individuals with chronic conditions such as heart disease, diabetes, or cancer, reflexology should be approached with caution. These conditions can be affected by the systemic changes that reflexology might promote, such as increased circulation and relaxation which can alter blood pressure and glucose levels.
- Always consult with a healthcare provider before beginning any new therapy, including reflexology, especially if you have any serious health conditions or are under medical treatment.
4. Pregnancy:
- Reflexology can sometimes stimulate labor, so pregnant women, especially those in high-risk categories or with complications, should consult their healthcare provider before engaging in reflexology.
5. After Surgery:
- Avoid reflexology immediately after surgery as it may affect the healing process or interfere with post-operative recovery. Always follow your doctor’s advice on when it is safe to resume such practices.
6. Varicose Veins and Blood Clot Risks:
- If you have varicose veins or a history of blood clots, consult with a healthcare provider before practicing reflexology. The pressure applied during reflexology could potentially dislodge a clot or worsen varicose veins.
Conclusion:
- Reflexology is intended to support and not replace traditional medical treatments. It’s important to use common sense and to consult healthcare professionals when considering reflexology, particularly if you have existing health issues or concerns. By adhering to these guidelines, you can enjoy the benefits of reflexology safely and effectively.
Conclusion
DIY hand reflexology is a powerful tool you can use to maintain health and relieve stress. By learning to apply these techniques, you can enjoy the benefits of reflexology from the comfort of your home.
Further Resources
For those interested in exploring more about hand reflexology and its various aspects, we recommend checking out the following resources on our website:
- Hand Reflexology: Delve deeper into the specific techniques and benefits of hand reflexology. This article provides a comprehensive overview, perfect for those looking to expand their understanding or practice at home.
- Reflexology Benefits: Discover the wide range of benefits that reflexology can offer for both physical and mental health. This resource explores how reflexology can be a key component of a holistic health regimen.
- Reflexology Cost: Learn about the factors that influence the cost of reflexology services, helping you to make informed decisions about incorporating this therapy into your health and wellness plans.
- Home: Visit our main page to learn more about Reflexology Auckland and our full range of services.
These articles provide valuable insights and detailed information to help you better understand the potential of reflexology and how you can integrate it into your health routine safely and effectively. Whether you’re new to reflexology or looking to deepen your knowledge, these resources are excellent starting points.
- How to Perform:
- Use your index and middle fingers to ‘walk’ along a specific line or area on the hand.
- Apply gentle pressure in a sequential, caterpillar-like motion.
- This method allows for more precise control and is ideal for smaller areas or where finer attention is needed.
- Benefits:
- Finger walking is particularly useful for detailed work on complex reflex areas like those between the bones of the hand, facilitating targeted effects on specific organs.
3. Hook and Backup:
- How to Perform:
- Press your thumb or another finger into a specific reflex point.
- Apply steady pressure to go slightly deeper.
- Gently pull the finger backward without lifting the pressure.
- Benefits:
- This technique reaches deeper layers of hand tissue, stimulating reflex points that are more deeply embedded and enhancing the impact on the corresponding internal areas.
4. Press and Rotate:
- How to Perform:
- Identify a reflex point on your hand.
- Press down firmly with your thumb.
- Slowly rotate your thumb over this point, maintaining constant pressure.
- Benefits:
- The rotating motion helps to increase blood circulation and nerve activity in the area, enhancing the reflexology effects and promoting healing in the associated body parts.
By mastering these fundamental hand reflexology techniques, you can begin to explore the benefits of this practice at home, offering yourself a way to support your health in a direct and personal manner.
Common Hand Reflex Points and Their Corresponding Benefits
Hand reflexology provides a unique approach to health, where specific points on your hands are associated with different parts of your body. By applying pressure to these points, you can potentially alleviate various ailments and improve your overall well-being. Here are some key reflex points located on the hands and the benefits they can offer:
1. The Thumb Base:
- Location and Technique:
- The base of the thumb corresponds to the head and neck area. You can apply pressure using the thumb of your opposite hand or perform gentle circular motions.
- Benefits:
- This point is especially beneficial for relieving headaches and reducing tension in the neck area. It can also be helpful in managing stress and fatigue that often accumulates in the head and neck.
2. The Index Finger Base:
- Location and Technique:
- Located at the base of the index finger, this point can be stimulated by pressing with the thumb and index finger of the opposite hand.
- Benefits:
- This reflex area is linked to the chest and respiratory system. Stimulating this point can aid in easing breathing difficulties, clearing chest congestion, and potentially providing relief from conditions like colds or bronchitis.
3. Center of the Palm:
- Location and Technique:
- The center of the palm acts as a reflex point for the stomach. Use the thumb of your opposite hand to apply a steady, firm pressure or perform a gentle rotating motion to stimulate this area.
- Benefits:
- This point is ideal for addressing issues related to digestion. It can help in soothing stomach pain, promoting better digestion, and alleviating symptoms of indigestion or bloating.
These reflex points are accessible and easy to work on, making them perfect for DIY hand reflexology sessions. By regularly stimulating these points, you can harness the potential benefits of reflexology to manage everyday ailments and enhance your health. Remember to approach reflexology with care and consult a professional if you have specific health conditions or concerns.
Tips for a Successful DIY Hand Reflexology Session
Hand reflexology is a flexible and easily accessible form of self-care that you can perform at home. To make the most out of your DIY hand reflexology sessions and ensure they are effective and enjoyable, follow these practical tips:
1. Start with Light Pressure and Adjust as Needed:
- Begin each session by applying gentle pressure to the reflex points. This helps your body to adjust without causing discomfort.
- Gradually increase the pressure as per your comfort level. It’s important to listen to your body and avoid applying too much force, which could lead to discomfort or pain.
2. Duration of Each Session:
- A standard hand reflexology session can be as short or as long as you prefer, typically lasting between 5 to 30 minutes.
- If you’re just starting out, begin with shorter sessions to see how your body responds before gradually increasing the duration.
- Even a few minutes can be beneficial, especially if you are dealing with stress or need a quick break to rejuvenate.
3. Regular Practice for Optimal Benefits:
- Consistency is key in reflexology. Aim to practice hand reflexology 2-3 times a week to maximize the health benefits.
- Regular sessions can help in maintaining improved circulation, stress relief, and better overall health.
4. Create a Relaxing Environment:
- Enhance your reflexology experience by creating a calming atmosphere. This could involve dimming the lights, playing soft music, or using aromatherapy with essential oils to help relax your mind and body.
- Make sure the room is at a comfortable temperature and that you won’t be disturbed during your session.
5. Hydrate and Reflect Post-Session:
- Drinking water after a reflexology session can help flush out toxins that are released during the process. Stay hydrated to support your body’s natural detoxification.
- Take a few minutes after your session to reflect on how you feel. This can help you better understand your body’s responses to different reflex points and tailor future sessions to your specific needs.
By following these tips, your DIY hand reflexology sessions can become a cherished part of your wellness routine, offering a simple yet effective way to enhance your health and well-being from the comfort of your home.
Safety Considerations and When to Avoid DIY Hand Reflexology
While hand reflexology is a generally safe practice that can offer numerous health benefits, there are certain situations and conditions where it should be approached with caution or avoided altogether. Being aware of these safety considerations can help prevent complications and ensure that reflexology is a beneficial addition to your wellness routine.
1. Hand Injuries or Conditions:
- Avoid practicing hand reflexology if you have any active injuries, infections, or severe conditions affecting your hands such as severe arthritis, fractures, or wounds. These conditions can be exacerbated by the pressure and manipulation involved in reflexology.
2. Acute or Severe Illnesses:
- If you are experiencing acute illnesses, such as severe infections or inflammation, reflexology might not be advisable. Wait until you have recovered or consult with your healthcare provider before starting reflexology.
3. Chronic Conditions:
- For individuals with chronic conditions such as heart disease, diabetes, or cancer, reflexology should be approached with caution. These conditions can be affected by the systemic changes that reflexology might promote, such as increased circulation and relaxation which can alter blood pressure and glucose levels.
- Always consult with a healthcare provider before beginning any new therapy, including reflexology, especially if you have any serious health conditions or are under medical treatment.
4. Pregnancy:
- Reflexology can sometimes stimulate labor, so pregnant women, especially those in high-risk categories or with complications, should consult their healthcare provider before engaging in reflexology.
5. After Surgery:
- Avoid reflexology immediately after surgery as it may affect the healing process or interfere with post-operative recovery. Always follow your doctor’s advice on when it is safe to resume such practices.
6. Varicose Veins and Blood Clot Risks:
- If you have varicose veins or a history of blood clots, consult with a healthcare provider before practicing reflexology. The pressure applied during reflexology could potentially dislodge a clot or worsen varicose veins.
Conclusion:
- Reflexology is intended to support and not replace traditional medical treatments. It’s important to use common sense and to consult healthcare professionals when considering reflexology, particularly if you have existing health issues or concerns. By adhering to these guidelines, you can enjoy the benefits of reflexology safely and effectively.
Conclusion
DIY hand reflexology is a powerful tool you can use to maintain health and relieve stress. By learning to apply these techniques, you can enjoy the benefits of reflexology from the comfort of your home.
Further Resources
For those interested in exploring more about hand reflexology and its various aspects, we recommend checking out the following resources on our website:
- Hand Reflexology: Delve deeper into the specific techniques and benefits of hand reflexology. This article provides a comprehensive overview, perfect for those looking to expand their understanding or practice at home.
- Reflexology Benefits: Discover the wide range of benefits that reflexology can offer for both physical and mental health. This resource explores how reflexology can be a key component of a holistic health regimen.
- Reflexology Cost: Learn about the factors that influence the cost of reflexology services, helping you to make informed decisions about incorporating this therapy into your health and wellness plans.
- Home: Visit our main page to learn more about Reflexology Auckland and our full range of services.
These articles provide valuable insights and detailed information to help you better understand the potential of reflexology and how you can integrate it into your health routine safely and effectively. Whether you’re new to reflexology or looking to deepen your knowledge, these resources are excellent starting points.
- How to Perform:
- Place the pad of your thumb on the area of your hand you wish to work on.
- Gently press down into the skin.
- Move your thumb forward in a small “walking” motion, inching along the hand.
- Continue this movement across different zones of the hand that correspond to areas of your body you wish to address.
- Benefits:
- This technique is excellent for navigating larger areas of the hand, such as the palm or the back of the hand, making it effective for broadly stimulating internal organs and body systems.
2. Finger Walking:
- How to Perform:
- Use your index and middle fingers to ‘walk’ along a specific line or area on the hand.
- Apply gentle pressure in a sequential, caterpillar-like motion.
- This method allows for more precise control and is ideal for smaller areas or where finer attention is needed.
- Benefits:
- Finger walking is particularly useful for detailed work on complex reflex areas like those between the bones of the hand, facilitating targeted effects on specific organs.
3. Hook and Backup:
- How to Perform:
- Press your thumb or another finger into a specific reflex point.
- Apply steady pressure to go slightly deeper.
- Gently pull the finger backward without lifting the pressure.
- Benefits:
- This technique reaches deeper layers of hand tissue, stimulating reflex points that are more deeply embedded and enhancing the impact on the corresponding internal areas.
4. Press and Rotate:
- How to Perform:
- Identify a reflex point on your hand.
- Press down firmly with your thumb.
- Slowly rotate your thumb over this point, maintaining constant pressure.
- Benefits:
- The rotating motion helps to increase blood circulation and nerve activity in the area, enhancing the reflexology effects and promoting healing in the associated body parts.
By mastering these fundamental hand reflexology techniques, you can begin to explore the benefits of this practice at home, offering yourself a way to support your health in a direct and personal manner.
Common Hand Reflex Points and Their Corresponding Benefits
Hand reflexology provides a unique approach to health, where specific points on your hands are associated with different parts of your body. By applying pressure to these points, you can potentially alleviate various ailments and improve your overall well-being. Here are some key reflex points located on the hands and the benefits they can offer:
1. The Thumb Base:
- Location and Technique:
- The base of the thumb corresponds to the head and neck area. You can apply pressure using the thumb of your opposite hand or perform gentle circular motions.
- Benefits:
- This point is especially beneficial for relieving headaches and reducing tension in the neck area. It can also be helpful in managing stress and fatigue that often accumulates in the head and neck.
2. The Index Finger Base:
- Location and Technique:
- Located at the base of the index finger, this point can be stimulated by pressing with the thumb and index finger of the opposite hand.
- Benefits:
- This reflex area is linked to the chest and respiratory system. Stimulating this point can aid in easing breathing difficulties, clearing chest congestion, and potentially providing relief from conditions like colds or bronchitis.
3. Center of the Palm:
- Location and Technique:
- The center of the palm acts as a reflex point for the stomach. Use the thumb of your opposite hand to apply a steady, firm pressure or perform a gentle rotating motion to stimulate this area.
- Benefits:
- This point is ideal for addressing issues related to digestion. It can help in soothing stomach pain, promoting better digestion, and alleviating symptoms of indigestion or bloating.
These reflex points are accessible and easy to work on, making them perfect for DIY hand reflexology sessions. By regularly stimulating these points, you can harness the potential benefits of reflexology to manage everyday ailments and enhance your health. Remember to approach reflexology with care and consult a professional if you have specific health conditions or concerns.
Tips for a Successful DIY Hand Reflexology Session
Hand reflexology is a flexible and easily accessible form of self-care that you can perform at home. To make the most out of your DIY hand reflexology sessions and ensure they are effective and enjoyable, follow these practical tips:
1. Start with Light Pressure and Adjust as Needed:
- Begin each session by applying gentle pressure to the reflex points. This helps your body to adjust without causing discomfort.
- Gradually increase the pressure as per your comfort level. It’s important to listen to your body and avoid applying too much force, which could lead to discomfort or pain.
2. Duration of Each Session:
- A standard hand reflexology session can be as short or as long as you prefer, typically lasting between 5 to 30 minutes.
- If you’re just starting out, begin with shorter sessions to see how your body responds before gradually increasing the duration.
- Even a few minutes can be beneficial, especially if you are dealing with stress or need a quick break to rejuvenate.
3. Regular Practice for Optimal Benefits:
- Consistency is key in reflexology. Aim to practice hand reflexology 2-3 times a week to maximize the health benefits.
- Regular sessions can help in maintaining improved circulation, stress relief, and better overall health.
4. Create a Relaxing Environment:
- Enhance your reflexology experience by creating a calming atmosphere. This could involve dimming the lights, playing soft music, or using aromatherapy with essential oils to help relax your mind and body.
- Make sure the room is at a comfortable temperature and that you won’t be disturbed during your session.
5. Hydrate and Reflect Post-Session:
- Drinking water after a reflexology session can help flush out toxins that are released during the process. Stay hydrated to support your body’s natural detoxification.
- Take a few minutes after your session to reflect on how you feel. This can help you better understand your body’s responses to different reflex points and tailor future sessions to your specific needs.
By following these tips, your DIY hand reflexology sessions can become a cherished part of your wellness routine, offering a simple yet effective way to enhance your health and well-being from the comfort of your home.
Safety Considerations and When to Avoid DIY Hand Reflexology
While hand reflexology is a generally safe practice that can offer numerous health benefits, there are certain situations and conditions where it should be approached with caution or avoided altogether. Being aware of these safety considerations can help prevent complications and ensure that reflexology is a beneficial addition to your wellness routine.
1. Hand Injuries or Conditions:
- Avoid practicing hand reflexology if you have any active injuries, infections, or severe conditions affecting your hands such as severe arthritis, fractures, or wounds. These conditions can be exacerbated by the pressure and manipulation involved in reflexology.
2. Acute or Severe Illnesses:
- If you are experiencing acute illnesses, such as severe infections or inflammation, reflexology might not be advisable. Wait until you have recovered or consult with your healthcare provider before starting reflexology.
3. Chronic Conditions:
- For individuals with chronic conditions such as heart disease, diabetes, or cancer, reflexology should be approached with caution. These conditions can be affected by the systemic changes that reflexology might promote, such as increased circulation and relaxation which can alter blood pressure and glucose levels.
- Always consult with a healthcare provider before beginning any new therapy, including reflexology, especially if you have any serious health conditions or are under medical treatment.
4. Pregnancy:
- Reflexology can sometimes stimulate labor, so pregnant women, especially those in high-risk categories or with complications, should consult their healthcare provider before engaging in reflexology.
5. After Surgery:
- Avoid reflexology immediately after surgery as it may affect the healing process or interfere with post-operative recovery. Always follow your doctor’s advice on when it is safe to resume such practices.
6. Varicose Veins and Blood Clot Risks:
- If you have varicose veins or a history of blood clots, consult with a healthcare provider before practicing reflexology. The pressure applied during reflexology could potentially dislodge a clot or worsen varicose veins.
Conclusion:
- Reflexology is intended to support and not replace traditional medical treatments. It’s important to use common sense and to consult healthcare professionals when considering reflexology, particularly if you have existing health issues or concerns. By adhering to these guidelines, you can enjoy the benefits of reflexology safely and effectively.
Conclusion
DIY hand reflexology is a powerful tool you can use to maintain health and relieve stress. By learning to apply these techniques, you can enjoy the benefits of reflexology from the comfort of your home.
Further Resources
For those interested in exploring more about hand reflexology and its various aspects, we recommend checking out the following resources on our website:
- Hand Reflexology: Delve deeper into the specific techniques and benefits of hand reflexology. This article provides a comprehensive overview, perfect for those looking to expand their understanding or practice at home.
- Reflexology Benefits: Discover the wide range of benefits that reflexology can offer for both physical and mental health. This resource explores how reflexology can be a key component of a holistic health regimen.
- Reflexology Cost: Learn about the factors that influence the cost of reflexology services, helping you to make informed decisions about incorporating this therapy into your health and wellness plans.
- Home: Visit our main page to learn more about Reflexology Auckland and our full range of services.
These articles provide valuable insights and detailed information to help you better understand the potential of reflexology and how you can integrate it into your health routine safely and effectively. Whether you’re new to reflexology or looking to deepen your knowledge, these resources are excellent starting points.
Hand reflexology is a practice rooted in ancient medicine, using pressure points on the hands believed to correspond to various parts of the body. This guide introduces you to simple DIY hand reflexology techniques that you can use at home to enhance relaxation and promote overall wellness.
Key Sections of DIY Hand Reflexology :
What You Need to Get Started
Embarking on your DIY hand reflexology journey is straightforward and requires minimal setup. Here’s what you’ll need to ensure a comfortable and effective session:
1. Your Hands:
- The primary “tool” in hand reflexology is, of course, your own hands. Clean, well-moisturized hands can make the process smoother and more comfortable.
2. Comfortable Seating:
- Choose a comfortable chair or a seat where you can relax without straining your back. Sitting upright in a supportive chair is often best, as it allows you to easily access both of your hands.
3. Optional Tools:
- Soft Mat or Pillow: While not necessary, a soft mat on your lap or a pillow can provide support, making it easier to hold your hand comfortably during the session. This can be particularly helpful if you have a longer session planned or if you find holding your arm up tiresome.
- Lotion or Hand Cream: Applying a small amount of lotion or hand cream can reduce friction and make reflexology techniques more pleasurable and less abrasive on the skin.
- Relaxing Background Music: Consider playing some soft, ambient music to enhance relaxation and create a therapeutic environment. Music or nature sounds can help in maintaining a calm mind and a focused approach.
4. Quiet and Comfortable Environment:
- Find a spot in your home that is typically quiet and free from interruptions. This could be a dedicated room or a cozy corner where you feel relaxed. The idea is to create a space that feels like a sanctuary, where stressors and external distractions are minimized.
- Good Lighting: Ensure the area is well-lit so that you can see your hands clearly without straining your eyes. Natural light is ideal, but a soft lamp can also create a warm and inviting environment.
5. Setting the Mood:
- You might want to set a timer if you have limited time to practice, so you don’t need to watch the clock. This allows you to fully immerse in the experience without worrying about time.
- Keep a glass of water nearby to stay hydrated before and after the session, as reflexology can sometimes release toxins and hydration can help flush these from your system.
By preparing your space and having these items at hand, you can maximize the benefits of your DIY hand reflexology sessions, turning them into a restorative ritual that you look forward to each time.
Understanding the Basics of Hand Reflexology
Hand reflexology is a therapeutic method where specific points on the hands are manipulated to improve health and promote healing in various parts of the body. According to reflexology theory, each area on the hand corresponds to different organs and systems within the body.
By applying pressure to these reflex areas, you can influence the health of the corresponding body parts, potentially easing ailments and boosting overall well-being.
Step-by-Step Guide to DIY Hand Reflexology Techniques
Here’s how you can begin practicing hand reflexology on yourself with some basic techniques. Each method targets different areas and serves various purposes, from relieving tension to improving body functions.
1. Thumb Walking:
- How to Perform:
- Place the pad of your thumb on the area of your hand you wish to work on.
- Gently press down into the skin.
- Move your thumb forward in a small “walking” motion, inching along the hand.
- Continue this movement across different zones of the hand that correspond to areas of your body you wish to address.
- Benefits:
- This technique is excellent for navigating larger areas of the hand, such as the palm or the back of the hand, making it effective for broadly stimulating internal organs and body systems.
2. Finger Walking:
- How to Perform:
- Use your index and middle fingers to ‘walk’ along a specific line or area on the hand.
- Apply gentle pressure in a sequential, caterpillar-like motion.
- This method allows for more precise control and is ideal for smaller areas or where finer attention is needed.
- Benefits:
- Finger walking is particularly useful for detailed work on complex reflex areas like those between the bones of the hand, facilitating targeted effects on specific organs.
3. Hook and Backup:
- How to Perform:
- Press your thumb or another finger into a specific reflex point.
- Apply steady pressure to go slightly deeper.
- Gently pull the finger backward without lifting the pressure.
- Benefits:
- This technique reaches deeper layers of hand tissue, stimulating reflex points that are more deeply embedded and enhancing the impact on the corresponding internal areas.
4. Press and Rotate:
- How to Perform:
- Identify a reflex point on your hand.
- Press down firmly with your thumb.
- Slowly rotate your thumb over this point, maintaining constant pressure.
- Benefits:
- The rotating motion helps to increase blood circulation and nerve activity in the area, enhancing the reflexology effects and promoting healing in the associated body parts.
By mastering these fundamental hand reflexology techniques, you can begin to explore the benefits of this practice at home, offering yourself a way to support your health in a direct and personal manner.
Common Hand Reflex Points and Their Corresponding Benefits
Hand reflexology provides a unique approach to health, where specific points on your hands are associated with different parts of your body. By applying pressure to these points, you can potentially alleviate various ailments and improve your overall well-being. Here are some key reflex points located on the hands and the benefits they can offer:
1. The Thumb Base:
- Location and Technique:
- The base of the thumb corresponds to the head and neck area. You can apply pressure using the thumb of your opposite hand or perform gentle circular motions.
- Benefits:
- This point is especially beneficial for relieving headaches and reducing tension in the neck area. It can also be helpful in managing stress and fatigue that often accumulates in the head and neck.
2. The Index Finger Base:
- Location and Technique:
- Located at the base of the index finger, this point can be stimulated by pressing with the thumb and index finger of the opposite hand.
- Benefits:
- This reflex area is linked to the chest and respiratory system. Stimulating this point can aid in easing breathing difficulties, clearing chest congestion, and potentially providing relief from conditions like colds or bronchitis.
3. Center of the Palm:
- Location and Technique:
- The center of the palm acts as a reflex point for the stomach. Use the thumb of your opposite hand to apply a steady, firm pressure or perform a gentle rotating motion to stimulate this area.
- Benefits:
- This point is ideal for addressing issues related to digestion. It can help in soothing stomach pain, promoting better digestion, and alleviating symptoms of indigestion or bloating.
These reflex points are accessible and easy to work on, making them perfect for DIY hand reflexology sessions. By regularly stimulating these points, you can harness the potential benefits of reflexology to manage everyday ailments and enhance your health. Remember to approach reflexology with care and consult a professional if you have specific health conditions or concerns.
Tips for a Successful DIY Hand Reflexology Session
Hand reflexology is a flexible and easily accessible form of self-care that you can perform at home. To make the most out of your DIY hand reflexology sessions and ensure they are effective and enjoyable, follow these practical tips:
1. Start with Light Pressure and Adjust as Needed:
- Begin each session by applying gentle pressure to the reflex points. This helps your body to adjust without causing discomfort.
- Gradually increase the pressure as per your comfort level. It’s important to listen to your body and avoid applying too much force, which could lead to discomfort or pain.
2. Duration of Each Session:
- A standard hand reflexology session can be as short or as long as you prefer, typically lasting between 5 to 30 minutes.
- If you’re just starting out, begin with shorter sessions to see how your body responds before gradually increasing the duration.
- Even a few minutes can be beneficial, especially if you are dealing with stress or need a quick break to rejuvenate.
3. Regular Practice for Optimal Benefits:
- Consistency is key in reflexology. Aim to practice hand reflexology 2-3 times a week to maximize the health benefits.
- Regular sessions can help in maintaining improved circulation, stress relief, and better overall health.
4. Create a Relaxing Environment:
- Enhance your reflexology experience by creating a calming atmosphere. This could involve dimming the lights, playing soft music, or using aromatherapy with essential oils to help relax your mind and body.
- Make sure the room is at a comfortable temperature and that you won’t be disturbed during your session.
5. Hydrate and Reflect Post-Session:
- Drinking water after a reflexology session can help flush out toxins that are released during the process. Stay hydrated to support your body’s natural detoxification.
- Take a few minutes after your session to reflect on how you feel. This can help you better understand your body’s responses to different reflex points and tailor future sessions to your specific needs.
By following these tips, your DIY hand reflexology sessions can become a cherished part of your wellness routine, offering a simple yet effective way to enhance your health and well-being from the comfort of your home.
Safety Considerations and When to Avoid DIY Hand Reflexology
While hand reflexology is a generally safe practice that can offer numerous health benefits, there are certain situations and conditions where it should be approached with caution or avoided altogether. Being aware of these safety considerations can help prevent complications and ensure that reflexology is a beneficial addition to your wellness routine.
1. Hand Injuries or Conditions:
- Avoid practicing hand reflexology if you have any active injuries, infections, or severe conditions affecting your hands such as severe arthritis, fractures, or wounds. These conditions can be exacerbated by the pressure and manipulation involved in reflexology.
2. Acute or Severe Illnesses:
- If you are experiencing acute illnesses, such as severe infections or inflammation, reflexology might not be advisable. Wait until you have recovered or consult with your healthcare provider before starting reflexology.
3. Chronic Conditions:
- For individuals with chronic conditions such as heart disease, diabetes, or cancer, reflexology should be approached with caution. These conditions can be affected by the systemic changes that reflexology might promote, such as increased circulation and relaxation which can alter blood pressure and glucose levels.
- Always consult with a healthcare provider before beginning any new therapy, including reflexology, especially if you have any serious health conditions or are under medical treatment.
4. Pregnancy:
- Reflexology can sometimes stimulate labor, so pregnant women, especially those in high-risk categories or with complications, should consult their healthcare provider before engaging in reflexology.
5. After Surgery:
- Avoid reflexology immediately after surgery as it may affect the healing process or interfere with post-operative recovery. Always follow your doctor’s advice on when it is safe to resume such practices.
6. Varicose Veins and Blood Clot Risks:
- If you have varicose veins or a history of blood clots, consult with a healthcare provider before practicing reflexology. The pressure applied during reflexology could potentially dislodge a clot or worsen varicose veins.
Conclusion:
- Reflexology is intended to support and not replace traditional medical treatments. It’s important to use common sense and to consult healthcare professionals when considering reflexology, particularly if you have existing health issues or concerns. By adhering to these guidelines, you can enjoy the benefits of reflexology safely and effectively.
Conclusion
DIY hand reflexology is a powerful tool you can use to maintain health and relieve stress. By learning to apply these techniques, you can enjoy the benefits of reflexology from the comfort of your home.
Further Resources
For those interested in exploring more about hand reflexology and its various aspects, we recommend checking out the following resources on our website:
- Hand Reflexology: Delve deeper into the specific techniques and benefits of hand reflexology. This article provides a comprehensive overview, perfect for those looking to expand their understanding or practice at home.
- Reflexology Benefits: Discover the wide range of benefits that reflexology can offer for both physical and mental health. This resource explores how reflexology can be a key component of a holistic health regimen.
- Reflexology Cost: Learn about the factors that influence the cost of reflexology services, helping you to make informed decisions about incorporating this therapy into your health and wellness plans.
- Home: Visit our main page to learn more about Reflexology Auckland and our full range of services.
These articles provide valuable insights and detailed information to help you better understand the potential of reflexology and how you can integrate it into your health routine safely and effectively. Whether you’re new to reflexology or looking to deepen your knowledge, these resources are excellent starting points.
- Location and Technique:
- The base of the thumb corresponds to the head and neck area. You can apply pressure using the thumb of your opposite hand or perform gentle circular motions.
- Benefits:
- This point is especially beneficial for relieving headaches and reducing tension in the neck area. It can also be helpful in managing stress and fatigue that often accumulates in the head and neck.
2. The Index Finger Base:
- Location and Technique:
- Located at the base of the index finger, this point can be stimulated by pressing with the thumb and index finger of the opposite hand.
- Benefits:
- This reflex area is linked to the chest and respiratory system. Stimulating this point can aid in easing breathing difficulties, clearing chest congestion, and potentially providing relief from conditions like colds or bronchitis.
3. Center of the Palm:
- Location and Technique:
- The center of the palm acts as a reflex point for the stomach. Use the thumb of your opposite hand to apply a steady, firm pressure or perform a gentle rotating motion to stimulate this area.
- Benefits:
- This point is ideal for addressing issues related to digestion. It can help in soothing stomach pain, promoting better digestion, and alleviating symptoms of indigestion or bloating.
These reflex points are accessible and easy to work on, making them perfect for DIY hand reflexology sessions. By regularly stimulating these points, you can harness the potential benefits of reflexology to manage everyday ailments and enhance your health. Remember to approach reflexology with care and consult a professional if you have specific health conditions or concerns.
Tips for a Successful DIY Hand Reflexology Session
Hand reflexology is a flexible and easily accessible form of self-care that you can perform at home. To make the most out of your DIY hand reflexology sessions and ensure they are effective and enjoyable, follow these practical tips:
1. Start with Light Pressure and Adjust as Needed:
- Begin each session by applying gentle pressure to the reflex points. This helps your body to adjust without causing discomfort.
- Gradually increase the pressure as per your comfort level. It’s important to listen to your body and avoid applying too much force, which could lead to discomfort or pain.
2. Duration of Each Session:
- A standard hand reflexology session can be as short or as long as you prefer, typically lasting between 5 to 30 minutes.
- If you’re just starting out, begin with shorter sessions to see how your body responds before gradually increasing the duration.
- Even a few minutes can be beneficial, especially if you are dealing with stress or need a quick break to rejuvenate.
3. Regular Practice for Optimal Benefits:
- Consistency is key in reflexology. Aim to practice hand reflexology 2-3 times a week to maximize the health benefits.
- Regular sessions can help in maintaining improved circulation, stress relief, and better overall health.
4. Create a Relaxing Environment:
- Enhance your reflexology experience by creating a calming atmosphere. This could involve dimming the lights, playing soft music, or using aromatherapy with essential oils to help relax your mind and body.
- Make sure the room is at a comfortable temperature and that you won’t be disturbed during your session.
5. Hydrate and Reflect Post-Session:
- Drinking water after a reflexology session can help flush out toxins that are released during the process. Stay hydrated to support your body’s natural detoxification.
- Take a few minutes after your session to reflect on how you feel. This can help you better understand your body’s responses to different reflex points and tailor future sessions to your specific needs.
By following these tips, your DIY hand reflexology sessions can become a cherished part of your wellness routine, offering a simple yet effective way to enhance your health and well-being from the comfort of your home.
Safety Considerations and When to Avoid DIY Hand Reflexology
While hand reflexology is a generally safe practice that can offer numerous health benefits, there are certain situations and conditions where it should be approached with caution or avoided altogether. Being aware of these safety considerations can help prevent complications and ensure that reflexology is a beneficial addition to your wellness routine.
1. Hand Injuries or Conditions:
- Avoid practicing hand reflexology if you have any active injuries, infections, or severe conditions affecting your hands such as severe arthritis, fractures, or wounds. These conditions can be exacerbated by the pressure and manipulation involved in reflexology.
2. Acute or Severe Illnesses:
- If you are experiencing acute illnesses, such as severe infections or inflammation, reflexology might not be advisable. Wait until you have recovered or consult with your healthcare provider before starting reflexology.
3. Chronic Conditions:
- For individuals with chronic conditions such as heart disease, diabetes, or cancer, reflexology should be approached with caution. These conditions can be affected by the systemic changes that reflexology might promote, such as increased circulation and relaxation which can alter blood pressure and glucose levels.
- Always consult with a healthcare provider before beginning any new therapy, including reflexology, especially if you have any serious health conditions or are under medical treatment.
4. Pregnancy:
- Reflexology can sometimes stimulate labor, so pregnant women, especially those in high-risk categories or with complications, should consult their healthcare provider before engaging in reflexology.
5. After Surgery:
- Avoid reflexology immediately after surgery as it may affect the healing process or interfere with post-operative recovery. Always follow your doctor’s advice on when it is safe to resume such practices.
6. Varicose Veins and Blood Clot Risks:
- If you have varicose veins or a history of blood clots, consult with a healthcare provider before practicing reflexology. The pressure applied during reflexology could potentially dislodge a clot or worsen varicose veins.
Conclusion:
- Reflexology is intended to support and not replace traditional medical treatments. It’s important to use common sense and to consult healthcare professionals when considering reflexology, particularly if you have existing health issues or concerns. By adhering to these guidelines, you can enjoy the benefits of reflexology safely and effectively.
Conclusion
DIY hand reflexology is a powerful tool you can use to maintain health and relieve stress. By learning to apply these techniques, you can enjoy the benefits of reflexology from the comfort of your home.
Further Resources
For those interested in exploring more about hand reflexology and its various aspects, we recommend checking out the following resources on our website:
- Hand Reflexology: Delve deeper into the specific techniques and benefits of hand reflexology. This article provides a comprehensive overview, perfect for those looking to expand their understanding or practice at home.
- Reflexology Benefits: Discover the wide range of benefits that reflexology can offer for both physical and mental health. This resource explores how reflexology can be a key component of a holistic health regimen.
- Reflexology Cost: Learn about the factors that influence the cost of reflexology services, helping you to make informed decisions about incorporating this therapy into your health and wellness plans.
- Home: Visit our main page to learn more about Reflexology Auckland and our full range of services.
These articles provide valuable insights and detailed information to help you better understand the potential of reflexology and how you can integrate it into your health routine safely and effectively. Whether you’re new to reflexology or looking to deepen your knowledge, these resources are excellent starting points.
Hand reflexology is a practice rooted in ancient medicine, using pressure points on the hands believed to correspond to various parts of the body. This guide introduces you to simple DIY hand reflexology techniques that you can use at home to enhance relaxation and promote overall wellness.
Key Sections of DIY Hand Reflexology :
What You Need to Get Started
Embarking on your DIY hand reflexology journey is straightforward and requires minimal setup. Here’s what you’ll need to ensure a comfortable and effective session:
1. Your Hands:
- The primary “tool” in hand reflexology is, of course, your own hands. Clean, well-moisturized hands can make the process smoother and more comfortable.
2. Comfortable Seating:
- Choose a comfortable chair or a seat where you can relax without straining your back. Sitting upright in a supportive chair is often best, as it allows you to easily access both of your hands.
3. Optional Tools:
- Soft Mat or Pillow: While not necessary, a soft mat on your lap or a pillow can provide support, making it easier to hold your hand comfortably during the session. This can be particularly helpful if you have a longer session planned or if you find holding your arm up tiresome.
- Lotion or Hand Cream: Applying a small amount of lotion or hand cream can reduce friction and make reflexology techniques more pleasurable and less abrasive on the skin.
- Relaxing Background Music: Consider playing some soft, ambient music to enhance relaxation and create a therapeutic environment. Music or nature sounds can help in maintaining a calm mind and a focused approach.
4. Quiet and Comfortable Environment:
- Find a spot in your home that is typically quiet and free from interruptions. This could be a dedicated room or a cozy corner where you feel relaxed. The idea is to create a space that feels like a sanctuary, where stressors and external distractions are minimized.
- Good Lighting: Ensure the area is well-lit so that you can see your hands clearly without straining your eyes. Natural light is ideal, but a soft lamp can also create a warm and inviting environment.
5. Setting the Mood:
- You might want to set a timer if you have limited time to practice, so you don’t need to watch the clock. This allows you to fully immerse in the experience without worrying about time.
- Keep a glass of water nearby to stay hydrated before and after the session, as reflexology can sometimes release toxins and hydration can help flush these from your system.
By preparing your space and having these items at hand, you can maximize the benefits of your DIY hand reflexology sessions, turning them into a restorative ritual that you look forward to each time.
Understanding the Basics of Hand Reflexology
Hand reflexology is a therapeutic method where specific points on the hands are manipulated to improve health and promote healing in various parts of the body. According to reflexology theory, each area on the hand corresponds to different organs and systems within the body.
By applying pressure to these reflex areas, you can influence the health of the corresponding body parts, potentially easing ailments and boosting overall well-being.
Step-by-Step Guide to DIY Hand Reflexology Techniques
Here’s how you can begin practicing hand reflexology on yourself with some basic techniques. Each method targets different areas and serves various purposes, from relieving tension to improving body functions.
1. Thumb Walking:
- How to Perform:
- Place the pad of your thumb on the area of your hand you wish to work on.
- Gently press down into the skin.
- Move your thumb forward in a small “walking” motion, inching along the hand.
- Continue this movement across different zones of the hand that correspond to areas of your body you wish to address.
- Benefits:
- This technique is excellent for navigating larger areas of the hand, such as the palm or the back of the hand, making it effective for broadly stimulating internal organs and body systems.
2. Finger Walking:
- How to Perform:
- Use your index and middle fingers to ‘walk’ along a specific line or area on the hand.
- Apply gentle pressure in a sequential, caterpillar-like motion.
- This method allows for more precise control and is ideal for smaller areas or where finer attention is needed.
- Benefits:
- Finger walking is particularly useful for detailed work on complex reflex areas like those between the bones of the hand, facilitating targeted effects on specific organs.
3. Hook and Backup:
- How to Perform:
- Press your thumb or another finger into a specific reflex point.
- Apply steady pressure to go slightly deeper.
- Gently pull the finger backward without lifting the pressure.
- Benefits:
- This technique reaches deeper layers of hand tissue, stimulating reflex points that are more deeply embedded and enhancing the impact on the corresponding internal areas.
4. Press and Rotate:
- How to Perform:
- Identify a reflex point on your hand.
- Press down firmly with your thumb.
- Slowly rotate your thumb over this point, maintaining constant pressure.
- Benefits:
- The rotating motion helps to increase blood circulation and nerve activity in the area, enhancing the reflexology effects and promoting healing in the associated body parts.
By mastering these fundamental hand reflexology techniques, you can begin to explore the benefits of this practice at home, offering yourself a way to support your health in a direct and personal manner.
Common Hand Reflex Points and Their Corresponding Benefits
Hand reflexology provides a unique approach to health, where specific points on your hands are associated with different parts of your body. By applying pressure to these points, you can potentially alleviate various ailments and improve your overall well-being. Here are some key reflex points located on the hands and the benefits they can offer:
1. The Thumb Base:
- Location and Technique:
- The base of the thumb corresponds to the head and neck area. You can apply pressure using the thumb of your opposite hand or perform gentle circular motions.
- Benefits:
- This point is especially beneficial for relieving headaches and reducing tension in the neck area. It can also be helpful in managing stress and fatigue that often accumulates in the head and neck.
2. The Index Finger Base:
- Location and Technique:
- Located at the base of the index finger, this point can be stimulated by pressing with the thumb and index finger of the opposite hand.
- Benefits:
- This reflex area is linked to the chest and respiratory system. Stimulating this point can aid in easing breathing difficulties, clearing chest congestion, and potentially providing relief from conditions like colds or bronchitis.
3. Center of the Palm:
- Location and Technique:
- The center of the palm acts as a reflex point for the stomach. Use the thumb of your opposite hand to apply a steady, firm pressure or perform a gentle rotating motion to stimulate this area.
- Benefits:
- This point is ideal for addressing issues related to digestion. It can help in soothing stomach pain, promoting better digestion, and alleviating symptoms of indigestion or bloating.
These reflex points are accessible and easy to work on, making them perfect for DIY hand reflexology sessions. By regularly stimulating these points, you can harness the potential benefits of reflexology to manage everyday ailments and enhance your health. Remember to approach reflexology with care and consult a professional if you have specific health conditions or concerns.
Tips for a Successful DIY Hand Reflexology Session
Hand reflexology is a flexible and easily accessible form of self-care that you can perform at home. To make the most out of your DIY hand reflexology sessions and ensure they are effective and enjoyable, follow these practical tips:
1. Start with Light Pressure and Adjust as Needed:
- Begin each session by applying gentle pressure to the reflex points. This helps your body to adjust without causing discomfort.
- Gradually increase the pressure as per your comfort level. It’s important to listen to your body and avoid applying too much force, which could lead to discomfort or pain.
2. Duration of Each Session:
- A standard hand reflexology session can be as short or as long as you prefer, typically lasting between 5 to 30 minutes.
- If you’re just starting out, begin with shorter sessions to see how your body responds before gradually increasing the duration.
- Even a few minutes can be beneficial, especially if you are dealing with stress or need a quick break to rejuvenate.
3. Regular Practice for Optimal Benefits:
- Consistency is key in reflexology. Aim to practice hand reflexology 2-3 times a week to maximize the health benefits.
- Regular sessions can help in maintaining improved circulation, stress relief, and better overall health.
4. Create a Relaxing Environment:
- Enhance your reflexology experience by creating a calming atmosphere. This could involve dimming the lights, playing soft music, or using aromatherapy with essential oils to help relax your mind and body.
- Make sure the room is at a comfortable temperature and that you won’t be disturbed during your session.
5. Hydrate and Reflect Post-Session:
- Drinking water after a reflexology session can help flush out toxins that are released during the process. Stay hydrated to support your body’s natural detoxification.
- Take a few minutes after your session to reflect on how you feel. This can help you better understand your body’s responses to different reflex points and tailor future sessions to your specific needs.
By following these tips, your DIY hand reflexology sessions can become a cherished part of your wellness routine, offering a simple yet effective way to enhance your health and well-being from the comfort of your home.
Safety Considerations and When to Avoid DIY Hand Reflexology
While hand reflexology is a generally safe practice that can offer numerous health benefits, there are certain situations and conditions where it should be approached with caution or avoided altogether. Being aware of these safety considerations can help prevent complications and ensure that reflexology is a beneficial addition to your wellness routine.
1. Hand Injuries or Conditions:
- Avoid practicing hand reflexology if you have any active injuries, infections, or severe conditions affecting your hands such as severe arthritis, fractures, or wounds. These conditions can be exacerbated by the pressure and manipulation involved in reflexology.
2. Acute or Severe Illnesses:
- If you are experiencing acute illnesses, such as severe infections or inflammation, reflexology might not be advisable. Wait until you have recovered or consult with your healthcare provider before starting reflexology.
3. Chronic Conditions:
- For individuals with chronic conditions such as heart disease, diabetes, or cancer, reflexology should be approached with caution. These conditions can be affected by the systemic changes that reflexology might promote, such as increased circulation and relaxation which can alter blood pressure and glucose levels.
- Always consult with a healthcare provider before beginning any new therapy, including reflexology, especially if you have any serious health conditions or are under medical treatment.
4. Pregnancy:
- Reflexology can sometimes stimulate labor, so pregnant women, especially those in high-risk categories or with complications, should consult their healthcare provider before engaging in reflexology.
5. After Surgery:
- Avoid reflexology immediately after surgery as it may affect the healing process or interfere with post-operative recovery. Always follow your doctor’s advice on when it is safe to resume such practices.
6. Varicose Veins and Blood Clot Risks:
- If you have varicose veins or a history of blood clots, consult with a healthcare provider before practicing reflexology. The pressure applied during reflexology could potentially dislodge a clot or worsen varicose veins.
Conclusion:
- Reflexology is intended to support and not replace traditional medical treatments. It’s important to use common sense and to consult healthcare professionals when considering reflexology, particularly if you have existing health issues or concerns. By adhering to these guidelines, you can enjoy the benefits of reflexology safely and effectively.
Conclusion
DIY hand reflexology is a powerful tool you can use to maintain health and relieve stress. By learning to apply these techniques, you can enjoy the benefits of reflexology from the comfort of your home.
Further Resources
For those interested in exploring more about hand reflexology and its various aspects, we recommend checking out the following resources on our website:
- Hand Reflexology: Delve deeper into the specific techniques and benefits of hand reflexology. This article provides a comprehensive overview, perfect for those looking to expand their understanding or practice at home.
- Reflexology Benefits: Discover the wide range of benefits that reflexology can offer for both physical and mental health. This resource explores how reflexology can be a key component of a holistic health regimen.
- Reflexology Cost: Learn about the factors that influence the cost of reflexology services, helping you to make informed decisions about incorporating this therapy into your health and wellness plans.
- Home: Visit our main page to learn more about Reflexology Auckland and our full range of services.
These articles provide valuable insights and detailed information to help you better understand the potential of reflexology and how you can integrate it into your health routine safely and effectively. Whether you’re new to reflexology or looking to deepen your knowledge, these resources are excellent starting points.
Hand reflexology is a practice rooted in ancient medicine, using pressure points on the hands believed to correspond to various parts of the body. This guide introduces you to simple DIY hand reflexology techniques that you can use at home to enhance relaxation and promote overall wellness.
Key Sections of DIY Hand Reflexology :
What You Need to Get Started
Embarking on your DIY hand reflexology journey is straightforward and requires minimal setup. Here’s what you’ll need to ensure a comfortable and effective session:
1. Your Hands:
- The primary “tool” in hand reflexology is, of course, your own hands. Clean, well-moisturized hands can make the process smoother and more comfortable.
2. Comfortable Seating:
- Choose a comfortable chair or a seat where you can relax without straining your back. Sitting upright in a supportive chair is often best, as it allows you to easily access both of your hands.
3. Optional Tools:
- Soft Mat or Pillow: While not necessary, a soft mat on your lap or a pillow can provide support, making it easier to hold your hand comfortably during the session. This can be particularly helpful if you have a longer session planned or if you find holding your arm up tiresome.
- Lotion or Hand Cream: Applying a small amount of lotion or hand cream can reduce friction and make reflexology techniques more pleasurable and less abrasive on the skin.
- Relaxing Background Music: Consider playing some soft, ambient music to enhance relaxation and create a therapeutic environment. Music or nature sounds can help in maintaining a calm mind and a focused approach.
4. Quiet and Comfortable Environment:
- Find a spot in your home that is typically quiet and free from interruptions. This could be a dedicated room or a cozy corner where you feel relaxed. The idea is to create a space that feels like a sanctuary, where stressors and external distractions are minimized.
- Good Lighting: Ensure the area is well-lit so that you can see your hands clearly without straining your eyes. Natural light is ideal, but a soft lamp can also create a warm and inviting environment.
5. Setting the Mood:
- You might want to set a timer if you have limited time to practice, so you don’t need to watch the clock. This allows you to fully immerse in the experience without worrying about time.
- Keep a glass of water nearby to stay hydrated before and after the session, as reflexology can sometimes release toxins and hydration can help flush these from your system.
By preparing your space and having these items at hand, you can maximize the benefits of your DIY hand reflexology sessions, turning them into a restorative ritual that you look forward to each time.
Understanding the Basics of Hand Reflexology
Hand reflexology is a therapeutic method where specific points on the hands are manipulated to improve health and promote healing in various parts of the body. According to reflexology theory, each area on the hand corresponds to different organs and systems within the body.
By applying pressure to these reflex areas, you can influence the health of the corresponding body parts, potentially easing ailments and boosting overall well-being.
Step-by-Step Guide to DIY Hand Reflexology Techniques
Here’s how you can begin practicing hand reflexology on yourself with some basic techniques. Each method targets different areas and serves various purposes, from relieving tension to improving body functions.
1. Thumb Walking:
- How to Perform:
- Place the pad of your thumb on the area of your hand you wish to work on.
- Gently press down into the skin.
- Move your thumb forward in a small “walking” motion, inching along the hand.
- Continue this movement across different zones of the hand that correspond to areas of your body you wish to address.
- Benefits:
- This technique is excellent for navigating larger areas of the hand, such as the palm or the back of the hand, making it effective for broadly stimulating internal organs and body systems.
2. Finger Walking:
- How to Perform:
- Use your index and middle fingers to ‘walk’ along a specific line or area on the hand.
- Apply gentle pressure in a sequential, caterpillar-like motion.
- This method allows for more precise control and is ideal for smaller areas or where finer attention is needed.
- Benefits:
- Finger walking is particularly useful for detailed work on complex reflex areas like those between the bones of the hand, facilitating targeted effects on specific organs.
3. Hook and Backup:
- How to Perform:
- Press your thumb or another finger into a specific reflex point.
- Apply steady pressure to go slightly deeper.
- Gently pull the finger backward without lifting the pressure.
- Benefits:
- This technique reaches deeper layers of hand tissue, stimulating reflex points that are more deeply embedded and enhancing the impact on the corresponding internal areas.
4. Press and Rotate:
- How to Perform:
- Identify a reflex point on your hand.
- Press down firmly with your thumb.
- Slowly rotate your thumb over this point, maintaining constant pressure.
- Benefits:
- The rotating motion helps to increase blood circulation and nerve activity in the area, enhancing the reflexology effects and promoting healing in the associated body parts.
By mastering these fundamental hand reflexology techniques, you can begin to explore the benefits of this practice at home, offering yourself a way to support your health in a direct and personal manner.
Common Hand Reflex Points and Their Corresponding Benefits
Hand reflexology provides a unique approach to health, where specific points on your hands are associated with different parts of your body. By applying pressure to these points, you can potentially alleviate various ailments and improve your overall well-being. Here are some key reflex points located on the hands and the benefits they can offer:
1. The Thumb Base:
- Location and Technique:
- The base of the thumb corresponds to the head and neck area. You can apply pressure using the thumb of your opposite hand or perform gentle circular motions.
- Benefits:
- This point is especially beneficial for relieving headaches and reducing tension in the neck area. It can also be helpful in managing stress and fatigue that often accumulates in the head and neck.
2. The Index Finger Base:
- Location and Technique:
- Located at the base of the index finger, this point can be stimulated by pressing with the thumb and index finger of the opposite hand.
- Benefits:
- This reflex area is linked to the chest and respiratory system. Stimulating this point can aid in easing breathing difficulties, clearing chest congestion, and potentially providing relief from conditions like colds or bronchitis.
3. Center of the Palm:
- Location and Technique:
- The center of the palm acts as a reflex point for the stomach. Use the thumb of your opposite hand to apply a steady, firm pressure or perform a gentle rotating motion to stimulate this area.
- Benefits:
- This point is ideal for addressing issues related to digestion. It can help in soothing stomach pain, promoting better digestion, and alleviating symptoms of indigestion or bloating.
These reflex points are accessible and easy to work on, making them perfect for DIY hand reflexology sessions. By regularly stimulating these points, you can harness the potential benefits of reflexology to manage everyday ailments and enhance your health. Remember to approach reflexology with care and consult a professional if you have specific health conditions or concerns.
Tips for a Successful DIY Hand Reflexology Session
Hand reflexology is a flexible and easily accessible form of self-care that you can perform at home. To make the most out of your DIY hand reflexology sessions and ensure they are effective and enjoyable, follow these practical tips:
1. Start with Light Pressure and Adjust as Needed:
- Begin each session by applying gentle pressure to the reflex points. This helps your body to adjust without causing discomfort.
- Gradually increase the pressure as per your comfort level. It’s important to listen to your body and avoid applying too much force, which could lead to discomfort or pain.
2. Duration of Each Session:
- A standard hand reflexology session can be as short or as long as you prefer, typically lasting between 5 to 30 minutes.
- If you’re just starting out, begin with shorter sessions to see how your body responds before gradually increasing the duration.
- Even a few minutes can be beneficial, especially if you are dealing with stress or need a quick break to rejuvenate.
3. Regular Practice for Optimal Benefits:
- Consistency is key in reflexology. Aim to practice hand reflexology 2-3 times a week to maximize the health benefits.
- Regular sessions can help in maintaining improved circulation, stress relief, and better overall health.
4. Create a Relaxing Environment:
- Enhance your reflexology experience by creating a calming atmosphere. This could involve dimming the lights, playing soft music, or using aromatherapy with essential oils to help relax your mind and body.
- Make sure the room is at a comfortable temperature and that you won’t be disturbed during your session.
5. Hydrate and Reflect Post-Session:
- Drinking water after a reflexology session can help flush out toxins that are released during the process. Stay hydrated to support your body’s natural detoxification.
- Take a few minutes after your session to reflect on how you feel. This can help you better understand your body’s responses to different reflex points and tailor future sessions to your specific needs.
By following these tips, your DIY hand reflexology sessions can become a cherished part of your wellness routine, offering a simple yet effective way to enhance your health and well-being from the comfort of your home.
Safety Considerations and When to Avoid DIY Hand Reflexology
While hand reflexology is a generally safe practice that can offer numerous health benefits, there are certain situations and conditions where it should be approached with caution or avoided altogether. Being aware of these safety considerations can help prevent complications and ensure that reflexology is a beneficial addition to your wellness routine.
1. Hand Injuries or Conditions:
- Avoid practicing hand reflexology if you have any active injuries, infections, or severe conditions affecting your hands such as severe arthritis, fractures, or wounds. These conditions can be exacerbated by the pressure and manipulation involved in reflexology.
2. Acute or Severe Illnesses:
- If you are experiencing acute illnesses, such as severe infections or inflammation, reflexology might not be advisable. Wait until you have recovered or consult with your healthcare provider before starting reflexology.
3. Chronic Conditions:
- For individuals with chronic conditions such as heart disease, diabetes, or cancer, reflexology should be approached with caution. These conditions can be affected by the systemic changes that reflexology might promote, such as increased circulation and relaxation which can alter blood pressure and glucose levels.
- Always consult with a healthcare provider before beginning any new therapy, including reflexology, especially if you have any serious health conditions or are under medical treatment.
4. Pregnancy:
- Reflexology can sometimes stimulate labor, so pregnant women, especially those in high-risk categories or with complications, should consult their healthcare provider before engaging in reflexology.
5. After Surgery:
- Avoid reflexology immediately after surgery as it may affect the healing process or interfere with post-operative recovery. Always follow your doctor’s advice on when it is safe to resume such practices.
6. Varicose Veins and Blood Clot Risks:
- If you have varicose veins or a history of blood clots, consult with a healthcare provider before practicing reflexology. The pressure applied during reflexology could potentially dislodge a clot or worsen varicose veins.
Conclusion:
- Reflexology is intended to support and not replace traditional medical treatments. It’s important to use common sense and to consult healthcare professionals when considering reflexology, particularly if you have existing health issues or concerns. By adhering to these guidelines, you can enjoy the benefits of reflexology safely and effectively.
Conclusion
DIY hand reflexology is a powerful tool you can use to maintain health and relieve stress. By learning to apply these techniques, you can enjoy the benefits of reflexology from the comfort of your home.
Further Resources
For those interested in exploring more about hand reflexology and its various aspects, we recommend checking out the following resources on our website:
- Hand Reflexology: Delve deeper into the specific techniques and benefits of hand reflexology. This article provides a comprehensive overview, perfect for those looking to expand their understanding or practice at home.
- Reflexology Benefits: Discover the wide range of benefits that reflexology can offer for both physical and mental health. This resource explores how reflexology can be a key component of a holistic health regimen.
- Reflexology Cost: Learn about the factors that influence the cost of reflexology services, helping you to make informed decisions about incorporating this therapy into your health and wellness plans.
- Home: Visit our main page to learn more about Reflexology Auckland and our full range of services.
These articles provide valuable insights and detailed information to help you better understand the potential of reflexology and how you can integrate it into your health routine safely and effectively. Whether you’re new to reflexology or looking to deepen your knowledge, these resources are excellent starting points.
- How to Perform:
- Press your thumb or another finger into a specific reflex point.
- Apply steady pressure to go slightly deeper.
- Gently pull the finger backward without lifting the pressure.
- Benefits:
- This technique reaches deeper layers of hand tissue, stimulating reflex points that are more deeply embedded and enhancing the impact on the corresponding internal areas.
4. Press and Rotate:
- How to Perform:
- Identify a reflex point on your hand.
- Press down firmly with your thumb.
- Slowly rotate your thumb over this point, maintaining constant pressure.
- Benefits:
- The rotating motion helps to increase blood circulation and nerve activity in the area, enhancing the reflexology effects and promoting healing in the associated body parts.
By mastering these fundamental hand reflexology techniques, you can begin to explore the benefits of this practice at home, offering yourself a way to support your health in a direct and personal manner.
Common Hand Reflex Points and Their Corresponding Benefits
Hand reflexology provides a unique approach to health, where specific points on your hands are associated with different parts of your body. By applying pressure to these points, you can potentially alleviate various ailments and improve your overall well-being. Here are some key reflex points located on the hands and the benefits they can offer:
1. The Thumb Base:
- Location and Technique:
- The base of the thumb corresponds to the head and neck area. You can apply pressure using the thumb of your opposite hand or perform gentle circular motions.
- Benefits:
- This point is especially beneficial for relieving headaches and reducing tension in the neck area. It can also be helpful in managing stress and fatigue that often accumulates in the head and neck.
2. The Index Finger Base:
- Location and Technique:
- Located at the base of the index finger, this point can be stimulated by pressing with the thumb and index finger of the opposite hand.
- Benefits:
- This reflex area is linked to the chest and respiratory system. Stimulating this point can aid in easing breathing difficulties, clearing chest congestion, and potentially providing relief from conditions like colds or bronchitis.
3. Center of the Palm:
- Location and Technique:
- The center of the palm acts as a reflex point for the stomach. Use the thumb of your opposite hand to apply a steady, firm pressure or perform a gentle rotating motion to stimulate this area.
- Benefits:
- This point is ideal for addressing issues related to digestion. It can help in soothing stomach pain, promoting better digestion, and alleviating symptoms of indigestion or bloating.
These reflex points are accessible and easy to work on, making them perfect for DIY hand reflexology sessions. By regularly stimulating these points, you can harness the potential benefits of reflexology to manage everyday ailments and enhance your health. Remember to approach reflexology with care and consult a professional if you have specific health conditions or concerns.
Tips for a Successful DIY Hand Reflexology Session
Hand reflexology is a flexible and easily accessible form of self-care that you can perform at home. To make the most out of your DIY hand reflexology sessions and ensure they are effective and enjoyable, follow these practical tips:
1. Start with Light Pressure and Adjust as Needed:
- Begin each session by applying gentle pressure to the reflex points. This helps your body to adjust without causing discomfort.
- Gradually increase the pressure as per your comfort level. It’s important to listen to your body and avoid applying too much force, which could lead to discomfort or pain.
2. Duration of Each Session:
- A standard hand reflexology session can be as short or as long as you prefer, typically lasting between 5 to 30 minutes.
- If you’re just starting out, begin with shorter sessions to see how your body responds before gradually increasing the duration.
- Even a few minutes can be beneficial, especially if you are dealing with stress or need a quick break to rejuvenate.
3. Regular Practice for Optimal Benefits:
- Consistency is key in reflexology. Aim to practice hand reflexology 2-3 times a week to maximize the health benefits.
- Regular sessions can help in maintaining improved circulation, stress relief, and better overall health.
4. Create a Relaxing Environment:
- Enhance your reflexology experience by creating a calming atmosphere. This could involve dimming the lights, playing soft music, or using aromatherapy with essential oils to help relax your mind and body.
- Make sure the room is at a comfortable temperature and that you won’t be disturbed during your session.
5. Hydrate and Reflect Post-Session:
- Drinking water after a reflexology session can help flush out toxins that are released during the process. Stay hydrated to support your body’s natural detoxification.
- Take a few minutes after your session to reflect on how you feel. This can help you better understand your body’s responses to different reflex points and tailor future sessions to your specific needs.
By following these tips, your DIY hand reflexology sessions can become a cherished part of your wellness routine, offering a simple yet effective way to enhance your health and well-being from the comfort of your home.
Safety Considerations and When to Avoid DIY Hand Reflexology
While hand reflexology is a generally safe practice that can offer numerous health benefits, there are certain situations and conditions where it should be approached with caution or avoided altogether. Being aware of these safety considerations can help prevent complications and ensure that reflexology is a beneficial addition to your wellness routine.
1. Hand Injuries or Conditions:
- Avoid practicing hand reflexology if you have any active injuries, infections, or severe conditions affecting your hands such as severe arthritis, fractures, or wounds. These conditions can be exacerbated by the pressure and manipulation involved in reflexology.
2. Acute or Severe Illnesses:
- If you are experiencing acute illnesses, such as severe infections or inflammation, reflexology might not be advisable. Wait until you have recovered or consult with your healthcare provider before starting reflexology.
3. Chronic Conditions:
- For individuals with chronic conditions such as heart disease, diabetes, or cancer, reflexology should be approached with caution. These conditions can be affected by the systemic changes that reflexology might promote, such as increased circulation and relaxation which can alter blood pressure and glucose levels.
- Always consult with a healthcare provider before beginning any new therapy, including reflexology, especially if you have any serious health conditions or are under medical treatment.
4. Pregnancy:
- Reflexology can sometimes stimulate labor, so pregnant women, especially those in high-risk categories or with complications, should consult their healthcare provider before engaging in reflexology.
5. After Surgery:
- Avoid reflexology immediately after surgery as it may affect the healing process or interfere with post-operative recovery. Always follow your doctor’s advice on when it is safe to resume such practices.
6. Varicose Veins and Blood Clot Risks:
- If you have varicose veins or a history of blood clots, consult with a healthcare provider before practicing reflexology. The pressure applied during reflexology could potentially dislodge a clot or worsen varicose veins.
Conclusion:
- Reflexology is intended to support and not replace traditional medical treatments. It’s important to use common sense and to consult healthcare professionals when considering reflexology, particularly if you have existing health issues or concerns. By adhering to these guidelines, you can enjoy the benefits of reflexology safely and effectively.
Conclusion
DIY hand reflexology is a powerful tool you can use to maintain health and relieve stress. By learning to apply these techniques, you can enjoy the benefits of reflexology from the comfort of your home.
Further Resources
For those interested in exploring more about hand reflexology and its various aspects, we recommend checking out the following resources on our website:
- Hand Reflexology: Delve deeper into the specific techniques and benefits of hand reflexology. This article provides a comprehensive overview, perfect for those looking to expand their understanding or practice at home.
- Reflexology Benefits: Discover the wide range of benefits that reflexology can offer for both physical and mental health. This resource explores how reflexology can be a key component of a holistic health regimen.
- Reflexology Cost: Learn about the factors that influence the cost of reflexology services, helping you to make informed decisions about incorporating this therapy into your health and wellness plans.
- Home: Visit our main page to learn more about Reflexology Auckland and our full range of services.
These articles provide valuable insights and detailed information to help you better understand the potential of reflexology and how you can integrate it into your health routine safely and effectively. Whether you’re new to reflexology or looking to deepen your knowledge, these resources are excellent starting points.
Hand reflexology is a practice rooted in ancient medicine, using pressure points on the hands believed to correspond to various parts of the body. This guide introduces you to simple DIY hand reflexology techniques that you can use at home to enhance relaxation and promote overall wellness.
Key Sections of DIY Hand Reflexology :
What You Need to Get Started
Embarking on your DIY hand reflexology journey is straightforward and requires minimal setup. Here’s what you’ll need to ensure a comfortable and effective session:
1. Your Hands:
- The primary “tool” in hand reflexology is, of course, your own hands. Clean, well-moisturized hands can make the process smoother and more comfortable.
2. Comfortable Seating:
- Choose a comfortable chair or a seat where you can relax without straining your back. Sitting upright in a supportive chair is often best, as it allows you to easily access both of your hands.
3. Optional Tools:
- Soft Mat or Pillow: While not necessary, a soft mat on your lap or a pillow can provide support, making it easier to hold your hand comfortably during the session. This can be particularly helpful if you have a longer session planned or if you find holding your arm up tiresome.
- Lotion or Hand Cream: Applying a small amount of lotion or hand cream can reduce friction and make reflexology techniques more pleasurable and less abrasive on the skin.
- Relaxing Background Music: Consider playing some soft, ambient music to enhance relaxation and create a therapeutic environment. Music or nature sounds can help in maintaining a calm mind and a focused approach.
4. Quiet and Comfortable Environment:
- Find a spot in your home that is typically quiet and free from interruptions. This could be a dedicated room or a cozy corner where you feel relaxed. The idea is to create a space that feels like a sanctuary, where stressors and external distractions are minimized.
- Good Lighting: Ensure the area is well-lit so that you can see your hands clearly without straining your eyes. Natural light is ideal, but a soft lamp can also create a warm and inviting environment.
5. Setting the Mood:
- You might want to set a timer if you have limited time to practice, so you don’t need to watch the clock. This allows you to fully immerse in the experience without worrying about time.
- Keep a glass of water nearby to stay hydrated before and after the session, as reflexology can sometimes release toxins and hydration can help flush these from your system.
By preparing your space and having these items at hand, you can maximize the benefits of your DIY hand reflexology sessions, turning them into a restorative ritual that you look forward to each time.
Understanding the Basics of Hand Reflexology
Hand reflexology is a therapeutic method where specific points on the hands are manipulated to improve health and promote healing in various parts of the body. According to reflexology theory, each area on the hand corresponds to different organs and systems within the body.
By applying pressure to these reflex areas, you can influence the health of the corresponding body parts, potentially easing ailments and boosting overall well-being.
Step-by-Step Guide to DIY Hand Reflexology Techniques
Here’s how you can begin practicing hand reflexology on yourself with some basic techniques. Each method targets different areas and serves various purposes, from relieving tension to improving body functions.
1. Thumb Walking:
- How to Perform:
- Place the pad of your thumb on the area of your hand you wish to work on.
- Gently press down into the skin.
- Move your thumb forward in a small “walking” motion, inching along the hand.
- Continue this movement across different zones of the hand that correspond to areas of your body you wish to address.
- Benefits:
- This technique is excellent for navigating larger areas of the hand, such as the palm or the back of the hand, making it effective for broadly stimulating internal organs and body systems.
2. Finger Walking:
- How to Perform:
- Use your index and middle fingers to ‘walk’ along a specific line or area on the hand.
- Apply gentle pressure in a sequential, caterpillar-like motion.
- This method allows for more precise control and is ideal for smaller areas or where finer attention is needed.
- Benefits:
- Finger walking is particularly useful for detailed work on complex reflex areas like those between the bones of the hand, facilitating targeted effects on specific organs.
3. Hook and Backup:
- How to Perform:
- Press your thumb or another finger into a specific reflex point.
- Apply steady pressure to go slightly deeper.
- Gently pull the finger backward without lifting the pressure.
- Benefits:
- This technique reaches deeper layers of hand tissue, stimulating reflex points that are more deeply embedded and enhancing the impact on the corresponding internal areas.
4. Press and Rotate:
- How to Perform:
- Identify a reflex point on your hand.
- Press down firmly with your thumb.
- Slowly rotate your thumb over this point, maintaining constant pressure.
- Benefits:
- The rotating motion helps to increase blood circulation and nerve activity in the area, enhancing the reflexology effects and promoting healing in the associated body parts.
By mastering these fundamental hand reflexology techniques, you can begin to explore the benefits of this practice at home, offering yourself a way to support your health in a direct and personal manner.
Common Hand Reflex Points and Their Corresponding Benefits
Hand reflexology provides a unique approach to health, where specific points on your hands are associated with different parts of your body. By applying pressure to these points, you can potentially alleviate various ailments and improve your overall well-being. Here are some key reflex points located on the hands and the benefits they can offer:
1. The Thumb Base:
- Location and Technique:
- The base of the thumb corresponds to the head and neck area. You can apply pressure using the thumb of your opposite hand or perform gentle circular motions.
- Benefits:
- This point is especially beneficial for relieving headaches and reducing tension in the neck area. It can also be helpful in managing stress and fatigue that often accumulates in the head and neck.
2. The Index Finger Base:
- Location and Technique:
- Located at the base of the index finger, this point can be stimulated by pressing with the thumb and index finger of the opposite hand.
- Benefits:
- This reflex area is linked to the chest and respiratory system. Stimulating this point can aid in easing breathing difficulties, clearing chest congestion, and potentially providing relief from conditions like colds or bronchitis.
3. Center of the Palm:
- Location and Technique:
- The center of the palm acts as a reflex point for the stomach. Use the thumb of your opposite hand to apply a steady, firm pressure or perform a gentle rotating motion to stimulate this area.
- Benefits:
- This point is ideal for addressing issues related to digestion. It can help in soothing stomach pain, promoting better digestion, and alleviating symptoms of indigestion or bloating.
These reflex points are accessible and easy to work on, making them perfect for DIY hand reflexology sessions. By regularly stimulating these points, you can harness the potential benefits of reflexology to manage everyday ailments and enhance your health. Remember to approach reflexology with care and consult a professional if you have specific health conditions or concerns.
Tips for a Successful DIY Hand Reflexology Session
Hand reflexology is a flexible and easily accessible form of self-care that you can perform at home. To make the most out of your DIY hand reflexology sessions and ensure they are effective and enjoyable, follow these practical tips:
1. Start with Light Pressure and Adjust as Needed:
- Begin each session by applying gentle pressure to the reflex points. This helps your body to adjust without causing discomfort.
- Gradually increase the pressure as per your comfort level. It’s important to listen to your body and avoid applying too much force, which could lead to discomfort or pain.
2. Duration of Each Session:
- A standard hand reflexology session can be as short or as long as you prefer, typically lasting between 5 to 30 minutes.
- If you’re just starting out, begin with shorter sessions to see how your body responds before gradually increasing the duration.
- Even a few minutes can be beneficial, especially if you are dealing with stress or need a quick break to rejuvenate.
3. Regular Practice for Optimal Benefits:
- Consistency is key in reflexology. Aim to practice hand reflexology 2-3 times a week to maximize the health benefits.
- Regular sessions can help in maintaining improved circulation, stress relief, and better overall health.
4. Create a Relaxing Environment:
- Enhance your reflexology experience by creating a calming atmosphere. This could involve dimming the lights, playing soft music, or using aromatherapy with essential oils to help relax your mind and body.
- Make sure the room is at a comfortable temperature and that you won’t be disturbed during your session.
5. Hydrate and Reflect Post-Session:
- Drinking water after a reflexology session can help flush out toxins that are released during the process. Stay hydrated to support your body’s natural detoxification.
- Take a few minutes after your session to reflect on how you feel. This can help you better understand your body’s responses to different reflex points and tailor future sessions to your specific needs.
By following these tips, your DIY hand reflexology sessions can become a cherished part of your wellness routine, offering a simple yet effective way to enhance your health and well-being from the comfort of your home.
Safety Considerations and When to Avoid DIY Hand Reflexology
While hand reflexology is a generally safe practice that can offer numerous health benefits, there are certain situations and conditions where it should be approached with caution or avoided altogether. Being aware of these safety considerations can help prevent complications and ensure that reflexology is a beneficial addition to your wellness routine.
1. Hand Injuries or Conditions:
- Avoid practicing hand reflexology if you have any active injuries, infections, or severe conditions affecting your hands such as severe arthritis, fractures, or wounds. These conditions can be exacerbated by the pressure and manipulation involved in reflexology.
2. Acute or Severe Illnesses:
- If you are experiencing acute illnesses, such as severe infections or inflammation, reflexology might not be advisable. Wait until you have recovered or consult with your healthcare provider before starting reflexology.
3. Chronic Conditions:
- For individuals with chronic conditions such as heart disease, diabetes, or cancer, reflexology should be approached with caution. These conditions can be affected by the systemic changes that reflexology might promote, such as increased circulation and relaxation which can alter blood pressure and glucose levels.
- Always consult with a healthcare provider before beginning any new therapy, including reflexology, especially if you have any serious health conditions or are under medical treatment.
4. Pregnancy:
- Reflexology can sometimes stimulate labor, so pregnant women, especially those in high-risk categories or with complications, should consult their healthcare provider before engaging in reflexology.
5. After Surgery:
- Avoid reflexology immediately after surgery as it may affect the healing process or interfere with post-operative recovery. Always follow your doctor’s advice on when it is safe to resume such practices.
6. Varicose Veins and Blood Clot Risks:
- If you have varicose veins or a history of blood clots, consult with a healthcare provider before practicing reflexology. The pressure applied during reflexology could potentially dislodge a clot or worsen varicose veins.
Conclusion:
- Reflexology is intended to support and not replace traditional medical treatments. It’s important to use common sense and to consult healthcare professionals when considering reflexology, particularly if you have existing health issues or concerns. By adhering to these guidelines, you can enjoy the benefits of reflexology safely and effectively.
Conclusion
DIY hand reflexology is a powerful tool you can use to maintain health and relieve stress. By learning to apply these techniques, you can enjoy the benefits of reflexology from the comfort of your home.
Further Resources
For those interested in exploring more about hand reflexology and its various aspects, we recommend checking out the following resources on our website:
- Hand Reflexology: Delve deeper into the specific techniques and benefits of hand reflexology. This article provides a comprehensive overview, perfect for those looking to expand their understanding or practice at home.
- Reflexology Benefits: Discover the wide range of benefits that reflexology can offer for both physical and mental health. This resource explores how reflexology can be a key component of a holistic health regimen.
- Reflexology Cost: Learn about the factors that influence the cost of reflexology services, helping you to make informed decisions about incorporating this therapy into your health and wellness plans.
- Home: Visit our main page to learn more about Reflexology Auckland and our full range of services.
These articles provide valuable insights and detailed information to help you better understand the potential of reflexology and how you can integrate it into your health routine safely and effectively. Whether you’re new to reflexology or looking to deepen your knowledge, these resources are excellent starting points.
- How to Perform:
- Use your index and middle fingers to ‘walk’ along a specific line or area on the hand.
- Apply gentle pressure in a sequential, caterpillar-like motion.
- This method allows for more precise control and is ideal for smaller areas or where finer attention is needed.
- Benefits:
- Finger walking is particularly useful for detailed work on complex reflex areas like those between the bones of the hand, facilitating targeted effects on specific organs.
3. Hook and Backup:
- How to Perform:
- Press your thumb or another finger into a specific reflex point.
- Apply steady pressure to go slightly deeper.
- Gently pull the finger backward without lifting the pressure.
- Benefits:
- This technique reaches deeper layers of hand tissue, stimulating reflex points that are more deeply embedded and enhancing the impact on the corresponding internal areas.
4. Press and Rotate:
- How to Perform:
- Identify a reflex point on your hand.
- Press down firmly with your thumb.
- Slowly rotate your thumb over this point, maintaining constant pressure.
- Benefits:
- The rotating motion helps to increase blood circulation and nerve activity in the area, enhancing the reflexology effects and promoting healing in the associated body parts.
By mastering these fundamental hand reflexology techniques, you can begin to explore the benefits of this practice at home, offering yourself a way to support your health in a direct and personal manner.
Common Hand Reflex Points and Their Corresponding Benefits
Hand reflexology provides a unique approach to health, where specific points on your hands are associated with different parts of your body. By applying pressure to these points, you can potentially alleviate various ailments and improve your overall well-being. Here are some key reflex points located on the hands and the benefits they can offer:
1. The Thumb Base:
- Location and Technique:
- The base of the thumb corresponds to the head and neck area. You can apply pressure using the thumb of your opposite hand or perform gentle circular motions.
- Benefits:
- This point is especially beneficial for relieving headaches and reducing tension in the neck area. It can also be helpful in managing stress and fatigue that often accumulates in the head and neck.
2. The Index Finger Base:
- Location and Technique:
- Located at the base of the index finger, this point can be stimulated by pressing with the thumb and index finger of the opposite hand.
- Benefits:
- This reflex area is linked to the chest and respiratory system. Stimulating this point can aid in easing breathing difficulties, clearing chest congestion, and potentially providing relief from conditions like colds or bronchitis.
3. Center of the Palm:
- Location and Technique:
- The center of the palm acts as a reflex point for the stomach. Use the thumb of your opposite hand to apply a steady, firm pressure or perform a gentle rotating motion to stimulate this area.
- Benefits:
- This point is ideal for addressing issues related to digestion. It can help in soothing stomach pain, promoting better digestion, and alleviating symptoms of indigestion or bloating.
These reflex points are accessible and easy to work on, making them perfect for DIY hand reflexology sessions. By regularly stimulating these points, you can harness the potential benefits of reflexology to manage everyday ailments and enhance your health. Remember to approach reflexology with care and consult a professional if you have specific health conditions or concerns.
Tips for a Successful DIY Hand Reflexology Session
Hand reflexology is a flexible and easily accessible form of self-care that you can perform at home. To make the most out of your DIY hand reflexology sessions and ensure they are effective and enjoyable, follow these practical tips:
1. Start with Light Pressure and Adjust as Needed:
- Begin each session by applying gentle pressure to the reflex points. This helps your body to adjust without causing discomfort.
- Gradually increase the pressure as per your comfort level. It’s important to listen to your body and avoid applying too much force, which could lead to discomfort or pain.
2. Duration of Each Session:
- A standard hand reflexology session can be as short or as long as you prefer, typically lasting between 5 to 30 minutes.
- If you’re just starting out, begin with shorter sessions to see how your body responds before gradually increasing the duration.
- Even a few minutes can be beneficial, especially if you are dealing with stress or need a quick break to rejuvenate.
3. Regular Practice for Optimal Benefits:
- Consistency is key in reflexology. Aim to practice hand reflexology 2-3 times a week to maximize the health benefits.
- Regular sessions can help in maintaining improved circulation, stress relief, and better overall health.
4. Create a Relaxing Environment:
- Enhance your reflexology experience by creating a calming atmosphere. This could involve dimming the lights, playing soft music, or using aromatherapy with essential oils to help relax your mind and body.
- Make sure the room is at a comfortable temperature and that you won’t be disturbed during your session.
5. Hydrate and Reflect Post-Session:
- Drinking water after a reflexology session can help flush out toxins that are released during the process. Stay hydrated to support your body’s natural detoxification.
- Take a few minutes after your session to reflect on how you feel. This can help you better understand your body’s responses to different reflex points and tailor future sessions to your specific needs.
By following these tips, your DIY hand reflexology sessions can become a cherished part of your wellness routine, offering a simple yet effective way to enhance your health and well-being from the comfort of your home.
Safety Considerations and When to Avoid DIY Hand Reflexology
While hand reflexology is a generally safe practice that can offer numerous health benefits, there are certain situations and conditions where it should be approached with caution or avoided altogether. Being aware of these safety considerations can help prevent complications and ensure that reflexology is a beneficial addition to your wellness routine.
1. Hand Injuries or Conditions:
- Avoid practicing hand reflexology if you have any active injuries, infections, or severe conditions affecting your hands such as severe arthritis, fractures, or wounds. These conditions can be exacerbated by the pressure and manipulation involved in reflexology.
2. Acute or Severe Illnesses:
- If you are experiencing acute illnesses, such as severe infections or inflammation, reflexology might not be advisable. Wait until you have recovered or consult with your healthcare provider before starting reflexology.
3. Chronic Conditions:
- For individuals with chronic conditions such as heart disease, diabetes, or cancer, reflexology should be approached with caution. These conditions can be affected by the systemic changes that reflexology might promote, such as increased circulation and relaxation which can alter blood pressure and glucose levels.
- Always consult with a healthcare provider before beginning any new therapy, including reflexology, especially if you have any serious health conditions or are under medical treatment.
4. Pregnancy:
- Reflexology can sometimes stimulate labor, so pregnant women, especially those in high-risk categories or with complications, should consult their healthcare provider before engaging in reflexology.
5. After Surgery:
- Avoid reflexology immediately after surgery as it may affect the healing process or interfere with post-operative recovery. Always follow your doctor’s advice on when it is safe to resume such practices.
6. Varicose Veins and Blood Clot Risks:
- If you have varicose veins or a history of blood clots, consult with a healthcare provider before practicing reflexology. The pressure applied during reflexology could potentially dislodge a clot or worsen varicose veins.
Conclusion:
- Reflexology is intended to support and not replace traditional medical treatments. It’s important to use common sense and to consult healthcare professionals when considering reflexology, particularly if you have existing health issues or concerns. By adhering to these guidelines, you can enjoy the benefits of reflexology safely and effectively.
Conclusion
DIY hand reflexology is a powerful tool you can use to maintain health and relieve stress. By learning to apply these techniques, you can enjoy the benefits of reflexology from the comfort of your home.
Further Resources
For those interested in exploring more about hand reflexology and its various aspects, we recommend checking out the following resources on our website:
- Hand Reflexology: Delve deeper into the specific techniques and benefits of hand reflexology. This article provides a comprehensive overview, perfect for those looking to expand their understanding or practice at home.
- Reflexology Benefits: Discover the wide range of benefits that reflexology can offer for both physical and mental health. This resource explores how reflexology can be a key component of a holistic health regimen.
- Reflexology Cost: Learn about the factors that influence the cost of reflexology services, helping you to make informed decisions about incorporating this therapy into your health and wellness plans.
- Home: Visit our main page to learn more about Reflexology Auckland and our full range of services.
These articles provide valuable insights and detailed information to help you better understand the potential of reflexology and how you can integrate it into your health routine safely and effectively. Whether you’re new to reflexology or looking to deepen your knowledge, these resources are excellent starting points.
Hand reflexology is a practice rooted in ancient medicine, using pressure points on the hands believed to correspond to various parts of the body. This guide introduces you to simple DIY hand reflexology techniques that you can use at home to enhance relaxation and promote overall wellness.
Key Sections of DIY Hand Reflexology :
What You Need to Get Started
Embarking on your DIY hand reflexology journey is straightforward and requires minimal setup. Here’s what you’ll need to ensure a comfortable and effective session:
1. Your Hands:
- The primary “tool” in hand reflexology is, of course, your own hands. Clean, well-moisturized hands can make the process smoother and more comfortable.
2. Comfortable Seating:
- Choose a comfortable chair or a seat where you can relax without straining your back. Sitting upright in a supportive chair is often best, as it allows you to easily access both of your hands.
3. Optional Tools:
- Soft Mat or Pillow: While not necessary, a soft mat on your lap or a pillow can provide support, making it easier to hold your hand comfortably during the session. This can be particularly helpful if you have a longer session planned or if you find holding your arm up tiresome.
- Lotion or Hand Cream: Applying a small amount of lotion or hand cream can reduce friction and make reflexology techniques more pleasurable and less abrasive on the skin.
- Relaxing Background Music: Consider playing some soft, ambient music to enhance relaxation and create a therapeutic environment. Music or nature sounds can help in maintaining a calm mind and a focused approach.
4. Quiet and Comfortable Environment:
- Find a spot in your home that is typically quiet and free from interruptions. This could be a dedicated room or a cozy corner where you feel relaxed. The idea is to create a space that feels like a sanctuary, where stressors and external distractions are minimized.
- Good Lighting: Ensure the area is well-lit so that you can see your hands clearly without straining your eyes. Natural light is ideal, but a soft lamp can also create a warm and inviting environment.
5. Setting the Mood:
- You might want to set a timer if you have limited time to practice, so you don’t need to watch the clock. This allows you to fully immerse in the experience without worrying about time.
- Keep a glass of water nearby to stay hydrated before and after the session, as reflexology can sometimes release toxins and hydration can help flush these from your system.
By preparing your space and having these items at hand, you can maximize the benefits of your DIY hand reflexology sessions, turning them into a restorative ritual that you look forward to each time.
Understanding the Basics of Hand Reflexology
Hand reflexology is a therapeutic method where specific points on the hands are manipulated to improve health and promote healing in various parts of the body. According to reflexology theory, each area on the hand corresponds to different organs and systems within the body.
By applying pressure to these reflex areas, you can influence the health of the corresponding body parts, potentially easing ailments and boosting overall well-being.
Step-by-Step Guide to DIY Hand Reflexology Techniques
Here’s how you can begin practicing hand reflexology on yourself with some basic techniques. Each method targets different areas and serves various purposes, from relieving tension to improving body functions.
1. Thumb Walking:
- How to Perform:
- Place the pad of your thumb on the area of your hand you wish to work on.
- Gently press down into the skin.
- Move your thumb forward in a small “walking” motion, inching along the hand.
- Continue this movement across different zones of the hand that correspond to areas of your body you wish to address.
- Benefits:
- This technique is excellent for navigating larger areas of the hand, such as the palm or the back of the hand, making it effective for broadly stimulating internal organs and body systems.
2. Finger Walking:
- How to Perform:
- Use your index and middle fingers to ‘walk’ along a specific line or area on the hand.
- Apply gentle pressure in a sequential, caterpillar-like motion.
- This method allows for more precise control and is ideal for smaller areas or where finer attention is needed.
- Benefits:
- Finger walking is particularly useful for detailed work on complex reflex areas like those between the bones of the hand, facilitating targeted effects on specific organs.
3. Hook and Backup:
- How to Perform:
- Press your thumb or another finger into a specific reflex point.
- Apply steady pressure to go slightly deeper.
- Gently pull the finger backward without lifting the pressure.
- Benefits:
- This technique reaches deeper layers of hand tissue, stimulating reflex points that are more deeply embedded and enhancing the impact on the corresponding internal areas.
4. Press and Rotate:
- How to Perform:
- Identify a reflex point on your hand.
- Press down firmly with your thumb.
- Slowly rotate your thumb over this point, maintaining constant pressure.
- Benefits:
- The rotating motion helps to increase blood circulation and nerve activity in the area, enhancing the reflexology effects and promoting healing in the associated body parts.
By mastering these fundamental hand reflexology techniques, you can begin to explore the benefits of this practice at home, offering yourself a way to support your health in a direct and personal manner.
Common Hand Reflex Points and Their Corresponding Benefits
Hand reflexology provides a unique approach to health, where specific points on your hands are associated with different parts of your body. By applying pressure to these points, you can potentially alleviate various ailments and improve your overall well-being. Here are some key reflex points located on the hands and the benefits they can offer:
1. The Thumb Base:
- Location and Technique:
- The base of the thumb corresponds to the head and neck area. You can apply pressure using the thumb of your opposite hand or perform gentle circular motions.
- Benefits:
- This point is especially beneficial for relieving headaches and reducing tension in the neck area. It can also be helpful in managing stress and fatigue that often accumulates in the head and neck.
2. The Index Finger Base:
- Location and Technique:
- Located at the base of the index finger, this point can be stimulated by pressing with the thumb and index finger of the opposite hand.
- Benefits:
- This reflex area is linked to the chest and respiratory system. Stimulating this point can aid in easing breathing difficulties, clearing chest congestion, and potentially providing relief from conditions like colds or bronchitis.
3. Center of the Palm:
- Location and Technique:
- The center of the palm acts as a reflex point for the stomach. Use the thumb of your opposite hand to apply a steady, firm pressure or perform a gentle rotating motion to stimulate this area.
- Benefits:
- This point is ideal for addressing issues related to digestion. It can help in soothing stomach pain, promoting better digestion, and alleviating symptoms of indigestion or bloating.
These reflex points are accessible and easy to work on, making them perfect for DIY hand reflexology sessions. By regularly stimulating these points, you can harness the potential benefits of reflexology to manage everyday ailments and enhance your health. Remember to approach reflexology with care and consult a professional if you have specific health conditions or concerns.
Tips for a Successful DIY Hand Reflexology Session
Hand reflexology is a flexible and easily accessible form of self-care that you can perform at home. To make the most out of your DIY hand reflexology sessions and ensure they are effective and enjoyable, follow these practical tips:
1. Start with Light Pressure and Adjust as Needed:
- Begin each session by applying gentle pressure to the reflex points. This helps your body to adjust without causing discomfort.
- Gradually increase the pressure as per your comfort level. It’s important to listen to your body and avoid applying too much force, which could lead to discomfort or pain.
2. Duration of Each Session:
- A standard hand reflexology session can be as short or as long as you prefer, typically lasting between 5 to 30 minutes.
- If you’re just starting out, begin with shorter sessions to see how your body responds before gradually increasing the duration.
- Even a few minutes can be beneficial, especially if you are dealing with stress or need a quick break to rejuvenate.
3. Regular Practice for Optimal Benefits:
- Consistency is key in reflexology. Aim to practice hand reflexology 2-3 times a week to maximize the health benefits.
- Regular sessions can help in maintaining improved circulation, stress relief, and better overall health.
4. Create a Relaxing Environment:
- Enhance your reflexology experience by creating a calming atmosphere. This could involve dimming the lights, playing soft music, or using aromatherapy with essential oils to help relax your mind and body.
- Make sure the room is at a comfortable temperature and that you won’t be disturbed during your session.
5. Hydrate and Reflect Post-Session:
- Drinking water after a reflexology session can help flush out toxins that are released during the process. Stay hydrated to support your body’s natural detoxification.
- Take a few minutes after your session to reflect on how you feel. This can help you better understand your body’s responses to different reflex points and tailor future sessions to your specific needs.
By following these tips, your DIY hand reflexology sessions can become a cherished part of your wellness routine, offering a simple yet effective way to enhance your health and well-being from the comfort of your home.
Safety Considerations and When to Avoid DIY Hand Reflexology
While hand reflexology is a generally safe practice that can offer numerous health benefits, there are certain situations and conditions where it should be approached with caution or avoided altogether. Being aware of these safety considerations can help prevent complications and ensure that reflexology is a beneficial addition to your wellness routine.
1. Hand Injuries or Conditions:
- Avoid practicing hand reflexology if you have any active injuries, infections, or severe conditions affecting your hands such as severe arthritis, fractures, or wounds. These conditions can be exacerbated by the pressure and manipulation involved in reflexology.
2. Acute or Severe Illnesses:
- If you are experiencing acute illnesses, such as severe infections or inflammation, reflexology might not be advisable. Wait until you have recovered or consult with your healthcare provider before starting reflexology.
3. Chronic Conditions:
- For individuals with chronic conditions such as heart disease, diabetes, or cancer, reflexology should be approached with caution. These conditions can be affected by the systemic changes that reflexology might promote, such as increased circulation and relaxation which can alter blood pressure and glucose levels.
- Always consult with a healthcare provider before beginning any new therapy, including reflexology, especially if you have any serious health conditions or are under medical treatment.
4. Pregnancy:
- Reflexology can sometimes stimulate labor, so pregnant women, especially those in high-risk categories or with complications, should consult their healthcare provider before engaging in reflexology.
5. After Surgery:
- Avoid reflexology immediately after surgery as it may affect the healing process or interfere with post-operative recovery. Always follow your doctor’s advice on when it is safe to resume such practices.
6. Varicose Veins and Blood Clot Risks:
- If you have varicose veins or a history of blood clots, consult with a healthcare provider before practicing reflexology. The pressure applied during reflexology could potentially dislodge a clot or worsen varicose veins.
Conclusion:
- Reflexology is intended to support and not replace traditional medical treatments. It’s important to use common sense and to consult healthcare professionals when considering reflexology, particularly if you have existing health issues or concerns. By adhering to these guidelines, you can enjoy the benefits of reflexology safely and effectively.
Conclusion
DIY hand reflexology is a powerful tool you can use to maintain health and relieve stress. By learning to apply these techniques, you can enjoy the benefits of reflexology from the comfort of your home.
Further Resources
For those interested in exploring more about hand reflexology and its various aspects, we recommend checking out the following resources on our website:
- Hand Reflexology: Delve deeper into the specific techniques and benefits of hand reflexology. This article provides a comprehensive overview, perfect for those looking to expand their understanding or practice at home.
- Reflexology Benefits: Discover the wide range of benefits that reflexology can offer for both physical and mental health. This resource explores how reflexology can be a key component of a holistic health regimen.
- Reflexology Cost: Learn about the factors that influence the cost of reflexology services, helping you to make informed decisions about incorporating this therapy into your health and wellness plans.
- Home: Visit our main page to learn more about Reflexology Auckland and our full range of services.
These articles provide valuable insights and detailed information to help you better understand the potential of reflexology and how you can integrate it into your health routine safely and effectively. Whether you’re new to reflexology or looking to deepen your knowledge, these resources are excellent starting points.
- How to Perform:
- Place the pad of your thumb on the area of your hand you wish to work on.
- Gently press down into the skin.
- Move your thumb forward in a small “walking” motion, inching along the hand.
- Continue this movement across different zones of the hand that correspond to areas of your body you wish to address.
- Benefits:
- This technique is excellent for navigating larger areas of the hand, such as the palm or the back of the hand, making it effective for broadly stimulating internal organs and body systems.
2. Finger Walking:
- How to Perform:
- Use your index and middle fingers to ‘walk’ along a specific line or area on the hand.
- Apply gentle pressure in a sequential, caterpillar-like motion.
- This method allows for more precise control and is ideal for smaller areas or where finer attention is needed.
- Benefits:
- Finger walking is particularly useful for detailed work on complex reflex areas like those between the bones of the hand, facilitating targeted effects on specific organs.
3. Hook and Backup:
- How to Perform:
- Press your thumb or another finger into a specific reflex point.
- Apply steady pressure to go slightly deeper.
- Gently pull the finger backward without lifting the pressure.
- Benefits:
- This technique reaches deeper layers of hand tissue, stimulating reflex points that are more deeply embedded and enhancing the impact on the corresponding internal areas.
4. Press and Rotate:
- How to Perform:
- Identify a reflex point on your hand.
- Press down firmly with your thumb.
- Slowly rotate your thumb over this point, maintaining constant pressure.
- Benefits:
- The rotating motion helps to increase blood circulation and nerve activity in the area, enhancing the reflexology effects and promoting healing in the associated body parts.
By mastering these fundamental hand reflexology techniques, you can begin to explore the benefits of this practice at home, offering yourself a way to support your health in a direct and personal manner.
Common Hand Reflex Points and Their Corresponding Benefits
Hand reflexology provides a unique approach to health, where specific points on your hands are associated with different parts of your body. By applying pressure to these points, you can potentially alleviate various ailments and improve your overall well-being. Here are some key reflex points located on the hands and the benefits they can offer:
1. The Thumb Base:
- Location and Technique:
- The base of the thumb corresponds to the head and neck area. You can apply pressure using the thumb of your opposite hand or perform gentle circular motions.
- Benefits:
- This point is especially beneficial for relieving headaches and reducing tension in the neck area. It can also be helpful in managing stress and fatigue that often accumulates in the head and neck.
2. The Index Finger Base:
- Location and Technique:
- Located at the base of the index finger, this point can be stimulated by pressing with the thumb and index finger of the opposite hand.
- Benefits:
- This reflex area is linked to the chest and respiratory system. Stimulating this point can aid in easing breathing difficulties, clearing chest congestion, and potentially providing relief from conditions like colds or bronchitis.
3. Center of the Palm:
- Location and Technique:
- The center of the palm acts as a reflex point for the stomach. Use the thumb of your opposite hand to apply a steady, firm pressure or perform a gentle rotating motion to stimulate this area.
- Benefits:
- This point is ideal for addressing issues related to digestion. It can help in soothing stomach pain, promoting better digestion, and alleviating symptoms of indigestion or bloating.
These reflex points are accessible and easy to work on, making them perfect for DIY hand reflexology sessions. By regularly stimulating these points, you can harness the potential benefits of reflexology to manage everyday ailments and enhance your health. Remember to approach reflexology with care and consult a professional if you have specific health conditions or concerns.
Tips for a Successful DIY Hand Reflexology Session
Hand reflexology is a flexible and easily accessible form of self-care that you can perform at home. To make the most out of your DIY hand reflexology sessions and ensure they are effective and enjoyable, follow these practical tips:
1. Start with Light Pressure and Adjust as Needed:
- Begin each session by applying gentle pressure to the reflex points. This helps your body to adjust without causing discomfort.
- Gradually increase the pressure as per your comfort level. It’s important to listen to your body and avoid applying too much force, which could lead to discomfort or pain.
2. Duration of Each Session:
- A standard hand reflexology session can be as short or as long as you prefer, typically lasting between 5 to 30 minutes.
- If you’re just starting out, begin with shorter sessions to see how your body responds before gradually increasing the duration.
- Even a few minutes can be beneficial, especially if you are dealing with stress or need a quick break to rejuvenate.
3. Regular Practice for Optimal Benefits:
- Consistency is key in reflexology. Aim to practice hand reflexology 2-3 times a week to maximize the health benefits.
- Regular sessions can help in maintaining improved circulation, stress relief, and better overall health.
4. Create a Relaxing Environment:
- Enhance your reflexology experience by creating a calming atmosphere. This could involve dimming the lights, playing soft music, or using aromatherapy with essential oils to help relax your mind and body.
- Make sure the room is at a comfortable temperature and that you won’t be disturbed during your session.
5. Hydrate and Reflect Post-Session:
- Drinking water after a reflexology session can help flush out toxins that are released during the process. Stay hydrated to support your body’s natural detoxification.
- Take a few minutes after your session to reflect on how you feel. This can help you better understand your body’s responses to different reflex points and tailor future sessions to your specific needs.
By following these tips, your DIY hand reflexology sessions can become a cherished part of your wellness routine, offering a simple yet effective way to enhance your health and well-being from the comfort of your home.
Safety Considerations and When to Avoid DIY Hand Reflexology
While hand reflexology is a generally safe practice that can offer numerous health benefits, there are certain situations and conditions where it should be approached with caution or avoided altogether. Being aware of these safety considerations can help prevent complications and ensure that reflexology is a beneficial addition to your wellness routine.
1. Hand Injuries or Conditions:
- Avoid practicing hand reflexology if you have any active injuries, infections, or severe conditions affecting your hands such as severe arthritis, fractures, or wounds. These conditions can be exacerbated by the pressure and manipulation involved in reflexology.
2. Acute or Severe Illnesses:
- If you are experiencing acute illnesses, such as severe infections or inflammation, reflexology might not be advisable. Wait until you have recovered or consult with your healthcare provider before starting reflexology.
3. Chronic Conditions:
- For individuals with chronic conditions such as heart disease, diabetes, or cancer, reflexology should be approached with caution. These conditions can be affected by the systemic changes that reflexology might promote, such as increased circulation and relaxation which can alter blood pressure and glucose levels.
- Always consult with a healthcare provider before beginning any new therapy, including reflexology, especially if you have any serious health conditions or are under medical treatment.
4. Pregnancy:
- Reflexology can sometimes stimulate labor, so pregnant women, especially those in high-risk categories or with complications, should consult their healthcare provider before engaging in reflexology.
5. After Surgery:
- Avoid reflexology immediately after surgery as it may affect the healing process or interfere with post-operative recovery. Always follow your doctor’s advice on when it is safe to resume such practices.
6. Varicose Veins and Blood Clot Risks:
- If you have varicose veins or a history of blood clots, consult with a healthcare provider before practicing reflexology. The pressure applied during reflexology could potentially dislodge a clot or worsen varicose veins.
Conclusion:
- Reflexology is intended to support and not replace traditional medical treatments. It’s important to use common sense and to consult healthcare professionals when considering reflexology, particularly if you have existing health issues or concerns. By adhering to these guidelines, you can enjoy the benefits of reflexology safely and effectively.
Conclusion
DIY hand reflexology is a powerful tool you can use to maintain health and relieve stress. By learning to apply these techniques, you can enjoy the benefits of reflexology from the comfort of your home.
Further Resources
For those interested in exploring more about hand reflexology and its various aspects, we recommend checking out the following resources on our website:
- Hand Reflexology: Delve deeper into the specific techniques and benefits of hand reflexology. This article provides a comprehensive overview, perfect for those looking to expand their understanding or practice at home.
- Reflexology Benefits: Discover the wide range of benefits that reflexology can offer for both physical and mental health. This resource explores how reflexology can be a key component of a holistic health regimen.
- Reflexology Cost: Learn about the factors that influence the cost of reflexology services, helping you to make informed decisions about incorporating this therapy into your health and wellness plans.
- Home: Visit our main page to learn more about Reflexology Auckland and our full range of services.
These articles provide valuable insights and detailed information to help you better understand the potential of reflexology and how you can integrate it into your health routine safely and effectively. Whether you’re new to reflexology or looking to deepen your knowledge, these resources are excellent starting points.
Hand reflexology is a practice rooted in ancient medicine, using pressure points on the hands believed to correspond to various parts of the body. This guide introduces you to simple DIY hand reflexology techniques that you can use at home to enhance relaxation and promote overall wellness.
Key Sections of DIY Hand Reflexology :
What You Need to Get Started
Embarking on your DIY hand reflexology journey is straightforward and requires minimal setup. Here’s what you’ll need to ensure a comfortable and effective session:
1. Your Hands:
- The primary “tool” in hand reflexology is, of course, your own hands. Clean, well-moisturized hands can make the process smoother and more comfortable.
2. Comfortable Seating:
- Choose a comfortable chair or a seat where you can relax without straining your back. Sitting upright in a supportive chair is often best, as it allows you to easily access both of your hands.
3. Optional Tools:
- Soft Mat or Pillow: While not necessary, a soft mat on your lap or a pillow can provide support, making it easier to hold your hand comfortably during the session. This can be particularly helpful if you have a longer session planned or if you find holding your arm up tiresome.
- Lotion or Hand Cream: Applying a small amount of lotion or hand cream can reduce friction and make reflexology techniques more pleasurable and less abrasive on the skin.
- Relaxing Background Music: Consider playing some soft, ambient music to enhance relaxation and create a therapeutic environment. Music or nature sounds can help in maintaining a calm mind and a focused approach.
4. Quiet and Comfortable Environment:
- Find a spot in your home that is typically quiet and free from interruptions. This could be a dedicated room or a cozy corner where you feel relaxed. The idea is to create a space that feels like a sanctuary, where stressors and external distractions are minimized.
- Good Lighting: Ensure the area is well-lit so that you can see your hands clearly without straining your eyes. Natural light is ideal, but a soft lamp can also create a warm and inviting environment.
5. Setting the Mood:
- You might want to set a timer if you have limited time to practice, so you don’t need to watch the clock. This allows you to fully immerse in the experience without worrying about time.
- Keep a glass of water nearby to stay hydrated before and after the session, as reflexology can sometimes release toxins and hydration can help flush these from your system.
By preparing your space and having these items at hand, you can maximize the benefits of your DIY hand reflexology sessions, turning them into a restorative ritual that you look forward to each time.
Understanding the Basics of Hand Reflexology
Hand reflexology is a therapeutic method where specific points on the hands are manipulated to improve health and promote healing in various parts of the body. According to reflexology theory, each area on the hand corresponds to different organs and systems within the body.
By applying pressure to these reflex areas, you can influence the health of the corresponding body parts, potentially easing ailments and boosting overall well-being.
Step-by-Step Guide to DIY Hand Reflexology Techniques
Here’s how you can begin practicing hand reflexology on yourself with some basic techniques. Each method targets different areas and serves various purposes, from relieving tension to improving body functions.
1. Thumb Walking:
- How to Perform:
- Place the pad of your thumb on the area of your hand you wish to work on.
- Gently press down into the skin.
- Move your thumb forward in a small “walking” motion, inching along the hand.
- Continue this movement across different zones of the hand that correspond to areas of your body you wish to address.
- Benefits:
- This technique is excellent for navigating larger areas of the hand, such as the palm or the back of the hand, making it effective for broadly stimulating internal organs and body systems.
2. Finger Walking:
- How to Perform:
- Use your index and middle fingers to ‘walk’ along a specific line or area on the hand.
- Apply gentle pressure in a sequential, caterpillar-like motion.
- This method allows for more precise control and is ideal for smaller areas or where finer attention is needed.
- Benefits:
- Finger walking is particularly useful for detailed work on complex reflex areas like those between the bones of the hand, facilitating targeted effects on specific organs.
3. Hook and Backup:
- How to Perform:
- Press your thumb or another finger into a specific reflex point.
- Apply steady pressure to go slightly deeper.
- Gently pull the finger backward without lifting the pressure.
- Benefits:
- This technique reaches deeper layers of hand tissue, stimulating reflex points that are more deeply embedded and enhancing the impact on the corresponding internal areas.
4. Press and Rotate:
- How to Perform:
- Identify a reflex point on your hand.
- Press down firmly with your thumb.
- Slowly rotate your thumb over this point, maintaining constant pressure.
- Benefits:
- The rotating motion helps to increase blood circulation and nerve activity in the area, enhancing the reflexology effects and promoting healing in the associated body parts.
By mastering these fundamental hand reflexology techniques, you can begin to explore the benefits of this practice at home, offering yourself a way to support your health in a direct and personal manner.
Common Hand Reflex Points and Their Corresponding Benefits
Hand reflexology provides a unique approach to health, where specific points on your hands are associated with different parts of your body. By applying pressure to these points, you can potentially alleviate various ailments and improve your overall well-being. Here are some key reflex points located on the hands and the benefits they can offer:
1. The Thumb Base:
- Location and Technique:
- The base of the thumb corresponds to the head and neck area. You can apply pressure using the thumb of your opposite hand or perform gentle circular motions.
- Benefits:
- This point is especially beneficial for relieving headaches and reducing tension in the neck area. It can also be helpful in managing stress and fatigue that often accumulates in the head and neck.
2. The Index Finger Base:
- Location and Technique:
- Located at the base of the index finger, this point can be stimulated by pressing with the thumb and index finger of the opposite hand.
- Benefits:
- This reflex area is linked to the chest and respiratory system. Stimulating this point can aid in easing breathing difficulties, clearing chest congestion, and potentially providing relief from conditions like colds or bronchitis.
3. Center of the Palm:
- Location and Technique:
- The center of the palm acts as a reflex point for the stomach. Use the thumb of your opposite hand to apply a steady, firm pressure or perform a gentle rotating motion to stimulate this area.
- Benefits:
- This point is ideal for addressing issues related to digestion. It can help in soothing stomach pain, promoting better digestion, and alleviating symptoms of indigestion or bloating.
These reflex points are accessible and easy to work on, making them perfect for DIY hand reflexology sessions. By regularly stimulating these points, you can harness the potential benefits of reflexology to manage everyday ailments and enhance your health. Remember to approach reflexology with care and consult a professional if you have specific health conditions or concerns.
Tips for a Successful DIY Hand Reflexology Session
Hand reflexology is a flexible and easily accessible form of self-care that you can perform at home. To make the most out of your DIY hand reflexology sessions and ensure they are effective and enjoyable, follow these practical tips:
1. Start with Light Pressure and Adjust as Needed:
- Begin each session by applying gentle pressure to the reflex points. This helps your body to adjust without causing discomfort.
- Gradually increase the pressure as per your comfort level. It’s important to listen to your body and avoid applying too much force, which could lead to discomfort or pain.
2. Duration of Each Session:
- A standard hand reflexology session can be as short or as long as you prefer, typically lasting between 5 to 30 minutes.
- If you’re just starting out, begin with shorter sessions to see how your body responds before gradually increasing the duration.
- Even a few minutes can be beneficial, especially if you are dealing with stress or need a quick break to rejuvenate.
3. Regular Practice for Optimal Benefits:
- Consistency is key in reflexology. Aim to practice hand reflexology 2-3 times a week to maximize the health benefits.
- Regular sessions can help in maintaining improved circulation, stress relief, and better overall health.
4. Create a Relaxing Environment:
- Enhance your reflexology experience by creating a calming atmosphere. This could involve dimming the lights, playing soft music, or using aromatherapy with essential oils to help relax your mind and body.
- Make sure the room is at a comfortable temperature and that you won’t be disturbed during your session.
5. Hydrate and Reflect Post-Session:
- Drinking water after a reflexology session can help flush out toxins that are released during the process. Stay hydrated to support your body’s natural detoxification.
- Take a few minutes after your session to reflect on how you feel. This can help you better understand your body’s responses to different reflex points and tailor future sessions to your specific needs.
By following these tips, your DIY hand reflexology sessions can become a cherished part of your wellness routine, offering a simple yet effective way to enhance your health and well-being from the comfort of your home.
Safety Considerations and When to Avoid DIY Hand Reflexology
While hand reflexology is a generally safe practice that can offer numerous health benefits, there are certain situations and conditions where it should be approached with caution or avoided altogether. Being aware of these safety considerations can help prevent complications and ensure that reflexology is a beneficial addition to your wellness routine.
1. Hand Injuries or Conditions:
- Avoid practicing hand reflexology if you have any active injuries, infections, or severe conditions affecting your hands such as severe arthritis, fractures, or wounds. These conditions can be exacerbated by the pressure and manipulation involved in reflexology.
2. Acute or Severe Illnesses:
- If you are experiencing acute illnesses, such as severe infections or inflammation, reflexology might not be advisable. Wait until you have recovered or consult with your healthcare provider before starting reflexology.
3. Chronic Conditions:
- For individuals with chronic conditions such as heart disease, diabetes, or cancer, reflexology should be approached with caution. These conditions can be affected by the systemic changes that reflexology might promote, such as increased circulation and relaxation which can alter blood pressure and glucose levels.
- Always consult with a healthcare provider before beginning any new therapy, including reflexology, especially if you have any serious health conditions or are under medical treatment.
4. Pregnancy:
- Reflexology can sometimes stimulate labor, so pregnant women, especially those in high-risk categories or with complications, should consult their healthcare provider before engaging in reflexology.
5. After Surgery:
- Avoid reflexology immediately after surgery as it may affect the healing process or interfere with post-operative recovery. Always follow your doctor’s advice on when it is safe to resume such practices.
6. Varicose Veins and Blood Clot Risks:
- If you have varicose veins or a history of blood clots, consult with a healthcare provider before practicing reflexology. The pressure applied during reflexology could potentially dislodge a clot or worsen varicose veins.
Conclusion:
- Reflexology is intended to support and not replace traditional medical treatments. It’s important to use common sense and to consult healthcare professionals when considering reflexology, particularly if you have existing health issues or concerns. By adhering to these guidelines, you can enjoy the benefits of reflexology safely and effectively.
Conclusion
DIY hand reflexology is a powerful tool you can use to maintain health and relieve stress. By learning to apply these techniques, you can enjoy the benefits of reflexology from the comfort of your home.
Further Resources
For those interested in exploring more about hand reflexology and its various aspects, we recommend checking out the following resources on our website:
- Hand Reflexology: Delve deeper into the specific techniques and benefits of hand reflexology. This article provides a comprehensive overview, perfect for those looking to expand their understanding or practice at home.
- Reflexology Benefits: Discover the wide range of benefits that reflexology can offer for both physical and mental health. This resource explores how reflexology can be a key component of a holistic health regimen.
- Reflexology Cost: Learn about the factors that influence the cost of reflexology services, helping you to make informed decisions about incorporating this therapy into your health and wellness plans.
- Home: Visit our main page to learn more about Reflexology Auckland and our full range of services.
These articles provide valuable insights and detailed information to help you better understand the potential of reflexology and how you can integrate it into your health routine safely and effectively. Whether you’re new to reflexology or looking to deepen your knowledge, these resources are excellent starting points.
- Location and Technique:
- The base of the thumb corresponds to the head and neck area. You can apply pressure using the thumb of your opposite hand or perform gentle circular motions.
- Benefits:
- This point is especially beneficial for relieving headaches and reducing tension in the neck area. It can also be helpful in managing stress and fatigue that often accumulates in the head and neck.
2. The Index Finger Base:
- Location and Technique:
- Located at the base of the index finger, this point can be stimulated by pressing with the thumb and index finger of the opposite hand.
- Benefits:
- This reflex area is linked to the chest and respiratory system. Stimulating this point can aid in easing breathing difficulties, clearing chest congestion, and potentially providing relief from conditions like colds or bronchitis.
3. Center of the Palm:
- Location and Technique:
- The center of the palm acts as a reflex point for the stomach. Use the thumb of your opposite hand to apply a steady, firm pressure or perform a gentle rotating motion to stimulate this area.
- Benefits:
- This point is ideal for addressing issues related to digestion. It can help in soothing stomach pain, promoting better digestion, and alleviating symptoms of indigestion or bloating.
These reflex points are accessible and easy to work on, making them perfect for DIY hand reflexology sessions. By regularly stimulating these points, you can harness the potential benefits of reflexology to manage everyday ailments and enhance your health. Remember to approach reflexology with care and consult a professional if you have specific health conditions or concerns.
Tips for a Successful DIY Hand Reflexology Session
Hand reflexology is a flexible and easily accessible form of self-care that you can perform at home. To make the most out of your DIY hand reflexology sessions and ensure they are effective and enjoyable, follow these practical tips:
1. Start with Light Pressure and Adjust as Needed:
- Begin each session by applying gentle pressure to the reflex points. This helps your body to adjust without causing discomfort.
- Gradually increase the pressure as per your comfort level. It’s important to listen to your body and avoid applying too much force, which could lead to discomfort or pain.
2. Duration of Each Session:
- A standard hand reflexology session can be as short or as long as you prefer, typically lasting between 5 to 30 minutes.
- If you’re just starting out, begin with shorter sessions to see how your body responds before gradually increasing the duration.
- Even a few minutes can be beneficial, especially if you are dealing with stress or need a quick break to rejuvenate.
3. Regular Practice for Optimal Benefits:
- Consistency is key in reflexology. Aim to practice hand reflexology 2-3 times a week to maximize the health benefits.
- Regular sessions can help in maintaining improved circulation, stress relief, and better overall health.
4. Create a Relaxing Environment:
- Enhance your reflexology experience by creating a calming atmosphere. This could involve dimming the lights, playing soft music, or using aromatherapy with essential oils to help relax your mind and body.
- Make sure the room is at a comfortable temperature and that you won’t be disturbed during your session.
5. Hydrate and Reflect Post-Session:
- Drinking water after a reflexology session can help flush out toxins that are released during the process. Stay hydrated to support your body’s natural detoxification.
- Take a few minutes after your session to reflect on how you feel. This can help you better understand your body’s responses to different reflex points and tailor future sessions to your specific needs.
By following these tips, your DIY hand reflexology sessions can become a cherished part of your wellness routine, offering a simple yet effective way to enhance your health and well-being from the comfort of your home.
Safety Considerations and When to Avoid DIY Hand Reflexology
While hand reflexology is a generally safe practice that can offer numerous health benefits, there are certain situations and conditions where it should be approached with caution or avoided altogether. Being aware of these safety considerations can help prevent complications and ensure that reflexology is a beneficial addition to your wellness routine.
1. Hand Injuries or Conditions:
- Avoid practicing hand reflexology if you have any active injuries, infections, or severe conditions affecting your hands such as severe arthritis, fractures, or wounds. These conditions can be exacerbated by the pressure and manipulation involved in reflexology.
2. Acute or Severe Illnesses:
- If you are experiencing acute illnesses, such as severe infections or inflammation, reflexology might not be advisable. Wait until you have recovered or consult with your healthcare provider before starting reflexology.
3. Chronic Conditions:
- For individuals with chronic conditions such as heart disease, diabetes, or cancer, reflexology should be approached with caution. These conditions can be affected by the systemic changes that reflexology might promote, such as increased circulation and relaxation which can alter blood pressure and glucose levels.
- Always consult with a healthcare provider before beginning any new therapy, including reflexology, especially if you have any serious health conditions or are under medical treatment.
4. Pregnancy:
- Reflexology can sometimes stimulate labor, so pregnant women, especially those in high-risk categories or with complications, should consult their healthcare provider before engaging in reflexology.
5. After Surgery:
- Avoid reflexology immediately after surgery as it may affect the healing process or interfere with post-operative recovery. Always follow your doctor’s advice on when it is safe to resume such practices.
6. Varicose Veins and Blood Clot Risks:
- If you have varicose veins or a history of blood clots, consult with a healthcare provider before practicing reflexology. The pressure applied during reflexology could potentially dislodge a clot or worsen varicose veins.
Conclusion:
- Reflexology is intended to support and not replace traditional medical treatments. It’s important to use common sense and to consult healthcare professionals when considering reflexology, particularly if you have existing health issues or concerns. By adhering to these guidelines, you can enjoy the benefits of reflexology safely and effectively.
Conclusion
DIY hand reflexology is a powerful tool you can use to maintain health and relieve stress. By learning to apply these techniques, you can enjoy the benefits of reflexology from the comfort of your home.
Further Resources
For those interested in exploring more about hand reflexology and its various aspects, we recommend checking out the following resources on our website:
- Hand Reflexology: Delve deeper into the specific techniques and benefits of hand reflexology. This article provides a comprehensive overview, perfect for those looking to expand their understanding or practice at home.
- Reflexology Benefits: Discover the wide range of benefits that reflexology can offer for both physical and mental health. This resource explores how reflexology can be a key component of a holistic health regimen.
- Reflexology Cost: Learn about the factors that influence the cost of reflexology services, helping you to make informed decisions about incorporating this therapy into your health and wellness plans.
- Home: Visit our main page to learn more about Reflexology Auckland and our full range of services.
These articles provide valuable insights and detailed information to help you better understand the potential of reflexology and how you can integrate it into your health routine safely and effectively. Whether you’re new to reflexology or looking to deepen your knowledge, these resources are excellent starting points.
- How to Perform:
- Place the pad of your thumb on the area of your hand you wish to work on.
- Gently press down into the skin.
- Move your thumb forward in a small “walking” motion, inching along the hand.
- Continue this movement across different zones of the hand that correspond to areas of your body you wish to address.
- Benefits:
- This technique is excellent for navigating larger areas of the hand, such as the palm or the back of the hand, making it effective for broadly stimulating internal organs and body systems.
2. Finger Walking:
- How to Perform:
- Use your index and middle fingers to ‘walk’ along a specific line or area on the hand.
- Apply gentle pressure in a sequential, caterpillar-like motion.
- This method allows for more precise control and is ideal for smaller areas or where finer attention is needed.
- Benefits:
- Finger walking is particularly useful for detailed work on complex reflex areas like those between the bones of the hand, facilitating targeted effects on specific organs.
3. Hook and Backup:
- How to Perform:
- Press your thumb or another finger into a specific reflex point.
- Apply steady pressure to go slightly deeper.
- Gently pull the finger backward without lifting the pressure.
- Benefits:
- This technique reaches deeper layers of hand tissue, stimulating reflex points that are more deeply embedded and enhancing the impact on the corresponding internal areas.
4. Press and Rotate:
- How to Perform:
- Identify a reflex point on your hand.
- Press down firmly with your thumb.
- Slowly rotate your thumb over this point, maintaining constant pressure.
- Benefits:
- The rotating motion helps to increase blood circulation and nerve activity in the area, enhancing the reflexology effects and promoting healing in the associated body parts.
By mastering these fundamental hand reflexology techniques, you can begin to explore the benefits of this practice at home, offering yourself a way to support your health in a direct and personal manner.
Common Hand Reflex Points and Their Corresponding Benefits
Hand reflexology provides a unique approach to health, where specific points on your hands are associated with different parts of your body. By applying pressure to these points, you can potentially alleviate various ailments and improve your overall well-being. Here are some key reflex points located on the hands and the benefits they can offer:
1. The Thumb Base:
- Location and Technique:
- The base of the thumb corresponds to the head and neck area. You can apply pressure using the thumb of your opposite hand or perform gentle circular motions.
- Benefits:
- This point is especially beneficial for relieving headaches and reducing tension in the neck area. It can also be helpful in managing stress and fatigue that often accumulates in the head and neck.
2. The Index Finger Base:
- Location and Technique:
- Located at the base of the index finger, this point can be stimulated by pressing with the thumb and index finger of the opposite hand.
- Benefits:
- This reflex area is linked to the chest and respiratory system. Stimulating this point can aid in easing breathing difficulties, clearing chest congestion, and potentially providing relief from conditions like colds or bronchitis.
3. Center of the Palm:
- Location and Technique:
- The center of the palm acts as a reflex point for the stomach. Use the thumb of your opposite hand to apply a steady, firm pressure or perform a gentle rotating motion to stimulate this area.
- Benefits:
- This point is ideal for addressing issues related to digestion. It can help in soothing stomach pain, promoting better digestion, and alleviating symptoms of indigestion or bloating.
These reflex points are accessible and easy to work on, making them perfect for DIY hand reflexology sessions. By regularly stimulating these points, you can harness the potential benefits of reflexology to manage everyday ailments and enhance your health. Remember to approach reflexology with care and consult a professional if you have specific health conditions or concerns.
Tips for a Successful DIY Hand Reflexology Session
Hand reflexology is a flexible and easily accessible form of self-care that you can perform at home. To make the most out of your DIY hand reflexology sessions and ensure they are effective and enjoyable, follow these practical tips:
1. Start with Light Pressure and Adjust as Needed:
- Begin each session by applying gentle pressure to the reflex points. This helps your body to adjust without causing discomfort.
- Gradually increase the pressure as per your comfort level. It’s important to listen to your body and avoid applying too much force, which could lead to discomfort or pain.
2. Duration of Each Session:
- A standard hand reflexology session can be as short or as long as you prefer, typically lasting between 5 to 30 minutes.
- If you’re just starting out, begin with shorter sessions to see how your body responds before gradually increasing the duration.
- Even a few minutes can be beneficial, especially if you are dealing with stress or need a quick break to rejuvenate.
3. Regular Practice for Optimal Benefits:
- Consistency is key in reflexology. Aim to practice hand reflexology 2-3 times a week to maximize the health benefits.
- Regular sessions can help in maintaining improved circulation, stress relief, and better overall health.
4. Create a Relaxing Environment:
- Enhance your reflexology experience by creating a calming atmosphere. This could involve dimming the lights, playing soft music, or using aromatherapy with essential oils to help relax your mind and body.
- Make sure the room is at a comfortable temperature and that you won’t be disturbed during your session.
5. Hydrate and Reflect Post-Session:
- Drinking water after a reflexology session can help flush out toxins that are released during the process. Stay hydrated to support your body’s natural detoxification.
- Take a few minutes after your session to reflect on how you feel. This can help you better understand your body’s responses to different reflex points and tailor future sessions to your specific needs.
By following these tips, your DIY hand reflexology sessions can become a cherished part of your wellness routine, offering a simple yet effective way to enhance your health and well-being from the comfort of your home.
Safety Considerations and When to Avoid DIY Hand Reflexology
While hand reflexology is a generally safe practice that can offer numerous health benefits, there are certain situations and conditions where it should be approached with caution or avoided altogether. Being aware of these safety considerations can help prevent complications and ensure that reflexology is a beneficial addition to your wellness routine.
1. Hand Injuries or Conditions:
- Avoid practicing hand reflexology if you have any active injuries, infections, or severe conditions affecting your hands such as severe arthritis, fractures, or wounds. These conditions can be exacerbated by the pressure and manipulation involved in reflexology.
2. Acute or Severe Illnesses:
- If you are experiencing acute illnesses, such as severe infections or inflammation, reflexology might not be advisable. Wait until you have recovered or consult with your healthcare provider before starting reflexology.
3. Chronic Conditions:
- For individuals with chronic conditions such as heart disease, diabetes, or cancer, reflexology should be approached with caution. These conditions can be affected by the systemic changes that reflexology might promote, such as increased circulation and relaxation which can alter blood pressure and glucose levels.
- Always consult with a healthcare provider before beginning any new therapy, including reflexology, especially if you have any serious health conditions or are under medical treatment.
4. Pregnancy:
- Reflexology can sometimes stimulate labor, so pregnant women, especially those in high-risk categories or with complications, should consult their healthcare provider before engaging in reflexology.
5. After Surgery:
- Avoid reflexology immediately after surgery as it may affect the healing process or interfere with post-operative recovery. Always follow your doctor’s advice on when it is safe to resume such practices.
6. Varicose Veins and Blood Clot Risks:
- If you have varicose veins or a history of blood clots, consult with a healthcare provider before practicing reflexology. The pressure applied during reflexology could potentially dislodge a clot or worsen varicose veins.
Conclusion:
- Reflexology is intended to support and not replace traditional medical treatments. It’s important to use common sense and to consult healthcare professionals when considering reflexology, particularly if you have existing health issues or concerns. By adhering to these guidelines, you can enjoy the benefits of reflexology safely and effectively.
Conclusion
DIY hand reflexology is a powerful tool you can use to maintain health and relieve stress. By learning to apply these techniques, you can enjoy the benefits of reflexology from the comfort of your home.
Further Resources
For those interested in exploring more about hand reflexology and its various aspects, we recommend checking out the following resources on our website:
- Hand Reflexology: Delve deeper into the specific techniques and benefits of hand reflexology. This article provides a comprehensive overview, perfect for those looking to expand their understanding or practice at home.
- Reflexology Benefits: Discover the wide range of benefits that reflexology can offer for both physical and mental health. This resource explores how reflexology can be a key component of a holistic health regimen.
- Reflexology Cost: Learn about the factors that influence the cost of reflexology services, helping you to make informed decisions about incorporating this therapy into your health and wellness plans.
- Home: Visit our main page to learn more about Reflexology Auckland and our full range of services.
These articles provide valuable insights and detailed information to help you better understand the potential of reflexology and how you can integrate it into your health routine safely and effectively. Whether you’re new to reflexology or looking to deepen your knowledge, these resources are excellent starting points.
Hand reflexology is a practice rooted in ancient medicine, using pressure points on the hands believed to correspond to various parts of the body. This guide introduces you to simple DIY hand reflexology techniques that you can use at home to enhance relaxation and promote overall wellness.
Key Sections of DIY Hand Reflexology :
What You Need to Get Started
Embarking on your DIY hand reflexology journey is straightforward and requires minimal setup. Here’s what you’ll need to ensure a comfortable and effective session:
1. Your Hands:
- The primary “tool” in hand reflexology is, of course, your own hands. Clean, well-moisturized hands can make the process smoother and more comfortable.
2. Comfortable Seating:
- Choose a comfortable chair or a seat where you can relax without straining your back. Sitting upright in a supportive chair is often best, as it allows you to easily access both of your hands.
3. Optional Tools:
- Soft Mat or Pillow: While not necessary, a soft mat on your lap or a pillow can provide support, making it easier to hold your hand comfortably during the session. This can be particularly helpful if you have a longer session planned or if you find holding your arm up tiresome.
- Lotion or Hand Cream: Applying a small amount of lotion or hand cream can reduce friction and make reflexology techniques more pleasurable and less abrasive on the skin.
- Relaxing Background Music: Consider playing some soft, ambient music to enhance relaxation and create a therapeutic environment. Music or nature sounds can help in maintaining a calm mind and a focused approach.
4. Quiet and Comfortable Environment:
- Find a spot in your home that is typically quiet and free from interruptions. This could be a dedicated room or a cozy corner where you feel relaxed. The idea is to create a space that feels like a sanctuary, where stressors and external distractions are minimized.
- Good Lighting: Ensure the area is well-lit so that you can see your hands clearly without straining your eyes. Natural light is ideal, but a soft lamp can also create a warm and inviting environment.
5. Setting the Mood:
- You might want to set a timer if you have limited time to practice, so you don’t need to watch the clock. This allows you to fully immerse in the experience without worrying about time.
- Keep a glass of water nearby to stay hydrated before and after the session, as reflexology can sometimes release toxins and hydration can help flush these from your system.
By preparing your space and having these items at hand, you can maximize the benefits of your DIY hand reflexology sessions, turning them into a restorative ritual that you look forward to each time.
Understanding the Basics of Hand Reflexology
Hand reflexology is a therapeutic method where specific points on the hands are manipulated to improve health and promote healing in various parts of the body. According to reflexology theory, each area on the hand corresponds to different organs and systems within the body.
By applying pressure to these reflex areas, you can influence the health of the corresponding body parts, potentially easing ailments and boosting overall well-being.
Step-by-Step Guide to DIY Hand Reflexology Techniques
Here’s how you can begin practicing hand reflexology on yourself with some basic techniques. Each method targets different areas and serves various purposes, from relieving tension to improving body functions.
1. Thumb Walking:
- How to Perform:
- Place the pad of your thumb on the area of your hand you wish to work on.
- Gently press down into the skin.
- Move your thumb forward in a small “walking” motion, inching along the hand.
- Continue this movement across different zones of the hand that correspond to areas of your body you wish to address.
- Benefits:
- This technique is excellent for navigating larger areas of the hand, such as the palm or the back of the hand, making it effective for broadly stimulating internal organs and body systems.
2. Finger Walking:
- How to Perform:
- Use your index and middle fingers to ‘walk’ along a specific line or area on the hand.
- Apply gentle pressure in a sequential, caterpillar-like motion.
- This method allows for more precise control and is ideal for smaller areas or where finer attention is needed.
- Benefits:
- Finger walking is particularly useful for detailed work on complex reflex areas like those between the bones of the hand, facilitating targeted effects on specific organs.
3. Hook and Backup:
- How to Perform:
- Press your thumb or another finger into a specific reflex point.
- Apply steady pressure to go slightly deeper.
- Gently pull the finger backward without lifting the pressure.
- Benefits:
- This technique reaches deeper layers of hand tissue, stimulating reflex points that are more deeply embedded and enhancing the impact on the corresponding internal areas.
4. Press and Rotate:
- How to Perform:
- Identify a reflex point on your hand.
- Press down firmly with your thumb.
- Slowly rotate your thumb over this point, maintaining constant pressure.
- Benefits:
- The rotating motion helps to increase blood circulation and nerve activity in the area, enhancing the reflexology effects and promoting healing in the associated body parts.
By mastering these fundamental hand reflexology techniques, you can begin to explore the benefits of this practice at home, offering yourself a way to support your health in a direct and personal manner.
Common Hand Reflex Points and Their Corresponding Benefits
Hand reflexology provides a unique approach to health, where specific points on your hands are associated with different parts of your body. By applying pressure to these points, you can potentially alleviate various ailments and improve your overall well-being. Here are some key reflex points located on the hands and the benefits they can offer:
1. The Thumb Base:
- Location and Technique:
- The base of the thumb corresponds to the head and neck area. You can apply pressure using the thumb of your opposite hand or perform gentle circular motions.
- Benefits:
- This point is especially beneficial for relieving headaches and reducing tension in the neck area. It can also be helpful in managing stress and fatigue that often accumulates in the head and neck.
2. The Index Finger Base:
- Location and Technique:
- Located at the base of the index finger, this point can be stimulated by pressing with the thumb and index finger of the opposite hand.
- Benefits:
- This reflex area is linked to the chest and respiratory system. Stimulating this point can aid in easing breathing difficulties, clearing chest congestion, and potentially providing relief from conditions like colds or bronchitis.
3. Center of the Palm:
- Location and Technique:
- The center of the palm acts as a reflex point for the stomach. Use the thumb of your opposite hand to apply a steady, firm pressure or perform a gentle rotating motion to stimulate this area.
- Benefits:
- This point is ideal for addressing issues related to digestion. It can help in soothing stomach pain, promoting better digestion, and alleviating symptoms of indigestion or bloating.
These reflex points are accessible and easy to work on, making them perfect for DIY hand reflexology sessions. By regularly stimulating these points, you can harness the potential benefits of reflexology to manage everyday ailments and enhance your health. Remember to approach reflexology with care and consult a professional if you have specific health conditions or concerns.
Tips for a Successful DIY Hand Reflexology Session
Hand reflexology is a flexible and easily accessible form of self-care that you can perform at home. To make the most out of your DIY hand reflexology sessions and ensure they are effective and enjoyable, follow these practical tips:
1. Start with Light Pressure and Adjust as Needed:
- Begin each session by applying gentle pressure to the reflex points. This helps your body to adjust without causing discomfort.
- Gradually increase the pressure as per your comfort level. It’s important to listen to your body and avoid applying too much force, which could lead to discomfort or pain.
2. Duration of Each Session:
- A standard hand reflexology session can be as short or as long as you prefer, typically lasting between 5 to 30 minutes.
- If you’re just starting out, begin with shorter sessions to see how your body responds before gradually increasing the duration.
- Even a few minutes can be beneficial, especially if you are dealing with stress or need a quick break to rejuvenate.
3. Regular Practice for Optimal Benefits:
- Consistency is key in reflexology. Aim to practice hand reflexology 2-3 times a week to maximize the health benefits.
- Regular sessions can help in maintaining improved circulation, stress relief, and better overall health.
4. Create a Relaxing Environment:
- Enhance your reflexology experience by creating a calming atmosphere. This could involve dimming the lights, playing soft music, or using aromatherapy with essential oils to help relax your mind and body.
- Make sure the room is at a comfortable temperature and that you won’t be disturbed during your session.
5. Hydrate and Reflect Post-Session:
- Drinking water after a reflexology session can help flush out toxins that are released during the process. Stay hydrated to support your body’s natural detoxification.
- Take a few minutes after your session to reflect on how you feel. This can help you better understand your body’s responses to different reflex points and tailor future sessions to your specific needs.
By following these tips, your DIY hand reflexology sessions can become a cherished part of your wellness routine, offering a simple yet effective way to enhance your health and well-being from the comfort of your home.
Safety Considerations and When to Avoid DIY Hand Reflexology
While hand reflexology is a generally safe practice that can offer numerous health benefits, there are certain situations and conditions where it should be approached with caution or avoided altogether. Being aware of these safety considerations can help prevent complications and ensure that reflexology is a beneficial addition to your wellness routine.
1. Hand Injuries or Conditions:
- Avoid practicing hand reflexology if you have any active injuries, infections, or severe conditions affecting your hands such as severe arthritis, fractures, or wounds. These conditions can be exacerbated by the pressure and manipulation involved in reflexology.
2. Acute or Severe Illnesses:
- If you are experiencing acute illnesses, such as severe infections or inflammation, reflexology might not be advisable. Wait until you have recovered or consult with your healthcare provider before starting reflexology.
3. Chronic Conditions:
- For individuals with chronic conditions such as heart disease, diabetes, or cancer, reflexology should be approached with caution. These conditions can be affected by the systemic changes that reflexology might promote, such as increased circulation and relaxation which can alter blood pressure and glucose levels.
- Always consult with a healthcare provider before beginning any new therapy, including reflexology, especially if you have any serious health conditions or are under medical treatment.
4. Pregnancy:
- Reflexology can sometimes stimulate labor, so pregnant women, especially those in high-risk categories or with complications, should consult their healthcare provider before engaging in reflexology.
5. After Surgery:
- Avoid reflexology immediately after surgery as it may affect the healing process or interfere with post-operative recovery. Always follow your doctor’s advice on when it is safe to resume such practices.
6. Varicose Veins and Blood Clot Risks:
- If you have varicose veins or a history of blood clots, consult with a healthcare provider before practicing reflexology. The pressure applied during reflexology could potentially dislodge a clot or worsen varicose veins.
Conclusion:
- Reflexology is intended to support and not replace traditional medical treatments. It’s important to use common sense and to consult healthcare professionals when considering reflexology, particularly if you have existing health issues or concerns. By adhering to these guidelines, you can enjoy the benefits of reflexology safely and effectively.
Conclusion
DIY hand reflexology is a powerful tool you can use to maintain health and relieve stress. By learning to apply these techniques, you can enjoy the benefits of reflexology from the comfort of your home.
Further Resources
For those interested in exploring more about hand reflexology and its various aspects, we recommend checking out the following resources on our website:
- Hand Reflexology: Delve deeper into the specific techniques and benefits of hand reflexology. This article provides a comprehensive overview, perfect for those looking to expand their understanding or practice at home.
- Reflexology Benefits: Discover the wide range of benefits that reflexology can offer for both physical and mental health. This resource explores how reflexology can be a key component of a holistic health regimen.
- Reflexology Cost: Learn about the factors that influence the cost of reflexology services, helping you to make informed decisions about incorporating this therapy into your health and wellness plans.
- Home: Visit our main page to learn more about Reflexology Auckland and our full range of services.
These articles provide valuable insights and detailed information to help you better understand the potential of reflexology and how you can integrate it into your health routine safely and effectively. Whether you’re new to reflexology or looking to deepen your knowledge, these resources are excellent starting points.
- How to Perform:
- Place the pad of your thumb on the area of your hand you wish to work on.
- Gently press down into the skin.
- Move your thumb forward in a small “walking” motion, inching along the hand.
- Continue this movement across different zones of the hand that correspond to areas of your body you wish to address.
- Benefits:
- This technique is excellent for navigating larger areas of the hand, such as the palm or the back of the hand, making it effective for broadly stimulating internal organs and body systems.
2. Finger Walking:
- How to Perform:
- Use your index and middle fingers to ‘walk’ along a specific line or area on the hand.
- Apply gentle pressure in a sequential, caterpillar-like motion.
- This method allows for more precise control and is ideal for smaller areas or where finer attention is needed.
- Benefits:
- Finger walking is particularly useful for detailed work on complex reflex areas like those between the bones of the hand, facilitating targeted effects on specific organs.
3. Hook and Backup:
- How to Perform:
- Press your thumb or another finger into a specific reflex point.
- Apply steady pressure to go slightly deeper.
- Gently pull the finger backward without lifting the pressure.
- Benefits:
- This technique reaches deeper layers of hand tissue, stimulating reflex points that are more deeply embedded and enhancing the impact on the corresponding internal areas.
4. Press and Rotate:
- How to Perform:
- Identify a reflex point on your hand.
- Press down firmly with your thumb.
- Slowly rotate your thumb over this point, maintaining constant pressure.
- Benefits:
- The rotating motion helps to increase blood circulation and nerve activity in the area, enhancing the reflexology effects and promoting healing in the associated body parts.
By mastering these fundamental hand reflexology techniques, you can begin to explore the benefits of this practice at home, offering yourself a way to support your health in a direct and personal manner.
Common Hand Reflex Points and Their Corresponding Benefits
Hand reflexology provides a unique approach to health, where specific points on your hands are associated with different parts of your body. By applying pressure to these points, you can potentially alleviate various ailments and improve your overall well-being. Here are some key reflex points located on the hands and the benefits they can offer:
1. The Thumb Base:
- Location and Technique:
- The base of the thumb corresponds to the head and neck area. You can apply pressure using the thumb of your opposite hand or perform gentle circular motions.
- Benefits:
- This point is especially beneficial for relieving headaches and reducing tension in the neck area. It can also be helpful in managing stress and fatigue that often accumulates in the head and neck.
2. The Index Finger Base:
- Location and Technique:
- Located at the base of the index finger, this point can be stimulated by pressing with the thumb and index finger of the opposite hand.
- Benefits:
- This reflex area is linked to the chest and respiratory system. Stimulating this point can aid in easing breathing difficulties, clearing chest congestion, and potentially providing relief from conditions like colds or bronchitis.
3. Center of the Palm:
- Location and Technique:
- The center of the palm acts as a reflex point for the stomach. Use the thumb of your opposite hand to apply a steady, firm pressure or perform a gentle rotating motion to stimulate this area.
- Benefits:
- This point is ideal for addressing issues related to digestion. It can help in soothing stomach pain, promoting better digestion, and alleviating symptoms of indigestion or bloating.
These reflex points are accessible and easy to work on, making them perfect for DIY hand reflexology sessions. By regularly stimulating these points, you can harness the potential benefits of reflexology to manage everyday ailments and enhance your health. Remember to approach reflexology with care and consult a professional if you have specific health conditions or concerns.
Tips for a Successful DIY Hand Reflexology Session
Hand reflexology is a flexible and easily accessible form of self-care that you can perform at home. To make the most out of your DIY hand reflexology sessions and ensure they are effective and enjoyable, follow these practical tips:
1. Start with Light Pressure and Adjust as Needed:
- Begin each session by applying gentle pressure to the reflex points. This helps your body to adjust without causing discomfort.
- Gradually increase the pressure as per your comfort level. It’s important to listen to your body and avoid applying too much force, which could lead to discomfort or pain.
2. Duration of Each Session:
- A standard hand reflexology session can be as short or as long as you prefer, typically lasting between 5 to 30 minutes.
- If you’re just starting out, begin with shorter sessions to see how your body responds before gradually increasing the duration.
- Even a few minutes can be beneficial, especially if you are dealing with stress or need a quick break to rejuvenate.
3. Regular Practice for Optimal Benefits:
- Consistency is key in reflexology. Aim to practice hand reflexology 2-3 times a week to maximize the health benefits.
- Regular sessions can help in maintaining improved circulation, stress relief, and better overall health.
4. Create a Relaxing Environment:
- Enhance your reflexology experience by creating a calming atmosphere. This could involve dimming the lights, playing soft music, or using aromatherapy with essential oils to help relax your mind and body.
- Make sure the room is at a comfortable temperature and that you won’t be disturbed during your session.
5. Hydrate and Reflect Post-Session:
- Drinking water after a reflexology session can help flush out toxins that are released during the process. Stay hydrated to support your body’s natural detoxification.
- Take a few minutes after your session to reflect on how you feel. This can help you better understand your body’s responses to different reflex points and tailor future sessions to your specific needs.
By following these tips, your DIY hand reflexology sessions can become a cherished part of your wellness routine, offering a simple yet effective way to enhance your health and well-being from the comfort of your home.
Safety Considerations and When to Avoid DIY Hand Reflexology
While hand reflexology is a generally safe practice that can offer numerous health benefits, there are certain situations and conditions where it should be approached with caution or avoided altogether. Being aware of these safety considerations can help prevent complications and ensure that reflexology is a beneficial addition to your wellness routine.
1. Hand Injuries or Conditions:
- Avoid practicing hand reflexology if you have any active injuries, infections, or severe conditions affecting your hands such as severe arthritis, fractures, or wounds. These conditions can be exacerbated by the pressure and manipulation involved in reflexology.
2. Acute or Severe Illnesses:
- If you are experiencing acute illnesses, such as severe infections or inflammation, reflexology might not be advisable. Wait until you have recovered or consult with your healthcare provider before starting reflexology.
3. Chronic Conditions:
- For individuals with chronic conditions such as heart disease, diabetes, or cancer, reflexology should be approached with caution. These conditions can be affected by the systemic changes that reflexology might promote, such as increased circulation and relaxation which can alter blood pressure and glucose levels.
- Always consult with a healthcare provider before beginning any new therapy, including reflexology, especially if you have any serious health conditions or are under medical treatment.
4. Pregnancy:
- Reflexology can sometimes stimulate labor, so pregnant women, especially those in high-risk categories or with complications, should consult their healthcare provider before engaging in reflexology.
5. After Surgery:
- Avoid reflexology immediately after surgery as it may affect the healing process or interfere with post-operative recovery. Always follow your doctor’s advice on when it is safe to resume such practices.
6. Varicose Veins and Blood Clot Risks:
- If you have varicose veins or a history of blood clots, consult with a healthcare provider before practicing reflexology. The pressure applied during reflexology could potentially dislodge a clot or worsen varicose veins.
Conclusion:
- Reflexology is intended to support and not replace traditional medical treatments. It’s important to use common sense and to consult healthcare professionals when considering reflexology, particularly if you have existing health issues or concerns. By adhering to these guidelines, you can enjoy the benefits of reflexology safely and effectively.
Conclusion
DIY hand reflexology is a powerful tool you can use to maintain health and relieve stress. By learning to apply these techniques, you can enjoy the benefits of reflexology from the comfort of your home.
Further Resources
For those interested in exploring more about hand reflexology and its various aspects, we recommend checking out the following resources on our website:
- Hand Reflexology: Delve deeper into the specific techniques and benefits of hand reflexology. This article provides a comprehensive overview, perfect for those looking to expand their understanding or practice at home.
- Reflexology Benefits: Discover the wide range of benefits that reflexology can offer for both physical and mental health. This resource explores how reflexology can be a key component of a holistic health regimen.
- Reflexology Cost: Learn about the factors that influence the cost of reflexology services, helping you to make informed decisions about incorporating this therapy into your health and wellness plans.
- Home: Visit our main page to learn more about Reflexology Auckland and our full range of services.
These articles provide valuable insights and detailed information to help you better understand the potential of reflexology and how you can integrate it into your health routine safely and effectively. Whether you’re new to reflexology or looking to deepen your knowledge, these resources are excellent starting points.
Hand reflexology is a practice rooted in ancient medicine, using pressure points on the hands believed to correspond to various parts of the body. This guide introduces you to simple DIY hand reflexology techniques that you can use at home to enhance relaxation and promote overall wellness.
Key Sections of DIY Hand Reflexology :
What You Need to Get Started
Embarking on your DIY hand reflexology journey is straightforward and requires minimal setup. Here’s what you’ll need to ensure a comfortable and effective session:
1. Your Hands:
- The primary “tool” in hand reflexology is, of course, your own hands. Clean, well-moisturized hands can make the process smoother and more comfortable.
2. Comfortable Seating:
- Choose a comfortable chair or a seat where you can relax without straining your back. Sitting upright in a supportive chair is often best, as it allows you to easily access both of your hands.
3. Optional Tools:
- Soft Mat or Pillow: While not necessary, a soft mat on your lap or a pillow can provide support, making it easier to hold your hand comfortably during the session. This can be particularly helpful if you have a longer session planned or if you find holding your arm up tiresome.
- Lotion or Hand Cream: Applying a small amount of lotion or hand cream can reduce friction and make reflexology techniques more pleasurable and less abrasive on the skin.
- Relaxing Background Music: Consider playing some soft, ambient music to enhance relaxation and create a therapeutic environment. Music or nature sounds can help in maintaining a calm mind and a focused approach.
4. Quiet and Comfortable Environment:
- Find a spot in your home that is typically quiet and free from interruptions. This could be a dedicated room or a cozy corner where you feel relaxed. The idea is to create a space that feels like a sanctuary, where stressors and external distractions are minimized.
- Good Lighting: Ensure the area is well-lit so that you can see your hands clearly without straining your eyes. Natural light is ideal, but a soft lamp can also create a warm and inviting environment.
5. Setting the Mood:
- You might want to set a timer if you have limited time to practice, so you don’t need to watch the clock. This allows you to fully immerse in the experience without worrying about time.
- Keep a glass of water nearby to stay hydrated before and after the session, as reflexology can sometimes release toxins and hydration can help flush these from your system.
By preparing your space and having these items at hand, you can maximize the benefits of your DIY hand reflexology sessions, turning them into a restorative ritual that you look forward to each time.
Understanding the Basics of Hand Reflexology
Hand reflexology is a therapeutic method where specific points on the hands are manipulated to improve health and promote healing in various parts of the body. According to reflexology theory, each area on the hand corresponds to different organs and systems within the body.
By applying pressure to these reflex areas, you can influence the health of the corresponding body parts, potentially easing ailments and boosting overall well-being.
Step-by-Step Guide to DIY Hand Reflexology Techniques
Here’s how you can begin practicing hand reflexology on yourself with some basic techniques. Each method targets different areas and serves various purposes, from relieving tension to improving body functions.
1. Thumb Walking:
- How to Perform:
- Place the pad of your thumb on the area of your hand you wish to work on.
- Gently press down into the skin.
- Move your thumb forward in a small “walking” motion, inching along the hand.
- Continue this movement across different zones of the hand that correspond to areas of your body you wish to address.
- Benefits:
- This technique is excellent for navigating larger areas of the hand, such as the palm or the back of the hand, making it effective for broadly stimulating internal organs and body systems.
2. Finger Walking:
- How to Perform:
- Use your index and middle fingers to ‘walk’ along a specific line or area on the hand.
- Apply gentle pressure in a sequential, caterpillar-like motion.
- This method allows for more precise control and is ideal for smaller areas or where finer attention is needed.
- Benefits:
- Finger walking is particularly useful for detailed work on complex reflex areas like those between the bones of the hand, facilitating targeted effects on specific organs.
3. Hook and Backup:
- How to Perform:
- Press your thumb or another finger into a specific reflex point.
- Apply steady pressure to go slightly deeper.
- Gently pull the finger backward without lifting the pressure.
- Benefits:
- This technique reaches deeper layers of hand tissue, stimulating reflex points that are more deeply embedded and enhancing the impact on the corresponding internal areas.
4. Press and Rotate:
- How to Perform:
- Identify a reflex point on your hand.
- Press down firmly with your thumb.
- Slowly rotate your thumb over this point, maintaining constant pressure.
- Benefits:
- The rotating motion helps to increase blood circulation and nerve activity in the area, enhancing the reflexology effects and promoting healing in the associated body parts.
By mastering these fundamental hand reflexology techniques, you can begin to explore the benefits of this practice at home, offering yourself a way to support your health in a direct and personal manner.
Common Hand Reflex Points and Their Corresponding Benefits
Hand reflexology provides a unique approach to health, where specific points on your hands are associated with different parts of your body. By applying pressure to these points, you can potentially alleviate various ailments and improve your overall well-being. Here are some key reflex points located on the hands and the benefits they can offer:
1. The Thumb Base:
- Location and Technique:
- The base of the thumb corresponds to the head and neck area. You can apply pressure using the thumb of your opposite hand or perform gentle circular motions.
- Benefits:
- This point is especially beneficial for relieving headaches and reducing tension in the neck area. It can also be helpful in managing stress and fatigue that often accumulates in the head and neck.
2. The Index Finger Base:
- Location and Technique:
- Located at the base of the index finger, this point can be stimulated by pressing with the thumb and index finger of the opposite hand.
- Benefits:
- This reflex area is linked to the chest and respiratory system. Stimulating this point can aid in easing breathing difficulties, clearing chest congestion, and potentially providing relief from conditions like colds or bronchitis.
3. Center of the Palm:
- Location and Technique:
- The center of the palm acts as a reflex point for the stomach. Use the thumb of your opposite hand to apply a steady, firm pressure or perform a gentle rotating motion to stimulate this area.
- Benefits:
- This point is ideal for addressing issues related to digestion. It can help in soothing stomach pain, promoting better digestion, and alleviating symptoms of indigestion or bloating.
These reflex points are accessible and easy to work on, making them perfect for DIY hand reflexology sessions. By regularly stimulating these points, you can harness the potential benefits of reflexology to manage everyday ailments and enhance your health. Remember to approach reflexology with care and consult a professional if you have specific health conditions or concerns.
Tips for a Successful DIY Hand Reflexology Session
Hand reflexology is a flexible and easily accessible form of self-care that you can perform at home. To make the most out of your DIY hand reflexology sessions and ensure they are effective and enjoyable, follow these practical tips:
1. Start with Light Pressure and Adjust as Needed:
- Begin each session by applying gentle pressure to the reflex points. This helps your body to adjust without causing discomfort.
- Gradually increase the pressure as per your comfort level. It’s important to listen to your body and avoid applying too much force, which could lead to discomfort or pain.
2. Duration of Each Session:
- A standard hand reflexology session can be as short or as long as you prefer, typically lasting between 5 to 30 minutes.
- If you’re just starting out, begin with shorter sessions to see how your body responds before gradually increasing the duration.
- Even a few minutes can be beneficial, especially if you are dealing with stress or need a quick break to rejuvenate.
3. Regular Practice for Optimal Benefits:
- Consistency is key in reflexology. Aim to practice hand reflexology 2-3 times a week to maximize the health benefits.
- Regular sessions can help in maintaining improved circulation, stress relief, and better overall health.
4. Create a Relaxing Environment:
- Enhance your reflexology experience by creating a calming atmosphere. This could involve dimming the lights, playing soft music, or using aromatherapy with essential oils to help relax your mind and body.
- Make sure the room is at a comfortable temperature and that you won’t be disturbed during your session.
5. Hydrate and Reflect Post-Session:
- Drinking water after a reflexology session can help flush out toxins that are released during the process. Stay hydrated to support your body’s natural detoxification.
- Take a few minutes after your session to reflect on how you feel. This can help you better understand your body’s responses to different reflex points and tailor future sessions to your specific needs.
By following these tips, your DIY hand reflexology sessions can become a cherished part of your wellness routine, offering a simple yet effective way to enhance your health and well-being from the comfort of your home.
Safety Considerations and When to Avoid DIY Hand Reflexology
While hand reflexology is a generally safe practice that can offer numerous health benefits, there are certain situations and conditions where it should be approached with caution or avoided altogether. Being aware of these safety considerations can help prevent complications and ensure that reflexology is a beneficial addition to your wellness routine.
1. Hand Injuries or Conditions:
- Avoid practicing hand reflexology if you have any active injuries, infections, or severe conditions affecting your hands such as severe arthritis, fractures, or wounds. These conditions can be exacerbated by the pressure and manipulation involved in reflexology.
2. Acute or Severe Illnesses:
- If you are experiencing acute illnesses, such as severe infections or inflammation, reflexology might not be advisable. Wait until you have recovered or consult with your healthcare provider before starting reflexology.
3. Chronic Conditions:
- For individuals with chronic conditions such as heart disease, diabetes, or cancer, reflexology should be approached with caution. These conditions can be affected by the systemic changes that reflexology might promote, such as increased circulation and relaxation which can alter blood pressure and glucose levels.
- Always consult with a healthcare provider before beginning any new therapy, including reflexology, especially if you have any serious health conditions or are under medical treatment.
4. Pregnancy:
- Reflexology can sometimes stimulate labor, so pregnant women, especially those in high-risk categories or with complications, should consult their healthcare provider before engaging in reflexology.
5. After Surgery:
- Avoid reflexology immediately after surgery as it may affect the healing process or interfere with post-operative recovery. Always follow your doctor’s advice on when it is safe to resume such practices.
6. Varicose Veins and Blood Clot Risks:
- If you have varicose veins or a history of blood clots, consult with a healthcare provider before practicing reflexology. The pressure applied during reflexology could potentially dislodge a clot or worsen varicose veins.
Conclusion:
- Reflexology is intended to support and not replace traditional medical treatments. It’s important to use common sense and to consult healthcare professionals when considering reflexology, particularly if you have existing health issues or concerns. By adhering to these guidelines, you can enjoy the benefits of reflexology safely and effectively.
Conclusion
DIY hand reflexology is a powerful tool you can use to maintain health and relieve stress. By learning to apply these techniques, you can enjoy the benefits of reflexology from the comfort of your home.
Further Resources
For those interested in exploring more about hand reflexology and its various aspects, we recommend checking out the following resources on our website:
- Hand Reflexology: Delve deeper into the specific techniques and benefits of hand reflexology. This article provides a comprehensive overview, perfect for those looking to expand their understanding or practice at home.
- Reflexology Benefits: Discover the wide range of benefits that reflexology can offer for both physical and mental health. This resource explores how reflexology can be a key component of a holistic health regimen.
- Reflexology Cost: Learn about the factors that influence the cost of reflexology services, helping you to make informed decisions about incorporating this therapy into your health and wellness plans.
- Home: Visit our main page to learn more about Reflexology Auckland and our full range of services.
These articles provide valuable insights and detailed information to help you better understand the potential of reflexology and how you can integrate it into your health routine safely and effectively. Whether you’re new to reflexology or looking to deepen your knowledge, these resources are excellent starting points.
- How to Perform:
- Place the pad of your thumb on the area of your hand you wish to work on.
- Gently press down into the skin.
- Move your thumb forward in a small “walking” motion, inching along the hand.
- Continue this movement across different zones of the hand that correspond to areas of your body you wish to address.
- Benefits:
- This technique is excellent for navigating larger areas of the hand, such as the palm or the back of the hand, making it effective for broadly stimulating internal organs and body systems.
2. Finger Walking:
- How to Perform:
- Use your index and middle fingers to ‘walk’ along a specific line or area on the hand.
- Apply gentle pressure in a sequential, caterpillar-like motion.
- This method allows for more precise control and is ideal for smaller areas or where finer attention is needed.
- Benefits:
- Finger walking is particularly useful for detailed work on complex reflex areas like those between the bones of the hand, facilitating targeted effects on specific organs.
3. Hook and Backup:
- How to Perform:
- Press your thumb or another finger into a specific reflex point.
- Apply steady pressure to go slightly deeper.
- Gently pull the finger backward without lifting the pressure.
- Benefits:
- This technique reaches deeper layers of hand tissue, stimulating reflex points that are more deeply embedded and enhancing the impact on the corresponding internal areas.
4. Press and Rotate:
- How to Perform:
- Identify a reflex point on your hand.
- Press down firmly with your thumb.
- Slowly rotate your thumb over this point, maintaining constant pressure.
- Benefits:
- The rotating motion helps to increase blood circulation and nerve activity in the area, enhancing the reflexology effects and promoting healing in the associated body parts.
By mastering these fundamental hand reflexology techniques, you can begin to explore the benefits of this practice at home, offering yourself a way to support your health in a direct and personal manner.
Common Hand Reflex Points and Their Corresponding Benefits
Hand reflexology provides a unique approach to health, where specific points on your hands are associated with different parts of your body. By applying pressure to these points, you can potentially alleviate various ailments and improve your overall well-being. Here are some key reflex points located on the hands and the benefits they can offer:
1. The Thumb Base:
- Location and Technique:
- The base of the thumb corresponds to the head and neck area. You can apply pressure using the thumb of your opposite hand or perform gentle circular motions.
- Benefits:
- This point is especially beneficial for relieving headaches and reducing tension in the neck area. It can also be helpful in managing stress and fatigue that often accumulates in the head and neck.
2. The Index Finger Base:
- Location and Technique:
- Located at the base of the index finger, this point can be stimulated by pressing with the thumb and index finger of the opposite hand.
- Benefits:
- This reflex area is linked to the chest and respiratory system. Stimulating this point can aid in easing breathing difficulties, clearing chest congestion, and potentially providing relief from conditions like colds or bronchitis.
3. Center of the Palm:
- Location and Technique:
- The center of the palm acts as a reflex point for the stomach. Use the thumb of your opposite hand to apply a steady, firm pressure or perform a gentle rotating motion to stimulate this area.
- Benefits:
- This point is ideal for addressing issues related to digestion. It can help in soothing stomach pain, promoting better digestion, and alleviating symptoms of indigestion or bloating.
These reflex points are accessible and easy to work on, making them perfect for DIY hand reflexology sessions. By regularly stimulating these points, you can harness the potential benefits of reflexology to manage everyday ailments and enhance your health. Remember to approach reflexology with care and consult a professional if you have specific health conditions or concerns.
Tips for a Successful DIY Hand Reflexology Session
Hand reflexology is a flexible and easily accessible form of self-care that you can perform at home. To make the most out of your DIY hand reflexology sessions and ensure they are effective and enjoyable, follow these practical tips:
1. Start with Light Pressure and Adjust as Needed:
- Begin each session by applying gentle pressure to the reflex points. This helps your body to adjust without causing discomfort.
- Gradually increase the pressure as per your comfort level. It’s important to listen to your body and avoid applying too much force, which could lead to discomfort or pain.
2. Duration of Each Session:
- A standard hand reflexology session can be as short or as long as you prefer, typically lasting between 5 to 30 minutes.
- If you’re just starting out, begin with shorter sessions to see how your body responds before gradually increasing the duration.
- Even a few minutes can be beneficial, especially if you are dealing with stress or need a quick break to rejuvenate.
3. Regular Practice for Optimal Benefits:
- Consistency is key in reflexology. Aim to practice hand reflexology 2-3 times a week to maximize the health benefits.
- Regular sessions can help in maintaining improved circulation, stress relief, and better overall health.
4. Create a Relaxing Environment:
- Enhance your reflexology experience by creating a calming atmosphere. This could involve dimming the lights, playing soft music, or using aromatherapy with essential oils to help relax your mind and body.
- Make sure the room is at a comfortable temperature and that you won’t be disturbed during your session.
5. Hydrate and Reflect Post-Session:
- Drinking water after a reflexology session can help flush out toxins that are released during the process. Stay hydrated to support your body’s natural detoxification.
- Take a few minutes after your session to reflect on how you feel. This can help you better understand your body’s responses to different reflex points and tailor future sessions to your specific needs.
By following these tips, your DIY hand reflexology sessions can become a cherished part of your wellness routine, offering a simple yet effective way to enhance your health and well-being from the comfort of your home.
Safety Considerations and When to Avoid DIY Hand Reflexology
While hand reflexology is a generally safe practice that can offer numerous health benefits, there are certain situations and conditions where it should be approached with caution or avoided altogether. Being aware of these safety considerations can help prevent complications and ensure that reflexology is a beneficial addition to your wellness routine.
1. Hand Injuries or Conditions:
- Avoid practicing hand reflexology if you have any active injuries, infections, or severe conditions affecting your hands such as severe arthritis, fractures, or wounds. These conditions can be exacerbated by the pressure and manipulation involved in reflexology.
2. Acute or Severe Illnesses:
- If you are experiencing acute illnesses, such as severe infections or inflammation, reflexology might not be advisable. Wait until you have recovered or consult with your healthcare provider before starting reflexology.
3. Chronic Conditions:
- For individuals with chronic conditions such as heart disease, diabetes, or cancer, reflexology should be approached with caution. These conditions can be affected by the systemic changes that reflexology might promote, such as increased circulation and relaxation which can alter blood pressure and glucose levels.
- Always consult with a healthcare provider before beginning any new therapy, including reflexology, especially if you have any serious health conditions or are under medical treatment.
4. Pregnancy:
- Reflexology can sometimes stimulate labor, so pregnant women, especially those in high-risk categories or with complications, should consult their healthcare provider before engaging in reflexology.
5. After Surgery:
- Avoid reflexology immediately after surgery as it may affect the healing process or interfere with post-operative recovery. Always follow your doctor’s advice on when it is safe to resume such practices.
6. Varicose Veins and Blood Clot Risks:
- If you have varicose veins or a history of blood clots, consult with a healthcare provider before practicing reflexology. The pressure applied during reflexology could potentially dislodge a clot or worsen varicose veins.
Conclusion:
- Reflexology is intended to support and not replace traditional medical treatments. It’s important to use common sense and to consult healthcare professionals when considering reflexology, particularly if you have existing health issues or concerns. By adhering to these guidelines, you can enjoy the benefits of reflexology safely and effectively.
Conclusion
DIY hand reflexology is a powerful tool you can use to maintain health and relieve stress. By learning to apply these techniques, you can enjoy the benefits of reflexology from the comfort of your home.
Further Resources
For those interested in exploring more about hand reflexology and its various aspects, we recommend checking out the following resources on our website:
- Hand Reflexology: Delve deeper into the specific techniques and benefits of hand reflexology. This article provides a comprehensive overview, perfect for those looking to expand their understanding or practice at home.
- Reflexology Benefits: Discover the wide range of benefits that reflexology can offer for both physical and mental health. This resource explores how reflexology can be a key component of a holistic health regimen.
- Reflexology Cost: Learn about the factors that influence the cost of reflexology services, helping you to make informed decisions about incorporating this therapy into your health and wellness plans.
- Home: Visit our main page to learn more about Reflexology Auckland and our full range of services.
These articles provide valuable insights and detailed information to help you better understand the potential of reflexology and how you can integrate it into your health routine safely and effectively. Whether you’re new to reflexology or looking to deepen your knowledge, these resources are excellent starting points.
Hand reflexology is a practice rooted in ancient medicine, using pressure points on the hands believed to correspond to various parts of the body. This guide introduces you to simple DIY hand reflexology techniques that you can use at home to enhance relaxation and promote overall wellness.
Key Sections of DIY Hand Reflexology :
What You Need to Get Started
Embarking on your DIY hand reflexology journey is straightforward and requires minimal setup. Here’s what you’ll need to ensure a comfortable and effective session:
1. Your Hands:
- The primary “tool” in hand reflexology is, of course, your own hands. Clean, well-moisturized hands can make the process smoother and more comfortable.
2. Comfortable Seating:
- Choose a comfortable chair or a seat where you can relax without straining your back. Sitting upright in a supportive chair is often best, as it allows you to easily access both of your hands.
3. Optional Tools:
- Soft Mat or Pillow: While not necessary, a soft mat on your lap or a pillow can provide support, making it easier to hold your hand comfortably during the session. This can be particularly helpful if you have a longer session planned or if you find holding your arm up tiresome.
- Lotion or Hand Cream: Applying a small amount of lotion or hand cream can reduce friction and make reflexology techniques more pleasurable and less abrasive on the skin.
- Relaxing Background Music: Consider playing some soft, ambient music to enhance relaxation and create a therapeutic environment. Music or nature sounds can help in maintaining a calm mind and a focused approach.
4. Quiet and Comfortable Environment:
- Find a spot in your home that is typically quiet and free from interruptions. This could be a dedicated room or a cozy corner where you feel relaxed. The idea is to create a space that feels like a sanctuary, where stressors and external distractions are minimized.
- Good Lighting: Ensure the area is well-lit so that you can see your hands clearly without straining your eyes. Natural light is ideal, but a soft lamp can also create a warm and inviting environment.
5. Setting the Mood:
- You might want to set a timer if you have limited time to practice, so you don’t need to watch the clock. This allows you to fully immerse in the experience without worrying about time.
- Keep a glass of water nearby to stay hydrated before and after the session, as reflexology can sometimes release toxins and hydration can help flush these from your system.
By preparing your space and having these items at hand, you can maximize the benefits of your DIY hand reflexology sessions, turning them into a restorative ritual that you look forward to each time.
Understanding the Basics of Hand Reflexology
Hand reflexology is a therapeutic method where specific points on the hands are manipulated to improve health and promote healing in various parts of the body. According to reflexology theory, each area on the hand corresponds to different organs and systems within the body.
By applying pressure to these reflex areas, you can influence the health of the corresponding body parts, potentially easing ailments and boosting overall well-being.
Step-by-Step Guide to DIY Hand Reflexology Techniques
Here’s how you can begin practicing hand reflexology on yourself with some basic techniques. Each method targets different areas and serves various purposes, from relieving tension to improving body functions.
1. Thumb Walking:
- How to Perform:
- Place the pad of your thumb on the area of your hand you wish to work on.
- Gently press down into the skin.
- Move your thumb forward in a small “walking” motion, inching along the hand.
- Continue this movement across different zones of the hand that correspond to areas of your body you wish to address.
- Benefits:
- This technique is excellent for navigating larger areas of the hand, such as the palm or the back of the hand, making it effective for broadly stimulating internal organs and body systems.
2. Finger Walking:
- How to Perform:
- Use your index and middle fingers to ‘walk’ along a specific line or area on the hand.
- Apply gentle pressure in a sequential, caterpillar-like motion.
- This method allows for more precise control and is ideal for smaller areas or where finer attention is needed.
- Benefits:
- Finger walking is particularly useful for detailed work on complex reflex areas like those between the bones of the hand, facilitating targeted effects on specific organs.
3. Hook and Backup:
- How to Perform:
- Press your thumb or another finger into a specific reflex point.
- Apply steady pressure to go slightly deeper.
- Gently pull the finger backward without lifting the pressure.
- Benefits:
- This technique reaches deeper layers of hand tissue, stimulating reflex points that are more deeply embedded and enhancing the impact on the corresponding internal areas.
4. Press and Rotate:
- How to Perform:
- Identify a reflex point on your hand.
- Press down firmly with your thumb.
- Slowly rotate your thumb over this point, maintaining constant pressure.
- Benefits:
- The rotating motion helps to increase blood circulation and nerve activity in the area, enhancing the reflexology effects and promoting healing in the associated body parts.
By mastering these fundamental hand reflexology techniques, you can begin to explore the benefits of this practice at home, offering yourself a way to support your health in a direct and personal manner.
Common Hand Reflex Points and Their Corresponding Benefits
Hand reflexology provides a unique approach to health, where specific points on your hands are associated with different parts of your body. By applying pressure to these points, you can potentially alleviate various ailments and improve your overall well-being. Here are some key reflex points located on the hands and the benefits they can offer:
1. The Thumb Base:
- Location and Technique:
- The base of the thumb corresponds to the head and neck area. You can apply pressure using the thumb of your opposite hand or perform gentle circular motions.
- Benefits:
- This point is especially beneficial for relieving headaches and reducing tension in the neck area. It can also be helpful in managing stress and fatigue that often accumulates in the head and neck.
2. The Index Finger Base:
- Location and Technique:
- Located at the base of the index finger, this point can be stimulated by pressing with the thumb and index finger of the opposite hand.
- Benefits:
- This reflex area is linked to the chest and respiratory system. Stimulating this point can aid in easing breathing difficulties, clearing chest congestion, and potentially providing relief from conditions like colds or bronchitis.
3. Center of the Palm:
- Location and Technique:
- The center of the palm acts as a reflex point for the stomach. Use the thumb of your opposite hand to apply a steady, firm pressure or perform a gentle rotating motion to stimulate this area.
- Benefits:
- This point is ideal for addressing issues related to digestion. It can help in soothing stomach pain, promoting better digestion, and alleviating symptoms of indigestion or bloating.
These reflex points are accessible and easy to work on, making them perfect for DIY hand reflexology sessions. By regularly stimulating these points, you can harness the potential benefits of reflexology to manage everyday ailments and enhance your health. Remember to approach reflexology with care and consult a professional if you have specific health conditions or concerns.
Tips for a Successful DIY Hand Reflexology Session
Hand reflexology is a flexible and easily accessible form of self-care that you can perform at home. To make the most out of your DIY hand reflexology sessions and ensure they are effective and enjoyable, follow these practical tips:
1. Start with Light Pressure and Adjust as Needed:
- Begin each session by applying gentle pressure to the reflex points. This helps your body to adjust without causing discomfort.
- Gradually increase the pressure as per your comfort level. It’s important to listen to your body and avoid applying too much force, which could lead to discomfort or pain.
2. Duration of Each Session:
- A standard hand reflexology session can be as short or as long as you prefer, typically lasting between 5 to 30 minutes.
- If you’re just starting out, begin with shorter sessions to see how your body responds before gradually increasing the duration.
- Even a few minutes can be beneficial, especially if you are dealing with stress or need a quick break to rejuvenate.
3. Regular Practice for Optimal Benefits:
- Consistency is key in reflexology. Aim to practice hand reflexology 2-3 times a week to maximize the health benefits.
- Regular sessions can help in maintaining improved circulation, stress relief, and better overall health.
4. Create a Relaxing Environment:
- Enhance your reflexology experience by creating a calming atmosphere. This could involve dimming the lights, playing soft music, or using aromatherapy with essential oils to help relax your mind and body.
- Make sure the room is at a comfortable temperature and that you won’t be disturbed during your session.
5. Hydrate and Reflect Post-Session:
- Drinking water after a reflexology session can help flush out toxins that are released during the process. Stay hydrated to support your body’s natural detoxification.
- Take a few minutes after your session to reflect on how you feel. This can help you better understand your body’s responses to different reflex points and tailor future sessions to your specific needs.
By following these tips, your DIY hand reflexology sessions can become a cherished part of your wellness routine, offering a simple yet effective way to enhance your health and well-being from the comfort of your home.
Safety Considerations and When to Avoid DIY Hand Reflexology
While hand reflexology is a generally safe practice that can offer numerous health benefits, there are certain situations and conditions where it should be approached with caution or avoided altogether. Being aware of these safety considerations can help prevent complications and ensure that reflexology is a beneficial addition to your wellness routine.
1. Hand Injuries or Conditions:
- Avoid practicing hand reflexology if you have any active injuries, infections, or severe conditions affecting your hands such as severe arthritis, fractures, or wounds. These conditions can be exacerbated by the pressure and manipulation involved in reflexology.
2. Acute or Severe Illnesses:
- If you are experiencing acute illnesses, such as severe infections or inflammation, reflexology might not be advisable. Wait until you have recovered or consult with your healthcare provider before starting reflexology.
3. Chronic Conditions:
- For individuals with chronic conditions such as heart disease, diabetes, or cancer, reflexology should be approached with caution. These conditions can be affected by the systemic changes that reflexology might promote, such as increased circulation and relaxation which can alter blood pressure and glucose levels.
- Always consult with a healthcare provider before beginning any new therapy, including reflexology, especially if you have any serious health conditions or are under medical treatment.
4. Pregnancy:
- Reflexology can sometimes stimulate labor, so pregnant women, especially those in high-risk categories or with complications, should consult their healthcare provider before engaging in reflexology.
5. After Surgery:
- Avoid reflexology immediately after surgery as it may affect the healing process or interfere with post-operative recovery. Always follow your doctor’s advice on when it is safe to resume such practices.
6. Varicose Veins and Blood Clot Risks:
- If you have varicose veins or a history of blood clots, consult with a healthcare provider before practicing reflexology. The pressure applied during reflexology could potentially dislodge a clot or worsen varicose veins.
Conclusion:
- Reflexology is intended to support and not replace traditional medical treatments. It’s important to use common sense and to consult healthcare professionals when considering reflexology, particularly if you have existing health issues or concerns. By adhering to these guidelines, you can enjoy the benefits of reflexology safely and effectively.
Conclusion
DIY hand reflexology is a powerful tool you can use to maintain health and relieve stress. By learning to apply these techniques, you can enjoy the benefits of reflexology from the comfort of your home.
Further Resources
For those interested in exploring more about hand reflexology and its various aspects, we recommend checking out the following resources on our website:
- Hand Reflexology: Delve deeper into the specific techniques and benefits of hand reflexology. This article provides a comprehensive overview, perfect for those looking to expand their understanding or practice at home.
- Reflexology Benefits: Discover the wide range of benefits that reflexology can offer for both physical and mental health. This resource explores how reflexology can be a key component of a holistic health regimen.
- Reflexology Cost: Learn about the factors that influence the cost of reflexology services, helping you to make informed decisions about incorporating this therapy into your health and wellness plans.
- Home: Visit our main page to learn more about Reflexology Auckland and our full range of services.
These articles provide valuable insights and detailed information to help you better understand the potential of reflexology and how you can integrate it into your health routine safely and effectively. Whether you’re new to reflexology or looking to deepen your knowledge, these resources are excellent starting points.
- How to Perform:
- Place the pad of your thumb on the area of your hand you wish to work on.
- Gently press down into the skin.
- Move your thumb forward in a small “walking” motion, inching along the hand.
- Continue this movement across different zones of the hand that correspond to areas of your body you wish to address.
- Benefits:
- This technique is excellent for navigating larger areas of the hand, such as the palm or the back of the hand, making it effective for broadly stimulating internal organs and body systems.
2. Finger Walking:
- How to Perform:
- Use your index and middle fingers to ‘walk’ along a specific line or area on the hand.
- Apply gentle pressure in a sequential, caterpillar-like motion.
- This method allows for more precise control and is ideal for smaller areas or where finer attention is needed.
- Benefits:
- Finger walking is particularly useful for detailed work on complex reflex areas like those between the bones of the hand, facilitating targeted effects on specific organs.
3. Hook and Backup:
- How to Perform:
- Press your thumb or another finger into a specific reflex point.
- Apply steady pressure to go slightly deeper.
- Gently pull the finger backward without lifting the pressure.
- Benefits:
- This technique reaches deeper layers of hand tissue, stimulating reflex points that are more deeply embedded and enhancing the impact on the corresponding internal areas.
4. Press and Rotate:
- How to Perform:
- Identify a reflex point on your hand.
- Press down firmly with your thumb.
- Slowly rotate your thumb over this point, maintaining constant pressure.
- Benefits:
- The rotating motion helps to increase blood circulation and nerve activity in the area, enhancing the reflexology effects and promoting healing in the associated body parts.
By mastering these fundamental hand reflexology techniques, you can begin to explore the benefits of this practice at home, offering yourself a way to support your health in a direct and personal manner.
Common Hand Reflex Points and Their Corresponding Benefits
Hand reflexology provides a unique approach to health, where specific points on your hands are associated with different parts of your body. By applying pressure to these points, you can potentially alleviate various ailments and improve your overall well-being. Here are some key reflex points located on the hands and the benefits they can offer:
1. The Thumb Base:
- Location and Technique:
- The base of the thumb corresponds to the head and neck area. You can apply pressure using the thumb of your opposite hand or perform gentle circular motions.
- Benefits:
- This point is especially beneficial for relieving headaches and reducing tension in the neck area. It can also be helpful in managing stress and fatigue that often accumulates in the head and neck.
2. The Index Finger Base:
- Location and Technique:
- Located at the base of the index finger, this point can be stimulated by pressing with the thumb and index finger of the opposite hand.
- Benefits:
- This reflex area is linked to the chest and respiratory system. Stimulating this point can aid in easing breathing difficulties, clearing chest congestion, and potentially providing relief from conditions like colds or bronchitis.
3. Center of the Palm:
- Location and Technique:
- The center of the palm acts as a reflex point for the stomach. Use the thumb of your opposite hand to apply a steady, firm pressure or perform a gentle rotating motion to stimulate this area.
- Benefits:
- This point is ideal for addressing issues related to digestion. It can help in soothing stomach pain, promoting better digestion, and alleviating symptoms of indigestion or bloating.
These reflex points are accessible and easy to work on, making them perfect for DIY hand reflexology sessions. By regularly stimulating these points, you can harness the potential benefits of reflexology to manage everyday ailments and enhance your health. Remember to approach reflexology with care and consult a professional if you have specific health conditions or concerns.
Tips for a Successful DIY Hand Reflexology Session
Hand reflexology is a flexible and easily accessible form of self-care that you can perform at home. To make the most out of your DIY hand reflexology sessions and ensure they are effective and enjoyable, follow these practical tips:
1. Start with Light Pressure and Adjust as Needed:
- Begin each session by applying gentle pressure to the reflex points. This helps your body to adjust without causing discomfort.
- Gradually increase the pressure as per your comfort level. It’s important to listen to your body and avoid applying too much force, which could lead to discomfort or pain.
2. Duration of Each Session:
- A standard hand reflexology session can be as short or as long as you prefer, typically lasting between 5 to 30 minutes.
- If you’re just starting out, begin with shorter sessions to see how your body responds before gradually increasing the duration.
- Even a few minutes can be beneficial, especially if you are dealing with stress or need a quick break to rejuvenate.
3. Regular Practice for Optimal Benefits:
- Consistency is key in reflexology. Aim to practice hand reflexology 2-3 times a week to maximize the health benefits.
- Regular sessions can help in maintaining improved circulation, stress relief, and better overall health.
4. Create a Relaxing Environment:
- Enhance your reflexology experience by creating a calming atmosphere. This could involve dimming the lights, playing soft music, or using aromatherapy with essential oils to help relax your mind and body.
- Make sure the room is at a comfortable temperature and that you won’t be disturbed during your session.
5. Hydrate and Reflect Post-Session:
- Drinking water after a reflexology session can help flush out toxins that are released during the process. Stay hydrated to support your body’s natural detoxification.
- Take a few minutes after your session to reflect on how you feel. This can help you better understand your body’s responses to different reflex points and tailor future sessions to your specific needs.
By following these tips, your DIY hand reflexology sessions can become a cherished part of your wellness routine, offering a simple yet effective way to enhance your health and well-being from the comfort of your home.
Safety Considerations and When to Avoid DIY Hand Reflexology
While hand reflexology is a generally safe practice that can offer numerous health benefits, there are certain situations and conditions where it should be approached with caution or avoided altogether. Being aware of these safety considerations can help prevent complications and ensure that reflexology is a beneficial addition to your wellness routine.
1. Hand Injuries or Conditions:
- Avoid practicing hand reflexology if you have any active injuries, infections, or severe conditions affecting your hands such as severe arthritis, fractures, or wounds. These conditions can be exacerbated by the pressure and manipulation involved in reflexology.
2. Acute or Severe Illnesses:
- If you are experiencing acute illnesses, such as severe infections or inflammation, reflexology might not be advisable. Wait until you have recovered or consult with your healthcare provider before starting reflexology.
3. Chronic Conditions:
- For individuals with chronic conditions such as heart disease, diabetes, or cancer, reflexology should be approached with caution. These conditions can be affected by the systemic changes that reflexology might promote, such as increased circulation and relaxation which can alter blood pressure and glucose levels.
- Always consult with a healthcare provider before beginning any new therapy, including reflexology, especially if you have any serious health conditions or are under medical treatment.
4. Pregnancy:
- Reflexology can sometimes stimulate labor, so pregnant women, especially those in high-risk categories or with complications, should consult their healthcare provider before engaging in reflexology.
5. After Surgery:
- Avoid reflexology immediately after surgery as it may affect the healing process or interfere with post-operative recovery. Always follow your doctor’s advice on when it is safe to resume such practices.
6. Varicose Veins and Blood Clot Risks:
- If you have varicose veins or a history of blood clots, consult with a healthcare provider before practicing reflexology. The pressure applied during reflexology could potentially dislodge a clot or worsen varicose veins.
Conclusion:
- Reflexology is intended to support and not replace traditional medical treatments. It’s important to use common sense and to consult healthcare professionals when considering reflexology, particularly if you have existing health issues or concerns. By adhering to these guidelines, you can enjoy the benefits of reflexology safely and effectively.
Conclusion
DIY hand reflexology is a powerful tool you can use to maintain health and relieve stress. By learning to apply these techniques, you can enjoy the benefits of reflexology from the comfort of your home.
Further Resources
For those interested in exploring more about hand reflexology and its various aspects, we recommend checking out the following resources on our website:
- Hand Reflexology: Delve deeper into the specific techniques and benefits of hand reflexology. This article provides a comprehensive overview, perfect for those looking to expand their understanding or practice at home.
- Reflexology Benefits: Discover the wide range of benefits that reflexology can offer for both physical and mental health. This resource explores how reflexology can be a key component of a holistic health regimen.
- Reflexology Cost: Learn about the factors that influence the cost of reflexology services, helping you to make informed decisions about incorporating this therapy into your health and wellness plans.
- Home: Visit our main page to learn more about Reflexology Auckland and our full range of services.
These articles provide valuable insights and detailed information to help you better understand the potential of reflexology and how you can integrate it into your health routine safely and effectively. Whether you’re new to reflexology or looking to deepen your knowledge, these resources are excellent starting points.
Hand reflexology is a practice rooted in ancient medicine, using pressure points on the hands believed to correspond to various parts of the body. This guide introduces you to simple DIY hand reflexology techniques that you can use at home to enhance relaxation and promote overall wellness.
Key Sections of DIY Hand Reflexology :
What You Need to Get Started
Embarking on your DIY hand reflexology journey is straightforward and requires minimal setup. Here’s what you’ll need to ensure a comfortable and effective session:
1. Your Hands:
- The primary “tool” in hand reflexology is, of course, your own hands. Clean, well-moisturized hands can make the process smoother and more comfortable.
2. Comfortable Seating:
- Choose a comfortable chair or a seat where you can relax without straining your back. Sitting upright in a supportive chair is often best, as it allows you to easily access both of your hands.
3. Optional Tools:
- Soft Mat or Pillow: While not necessary, a soft mat on your lap or a pillow can provide support, making it easier to hold your hand comfortably during the session. This can be particularly helpful if you have a longer session planned or if you find holding your arm up tiresome.
- Lotion or Hand Cream: Applying a small amount of lotion or hand cream can reduce friction and make reflexology techniques more pleasurable and less abrasive on the skin.
- Relaxing Background Music: Consider playing some soft, ambient music to enhance relaxation and create a therapeutic environment. Music or nature sounds can help in maintaining a calm mind and a focused approach.
4. Quiet and Comfortable Environment:
- Find a spot in your home that is typically quiet and free from interruptions. This could be a dedicated room or a cozy corner where you feel relaxed. The idea is to create a space that feels like a sanctuary, where stressors and external distractions are minimized.
- Good Lighting: Ensure the area is well-lit so that you can see your hands clearly without straining your eyes. Natural light is ideal, but a soft lamp can also create a warm and inviting environment.
5. Setting the Mood:
- You might want to set a timer if you have limited time to practice, so you don’t need to watch the clock. This allows you to fully immerse in the experience without worrying about time.
- Keep a glass of water nearby to stay hydrated before and after the session, as reflexology can sometimes release toxins and hydration can help flush these from your system.
By preparing your space and having these items at hand, you can maximize the benefits of your DIY hand reflexology sessions, turning them into a restorative ritual that you look forward to each time.
Understanding the Basics of Hand Reflexology
Hand reflexology is a therapeutic method where specific points on the hands are manipulated to improve health and promote healing in various parts of the body. According to reflexology theory, each area on the hand corresponds to different organs and systems within the body.
By applying pressure to these reflex areas, you can influence the health of the corresponding body parts, potentially easing ailments and boosting overall well-being.
Step-by-Step Guide to DIY Hand Reflexology Techniques
Here’s how you can begin practicing hand reflexology on yourself with some basic techniques. Each method targets different areas and serves various purposes, from relieving tension to improving body functions.
1. Thumb Walking:
- How to Perform:
- Place the pad of your thumb on the area of your hand you wish to work on.
- Gently press down into the skin.
- Move your thumb forward in a small “walking” motion, inching along the hand.
- Continue this movement across different zones of the hand that correspond to areas of your body you wish to address.
- Benefits:
- This technique is excellent for navigating larger areas of the hand, such as the palm or the back of the hand, making it effective for broadly stimulating internal organs and body systems.
2. Finger Walking:
- How to Perform:
- Use your index and middle fingers to ‘walk’ along a specific line or area on the hand.
- Apply gentle pressure in a sequential, caterpillar-like motion.
- This method allows for more precise control and is ideal for smaller areas or where finer attention is needed.
- Benefits:
- Finger walking is particularly useful for detailed work on complex reflex areas like those between the bones of the hand, facilitating targeted effects on specific organs.
3. Hook and Backup:
- How to Perform:
- Press your thumb or another finger into a specific reflex point.
- Apply steady pressure to go slightly deeper.
- Gently pull the finger backward without lifting the pressure.
- Benefits:
- This technique reaches deeper layers of hand tissue, stimulating reflex points that are more deeply embedded and enhancing the impact on the corresponding internal areas.
4. Press and Rotate:
- How to Perform:
- Identify a reflex point on your hand.
- Press down firmly with your thumb.
- Slowly rotate your thumb over this point, maintaining constant pressure.
- Benefits:
- The rotating motion helps to increase blood circulation and nerve activity in the area, enhancing the reflexology effects and promoting healing in the associated body parts.
By mastering these fundamental hand reflexology techniques, you can begin to explore the benefits of this practice at home, offering yourself a way to support your health in a direct and personal manner.
Common Hand Reflex Points and Their Corresponding Benefits
Hand reflexology provides a unique approach to health, where specific points on your hands are associated with different parts of your body. By applying pressure to these points, you can potentially alleviate various ailments and improve your overall well-being. Here are some key reflex points located on the hands and the benefits they can offer:
1. The Thumb Base:
- Location and Technique:
- The base of the thumb corresponds to the head and neck area. You can apply pressure using the thumb of your opposite hand or perform gentle circular motions.
- Benefits:
- This point is especially beneficial for relieving headaches and reducing tension in the neck area. It can also be helpful in managing stress and fatigue that often accumulates in the head and neck.
2. The Index Finger Base:
- Location and Technique:
- Located at the base of the index finger, this point can be stimulated by pressing with the thumb and index finger of the opposite hand.
- Benefits:
- This reflex area is linked to the chest and respiratory system. Stimulating this point can aid in easing breathing difficulties, clearing chest congestion, and potentially providing relief from conditions like colds or bronchitis.
3. Center of the Palm:
- Location and Technique:
- The center of the palm acts as a reflex point for the stomach. Use the thumb of your opposite hand to apply a steady, firm pressure or perform a gentle rotating motion to stimulate this area.
- Benefits:
- This point is ideal for addressing issues related to digestion. It can help in soothing stomach pain, promoting better digestion, and alleviating symptoms of indigestion or bloating.
These reflex points are accessible and easy to work on, making them perfect for DIY hand reflexology sessions. By regularly stimulating these points, you can harness the potential benefits of reflexology to manage everyday ailments and enhance your health. Remember to approach reflexology with care and consult a professional if you have specific health conditions or concerns.
Tips for a Successful DIY Hand Reflexology Session
Hand reflexology is a flexible and easily accessible form of self-care that you can perform at home. To make the most out of your DIY hand reflexology sessions and ensure they are effective and enjoyable, follow these practical tips:
1. Start with Light Pressure and Adjust as Needed:
- Begin each session by applying gentle pressure to the reflex points. This helps your body to adjust without causing discomfort.
- Gradually increase the pressure as per your comfort level. It’s important to listen to your body and avoid applying too much force, which could lead to discomfort or pain.
2. Duration of Each Session:
- A standard hand reflexology session can be as short or as long as you prefer, typically lasting between 5 to 30 minutes.
- If you’re just starting out, begin with shorter sessions to see how your body responds before gradually increasing the duration.
- Even a few minutes can be beneficial, especially if you are dealing with stress or need a quick break to rejuvenate.
3. Regular Practice for Optimal Benefits:
- Consistency is key in reflexology. Aim to practice hand reflexology 2-3 times a week to maximize the health benefits.
- Regular sessions can help in maintaining improved circulation, stress relief, and better overall health.
4. Create a Relaxing Environment:
- Enhance your reflexology experience by creating a calming atmosphere. This could involve dimming the lights, playing soft music, or using aromatherapy with essential oils to help relax your mind and body.
- Make sure the room is at a comfortable temperature and that you won’t be disturbed during your session.
5. Hydrate and Reflect Post-Session:
- Drinking water after a reflexology session can help flush out toxins that are released during the process. Stay hydrated to support your body’s natural detoxification.
- Take a few minutes after your session to reflect on how you feel. This can help you better understand your body’s responses to different reflex points and tailor future sessions to your specific needs.
By following these tips, your DIY hand reflexology sessions can become a cherished part of your wellness routine, offering a simple yet effective way to enhance your health and well-being from the comfort of your home.
Safety Considerations and When to Avoid DIY Hand Reflexology
While hand reflexology is a generally safe practice that can offer numerous health benefits, there are certain situations and conditions where it should be approached with caution or avoided altogether. Being aware of these safety considerations can help prevent complications and ensure that reflexology is a beneficial addition to your wellness routine.
1. Hand Injuries or Conditions:
- Avoid practicing hand reflexology if you have any active injuries, infections, or severe conditions affecting your hands such as severe arthritis, fractures, or wounds. These conditions can be exacerbated by the pressure and manipulation involved in reflexology.
2. Acute or Severe Illnesses:
- If you are experiencing acute illnesses, such as severe infections or inflammation, reflexology might not be advisable. Wait until you have recovered or consult with your healthcare provider before starting reflexology.
3. Chronic Conditions:
- For individuals with chronic conditions such as heart disease, diabetes, or cancer, reflexology should be approached with caution. These conditions can be affected by the systemic changes that reflexology might promote, such as increased circulation and relaxation which can alter blood pressure and glucose levels.
- Always consult with a healthcare provider before beginning any new therapy, including reflexology, especially if you have any serious health conditions or are under medical treatment.
4. Pregnancy:
- Reflexology can sometimes stimulate labor, so pregnant women, especially those in high-risk categories or with complications, should consult their healthcare provider before engaging in reflexology.
5. After Surgery:
- Avoid reflexology immediately after surgery as it may affect the healing process or interfere with post-operative recovery. Always follow your doctor’s advice on when it is safe to resume such practices.
6. Varicose Veins and Blood Clot Risks:
- If you have varicose veins or a history of blood clots, consult with a healthcare provider before practicing reflexology. The pressure applied during reflexology could potentially dislodge a clot or worsen varicose veins.
Conclusion:
- Reflexology is intended to support and not replace traditional medical treatments. It’s important to use common sense and to consult healthcare professionals when considering reflexology, particularly if you have existing health issues or concerns. By adhering to these guidelines, you can enjoy the benefits of reflexology safely and effectively.
Conclusion
DIY hand reflexology is a powerful tool you can use to maintain health and relieve stress. By learning to apply these techniques, you can enjoy the benefits of reflexology from the comfort of your home.
Further Resources
For those interested in exploring more about hand reflexology and its various aspects, we recommend checking out the following resources on our website:
- Hand Reflexology: Delve deeper into the specific techniques and benefits of hand reflexology. This article provides a comprehensive overview, perfect for those looking to expand their understanding or practice at home.
- Reflexology Benefits: Discover the wide range of benefits that reflexology can offer for both physical and mental health. This resource explores how reflexology can be a key component of a holistic health regimen.
- Reflexology Cost: Learn about the factors that influence the cost of reflexology services, helping you to make informed decisions about incorporating this therapy into your health and wellness plans.
- Home: Visit our main page to learn more about Reflexology Auckland and our full range of services.
These articles provide valuable insights and detailed information to help you better understand the potential of reflexology and how you can integrate it into your health routine safely and effectively. Whether you’re new to reflexology or looking to deepen your knowledge, these resources are excellent starting points.
- Location and Technique:
- The base of the thumb corresponds to the head and neck area. You can apply pressure using the thumb of your opposite hand or perform gentle circular motions.
- Benefits:
- This point is especially beneficial for relieving headaches and reducing tension in the neck area. It can also be helpful in managing stress and fatigue that often accumulates in the head and neck.
2. The Index Finger Base:
- Location and Technique:
- Located at the base of the index finger, this point can be stimulated by pressing with the thumb and index finger of the opposite hand.
- Benefits:
- This reflex area is linked to the chest and respiratory system. Stimulating this point can aid in easing breathing difficulties, clearing chest congestion, and potentially providing relief from conditions like colds or bronchitis.
3. Center of the Palm:
- Location and Technique:
- The center of the palm acts as a reflex point for the stomach. Use the thumb of your opposite hand to apply a steady, firm pressure or perform a gentle rotating motion to stimulate this area.
- Benefits:
- This point is ideal for addressing issues related to digestion. It can help in soothing stomach pain, promoting better digestion, and alleviating symptoms of indigestion or bloating.
These reflex points are accessible and easy to work on, making them perfect for DIY hand reflexology sessions. By regularly stimulating these points, you can harness the potential benefits of reflexology to manage everyday ailments and enhance your health. Remember to approach reflexology with care and consult a professional if you have specific health conditions or concerns.
Tips for a Successful DIY Hand Reflexology Session
Hand reflexology is a flexible and easily accessible form of self-care that you can perform at home. To make the most out of your DIY hand reflexology sessions and ensure they are effective and enjoyable, follow these practical tips:
1. Start with Light Pressure and Adjust as Needed:
- Begin each session by applying gentle pressure to the reflex points. This helps your body to adjust without causing discomfort.
- Gradually increase the pressure as per your comfort level. It’s important to listen to your body and avoid applying too much force, which could lead to discomfort or pain.
2. Duration of Each Session:
- A standard hand reflexology session can be as short or as long as you prefer, typically lasting between 5 to 30 minutes.
- If you’re just starting out, begin with shorter sessions to see how your body responds before gradually increasing the duration.
- Even a few minutes can be beneficial, especially if you are dealing with stress or need a quick break to rejuvenate.
3. Regular Practice for Optimal Benefits:
- Consistency is key in reflexology. Aim to practice hand reflexology 2-3 times a week to maximize the health benefits.
- Regular sessions can help in maintaining improved circulation, stress relief, and better overall health.
4. Create a Relaxing Environment:
- Enhance your reflexology experience by creating a calming atmosphere. This could involve dimming the lights, playing soft music, or using aromatherapy with essential oils to help relax your mind and body.
- Make sure the room is at a comfortable temperature and that you won’t be disturbed during your session.
5. Hydrate and Reflect Post-Session:
- Drinking water after a reflexology session can help flush out toxins that are released during the process. Stay hydrated to support your body’s natural detoxification.
- Take a few minutes after your session to reflect on how you feel. This can help you better understand your body’s responses to different reflex points and tailor future sessions to your specific needs.
By following these tips, your DIY hand reflexology sessions can become a cherished part of your wellness routine, offering a simple yet effective way to enhance your health and well-being from the comfort of your home.
Safety Considerations and When to Avoid DIY Hand Reflexology
While hand reflexology is a generally safe practice that can offer numerous health benefits, there are certain situations and conditions where it should be approached with caution or avoided altogether. Being aware of these safety considerations can help prevent complications and ensure that reflexology is a beneficial addition to your wellness routine.
1. Hand Injuries or Conditions:
- Avoid practicing hand reflexology if you have any active injuries, infections, or severe conditions affecting your hands such as severe arthritis, fractures, or wounds. These conditions can be exacerbated by the pressure and manipulation involved in reflexology.
2. Acute or Severe Illnesses:
- If you are experiencing acute illnesses, such as severe infections or inflammation, reflexology might not be advisable. Wait until you have recovered or consult with your healthcare provider before starting reflexology.
3. Chronic Conditions:
- For individuals with chronic conditions such as heart disease, diabetes, or cancer, reflexology should be approached with caution. These conditions can be affected by the systemic changes that reflexology might promote, such as increased circulation and relaxation which can alter blood pressure and glucose levels.
- Always consult with a healthcare provider before beginning any new therapy, including reflexology, especially if you have any serious health conditions or are under medical treatment.
4. Pregnancy:
- Reflexology can sometimes stimulate labor, so pregnant women, especially those in high-risk categories or with complications, should consult their healthcare provider before engaging in reflexology.
5. After Surgery:
- Avoid reflexology immediately after surgery as it may affect the healing process or interfere with post-operative recovery. Always follow your doctor’s advice on when it is safe to resume such practices.
6. Varicose Veins and Blood Clot Risks:
- If you have varicose veins or a history of blood clots, consult with a healthcare provider before practicing reflexology. The pressure applied during reflexology could potentially dislodge a clot or worsen varicose veins.
Conclusion:
- Reflexology is intended to support and not replace traditional medical treatments. It’s important to use common sense and to consult healthcare professionals when considering reflexology, particularly if you have existing health issues or concerns. By adhering to these guidelines, you can enjoy the benefits of reflexology safely and effectively.
Conclusion
DIY hand reflexology is a powerful tool you can use to maintain health and relieve stress. By learning to apply these techniques, you can enjoy the benefits of reflexology from the comfort of your home.
Further Resources
For those interested in exploring more about hand reflexology and its various aspects, we recommend checking out the following resources on our website:
- Hand Reflexology: Delve deeper into the specific techniques and benefits of hand reflexology. This article provides a comprehensive overview, perfect for those looking to expand their understanding or practice at home.
- Reflexology Benefits: Discover the wide range of benefits that reflexology can offer for both physical and mental health. This resource explores how reflexology can be a key component of a holistic health regimen.
- Reflexology Cost: Learn about the factors that influence the cost of reflexology services, helping you to make informed decisions about incorporating this therapy into your health and wellness plans.
- Home: Visit our main page to learn more about Reflexology Auckland and our full range of services.
These articles provide valuable insights and detailed information to help you better understand the potential of reflexology and how you can integrate it into your health routine safely and effectively. Whether you’re new to reflexology or looking to deepen your knowledge, these resources are excellent starting points.
- How to Perform:
- Use your index and middle fingers to ‘walk’ along a specific line or area on the hand.
- Apply gentle pressure in a sequential, caterpillar-like motion.
- This method allows for more precise control and is ideal for smaller areas or where finer attention is needed.
- Benefits:
- Finger walking is particularly useful for detailed work on complex reflex areas like those between the bones of the hand, facilitating targeted effects on specific organs.
3. Hook and Backup:
- How to Perform:
- Press your thumb or another finger into a specific reflex point.
- Apply steady pressure to go slightly deeper.
- Gently pull the finger backward without lifting the pressure.
- Benefits:
- This technique reaches deeper layers of hand tissue, stimulating reflex points that are more deeply embedded and enhancing the impact on the corresponding internal areas.
4. Press and Rotate:
- How to Perform:
- Identify a reflex point on your hand.
- Press down firmly with your thumb.
- Slowly rotate your thumb over this point, maintaining constant pressure.
- Benefits:
- The rotating motion helps to increase blood circulation and nerve activity in the area, enhancing the reflexology effects and promoting healing in the associated body parts.
By mastering these fundamental hand reflexology techniques, you can begin to explore the benefits of this practice at home, offering yourself a way to support your health in a direct and personal manner.
Common Hand Reflex Points and Their Corresponding Benefits
Hand reflexology provides a unique approach to health, where specific points on your hands are associated with different parts of your body. By applying pressure to these points, you can potentially alleviate various ailments and improve your overall well-being. Here are some key reflex points located on the hands and the benefits they can offer:
1. The Thumb Base:
- Location and Technique:
- The base of the thumb corresponds to the head and neck area. You can apply pressure using the thumb of your opposite hand or perform gentle circular motions.
- Benefits:
- This point is especially beneficial for relieving headaches and reducing tension in the neck area. It can also be helpful in managing stress and fatigue that often accumulates in the head and neck.
2. The Index Finger Base:
- Location and Technique:
- Located at the base of the index finger, this point can be stimulated by pressing with the thumb and index finger of the opposite hand.
- Benefits:
- This reflex area is linked to the chest and respiratory system. Stimulating this point can aid in easing breathing difficulties, clearing chest congestion, and potentially providing relief from conditions like colds or bronchitis.
3. Center of the Palm:
- Location and Technique:
- The center of the palm acts as a reflex point for the stomach. Use the thumb of your opposite hand to apply a steady, firm pressure or perform a gentle rotating motion to stimulate this area.
- Benefits:
- This point is ideal for addressing issues related to digestion. It can help in soothing stomach pain, promoting better digestion, and alleviating symptoms of indigestion or bloating.
These reflex points are accessible and easy to work on, making them perfect for DIY hand reflexology sessions. By regularly stimulating these points, you can harness the potential benefits of reflexology to manage everyday ailments and enhance your health. Remember to approach reflexology with care and consult a professional if you have specific health conditions or concerns.
Tips for a Successful DIY Hand Reflexology Session
Hand reflexology is a flexible and easily accessible form of self-care that you can perform at home. To make the most out of your DIY hand reflexology sessions and ensure they are effective and enjoyable, follow these practical tips:
1. Start with Light Pressure and Adjust as Needed:
- Begin each session by applying gentle pressure to the reflex points. This helps your body to adjust without causing discomfort.
- Gradually increase the pressure as per your comfort level. It’s important to listen to your body and avoid applying too much force, which could lead to discomfort or pain.
2. Duration of Each Session:
- A standard hand reflexology session can be as short or as long as you prefer, typically lasting between 5 to 30 minutes.
- If you’re just starting out, begin with shorter sessions to see how your body responds before gradually increasing the duration.
- Even a few minutes can be beneficial, especially if you are dealing with stress or need a quick break to rejuvenate.
3. Regular Practice for Optimal Benefits:
- Consistency is key in reflexology. Aim to practice hand reflexology 2-3 times a week to maximize the health benefits.
- Regular sessions can help in maintaining improved circulation, stress relief, and better overall health.
4. Create a Relaxing Environment:
- Enhance your reflexology experience by creating a calming atmosphere. This could involve dimming the lights, playing soft music, or using aromatherapy with essential oils to help relax your mind and body.
- Make sure the room is at a comfortable temperature and that you won’t be disturbed during your session.
5. Hydrate and Reflect Post-Session:
- Drinking water after a reflexology session can help flush out toxins that are released during the process. Stay hydrated to support your body’s natural detoxification.
- Take a few minutes after your session to reflect on how you feel. This can help you better understand your body’s responses to different reflex points and tailor future sessions to your specific needs.
By following these tips, your DIY hand reflexology sessions can become a cherished part of your wellness routine, offering a simple yet effective way to enhance your health and well-being from the comfort of your home.
Safety Considerations and When to Avoid DIY Hand Reflexology
While hand reflexology is a generally safe practice that can offer numerous health benefits, there are certain situations and conditions where it should be approached with caution or avoided altogether. Being aware of these safety considerations can help prevent complications and ensure that reflexology is a beneficial addition to your wellness routine.
1. Hand Injuries or Conditions:
- Avoid practicing hand reflexology if you have any active injuries, infections, or severe conditions affecting your hands such as severe arthritis, fractures, or wounds. These conditions can be exacerbated by the pressure and manipulation involved in reflexology.
2. Acute or Severe Illnesses:
- If you are experiencing acute illnesses, such as severe infections or inflammation, reflexology might not be advisable. Wait until you have recovered or consult with your healthcare provider before starting reflexology.
3. Chronic Conditions:
- For individuals with chronic conditions such as heart disease, diabetes, or cancer, reflexology should be approached with caution. These conditions can be affected by the systemic changes that reflexology might promote, such as increased circulation and relaxation which can alter blood pressure and glucose levels.
- Always consult with a healthcare provider before beginning any new therapy, including reflexology, especially if you have any serious health conditions or are under medical treatment.
4. Pregnancy:
- Reflexology can sometimes stimulate labor, so pregnant women, especially those in high-risk categories or with complications, should consult their healthcare provider before engaging in reflexology.
5. After Surgery:
- Avoid reflexology immediately after surgery as it may affect the healing process or interfere with post-operative recovery. Always follow your doctor’s advice on when it is safe to resume such practices.
6. Varicose Veins and Blood Clot Risks:
- If you have varicose veins or a history of blood clots, consult with a healthcare provider before practicing reflexology. The pressure applied during reflexology could potentially dislodge a clot or worsen varicose veins.
Conclusion:
- Reflexology is intended to support and not replace traditional medical treatments. It’s important to use common sense and to consult healthcare professionals when considering reflexology, particularly if you have existing health issues or concerns. By adhering to these guidelines, you can enjoy the benefits of reflexology safely and effectively.
Conclusion
DIY hand reflexology is a powerful tool you can use to maintain health and relieve stress. By learning to apply these techniques, you can enjoy the benefits of reflexology from the comfort of your home.
Further Resources
For those interested in exploring more about hand reflexology and its various aspects, we recommend checking out the following resources on our website:
- Hand Reflexology: Delve deeper into the specific techniques and benefits of hand reflexology. This article provides a comprehensive overview, perfect for those looking to expand their understanding or practice at home.
- Reflexology Benefits: Discover the wide range of benefits that reflexology can offer for both physical and mental health. This resource explores how reflexology can be a key component of a holistic health regimen.
- Reflexology Cost: Learn about the factors that influence the cost of reflexology services, helping you to make informed decisions about incorporating this therapy into your health and wellness plans.
- Home: Visit our main page to learn more about Reflexology Auckland and our full range of services.
These articles provide valuable insights and detailed information to help you better understand the potential of reflexology and how you can integrate it into your health routine safely and effectively. Whether you’re new to reflexology or looking to deepen your knowledge, these resources are excellent starting points.
- How to Perform:
- Place the pad of your thumb on the area of your hand you wish to work on.
- Gently press down into the skin.
- Move your thumb forward in a small “walking” motion, inching along the hand.
- Continue this movement across different zones of the hand that correspond to areas of your body you wish to address.
- Benefits:
- This technique is excellent for navigating larger areas of the hand, such as the palm or the back of the hand, making it effective for broadly stimulating internal organs and body systems.
2. Finger Walking:
- How to Perform:
- Use your index and middle fingers to ‘walk’ along a specific line or area on the hand.
- Apply gentle pressure in a sequential, caterpillar-like motion.
- This method allows for more precise control and is ideal for smaller areas or where finer attention is needed.
- Benefits:
- Finger walking is particularly useful for detailed work on complex reflex areas like those between the bones of the hand, facilitating targeted effects on specific organs.
3. Hook and Backup:
- How to Perform:
- Press your thumb or another finger into a specific reflex point.
- Apply steady pressure to go slightly deeper.
- Gently pull the finger backward without lifting the pressure.
- Benefits:
- This technique reaches deeper layers of hand tissue, stimulating reflex points that are more deeply embedded and enhancing the impact on the corresponding internal areas.
4. Press and Rotate:
- How to Perform:
- Identify a reflex point on your hand.
- Press down firmly with your thumb.
- Slowly rotate your thumb over this point, maintaining constant pressure.
- Benefits:
- The rotating motion helps to increase blood circulation and nerve activity in the area, enhancing the reflexology effects and promoting healing in the associated body parts.
By mastering these fundamental hand reflexology techniques, you can begin to explore the benefits of this practice at home, offering yourself a way to support your health in a direct and personal manner.
Common Hand Reflex Points and Their Corresponding Benefits
Hand reflexology provides a unique approach to health, where specific points on your hands are associated with different parts of your body. By applying pressure to these points, you can potentially alleviate various ailments and improve your overall well-being. Here are some key reflex points located on the hands and the benefits they can offer:
1. The Thumb Base:
- Location and Technique:
- The base of the thumb corresponds to the head and neck area. You can apply pressure using the thumb of your opposite hand or perform gentle circular motions.
- Benefits:
- This point is especially beneficial for relieving headaches and reducing tension in the neck area. It can also be helpful in managing stress and fatigue that often accumulates in the head and neck.
2. The Index Finger Base:
- Location and Technique:
- Located at the base of the index finger, this point can be stimulated by pressing with the thumb and index finger of the opposite hand.
- Benefits:
- This reflex area is linked to the chest and respiratory system. Stimulating this point can aid in easing breathing difficulties, clearing chest congestion, and potentially providing relief from conditions like colds or bronchitis.
3. Center of the Palm:
- Location and Technique:
- The center of the palm acts as a reflex point for the stomach. Use the thumb of your opposite hand to apply a steady, firm pressure or perform a gentle rotating motion to stimulate this area.
- Benefits:
- This point is ideal for addressing issues related to digestion. It can help in soothing stomach pain, promoting better digestion, and alleviating symptoms of indigestion or bloating.
These reflex points are accessible and easy to work on, making them perfect for DIY hand reflexology sessions. By regularly stimulating these points, you can harness the potential benefits of reflexology to manage everyday ailments and enhance your health. Remember to approach reflexology with care and consult a professional if you have specific health conditions or concerns.
Tips for a Successful DIY Hand Reflexology Session
Hand reflexology is a flexible and easily accessible form of self-care that you can perform at home. To make the most out of your DIY hand reflexology sessions and ensure they are effective and enjoyable, follow these practical tips:
1. Start with Light Pressure and Adjust as Needed:
- Begin each session by applying gentle pressure to the reflex points. This helps your body to adjust without causing discomfort.
- Gradually increase the pressure as per your comfort level. It’s important to listen to your body and avoid applying too much force, which could lead to discomfort or pain.
2. Duration of Each Session:
- A standard hand reflexology session can be as short or as long as you prefer, typically lasting between 5 to 30 minutes.
- If you’re just starting out, begin with shorter sessions to see how your body responds before gradually increasing the duration.
- Even a few minutes can be beneficial, especially if you are dealing with stress or need a quick break to rejuvenate.
3. Regular Practice for Optimal Benefits:
- Consistency is key in reflexology. Aim to practice hand reflexology 2-3 times a week to maximize the health benefits.
- Regular sessions can help in maintaining improved circulation, stress relief, and better overall health.
4. Create a Relaxing Environment:
- Enhance your reflexology experience by creating a calming atmosphere. This could involve dimming the lights, playing soft music, or using aromatherapy with essential oils to help relax your mind and body.
- Make sure the room is at a comfortable temperature and that you won’t be disturbed during your session.
5. Hydrate and Reflect Post-Session:
- Drinking water after a reflexology session can help flush out toxins that are released during the process. Stay hydrated to support your body’s natural detoxification.
- Take a few minutes after your session to reflect on how you feel. This can help you better understand your body’s responses to different reflex points and tailor future sessions to your specific needs.
By following these tips, your DIY hand reflexology sessions can become a cherished part of your wellness routine, offering a simple yet effective way to enhance your health and well-being from the comfort of your home.
Safety Considerations and When to Avoid DIY Hand Reflexology
While hand reflexology is a generally safe practice that can offer numerous health benefits, there are certain situations and conditions where it should be approached with caution or avoided altogether. Being aware of these safety considerations can help prevent complications and ensure that reflexology is a beneficial addition to your wellness routine.
1. Hand Injuries or Conditions:
- Avoid practicing hand reflexology if you have any active injuries, infections, or severe conditions affecting your hands such as severe arthritis, fractures, or wounds. These conditions can be exacerbated by the pressure and manipulation involved in reflexology.
2. Acute or Severe Illnesses:
- If you are experiencing acute illnesses, such as severe infections or inflammation, reflexology might not be advisable. Wait until you have recovered or consult with your healthcare provider before starting reflexology.
3. Chronic Conditions:
- For individuals with chronic conditions such as heart disease, diabetes, or cancer, reflexology should be approached with caution. These conditions can be affected by the systemic changes that reflexology might promote, such as increased circulation and relaxation which can alter blood pressure and glucose levels.
- Always consult with a healthcare provider before beginning any new therapy, including reflexology, especially if you have any serious health conditions or are under medical treatment.
4. Pregnancy:
- Reflexology can sometimes stimulate labor, so pregnant women, especially those in high-risk categories or with complications, should consult their healthcare provider before engaging in reflexology.
5. After Surgery:
- Avoid reflexology immediately after surgery as it may affect the healing process or interfere with post-operative recovery. Always follow your doctor’s advice on when it is safe to resume such practices.
6. Varicose Veins and Blood Clot Risks:
- If you have varicose veins or a history of blood clots, consult with a healthcare provider before practicing reflexology. The pressure applied during reflexology could potentially dislodge a clot or worsen varicose veins.
Conclusion:
- Reflexology is intended to support and not replace traditional medical treatments. It’s important to use common sense and to consult healthcare professionals when considering reflexology, particularly if you have existing health issues or concerns. By adhering to these guidelines, you can enjoy the benefits of reflexology safely and effectively.
Conclusion
DIY hand reflexology is a powerful tool you can use to maintain health and relieve stress. By learning to apply these techniques, you can enjoy the benefits of reflexology from the comfort of your home.
Further Resources
For those interested in exploring more about hand reflexology and its various aspects, we recommend checking out the following resources on our website:
- Hand Reflexology: Delve deeper into the specific techniques and benefits of hand reflexology. This article provides a comprehensive overview, perfect for those looking to expand their understanding or practice at home.
- Reflexology Benefits: Discover the wide range of benefits that reflexology can offer for both physical and mental health. This resource explores how reflexology can be a key component of a holistic health regimen.
- Reflexology Cost: Learn about the factors that influence the cost of reflexology services, helping you to make informed decisions about incorporating this therapy into your health and wellness plans.
- Home: Visit our main page to learn more about Reflexology Auckland and our full range of services.
These articles provide valuable insights and detailed information to help you better understand the potential of reflexology and how you can integrate it into your health routine safely and effectively. Whether you’re new to reflexology or looking to deepen your knowledge, these resources are excellent starting points.
Hand reflexology is a practice rooted in ancient medicine, using pressure points on the hands believed to correspond to various parts of the body. This guide introduces you to simple DIY hand reflexology techniques that you can use at home to enhance relaxation and promote overall wellness.
Key Sections of DIY Hand Reflexology :
What You Need to Get Started
Embarking on your DIY hand reflexology journey is straightforward and requires minimal setup. Here’s what you’ll need to ensure a comfortable and effective session:
1. Your Hands:
- The primary “tool” in hand reflexology is, of course, your own hands. Clean, well-moisturized hands can make the process smoother and more comfortable.
2. Comfortable Seating:
- Choose a comfortable chair or a seat where you can relax without straining your back. Sitting upright in a supportive chair is often best, as it allows you to easily access both of your hands.
3. Optional Tools:
- Soft Mat or Pillow: While not necessary, a soft mat on your lap or a pillow can provide support, making it easier to hold your hand comfortably during the session. This can be particularly helpful if you have a longer session planned or if you find holding your arm up tiresome.
- Lotion or Hand Cream: Applying a small amount of lotion or hand cream can reduce friction and make reflexology techniques more pleasurable and less abrasive on the skin.
- Relaxing Background Music: Consider playing some soft, ambient music to enhance relaxation and create a therapeutic environment. Music or nature sounds can help in maintaining a calm mind and a focused approach.
4. Quiet and Comfortable Environment:
- Find a spot in your home that is typically quiet and free from interruptions. This could be a dedicated room or a cozy corner where you feel relaxed. The idea is to create a space that feels like a sanctuary, where stressors and external distractions are minimized.
- Good Lighting: Ensure the area is well-lit so that you can see your hands clearly without straining your eyes. Natural light is ideal, but a soft lamp can also create a warm and inviting environment.
5. Setting the Mood:
- You might want to set a timer if you have limited time to practice, so you don’t need to watch the clock. This allows you to fully immerse in the experience without worrying about time.
- Keep a glass of water nearby to stay hydrated before and after the session, as reflexology can sometimes release toxins and hydration can help flush these from your system.
By preparing your space and having these items at hand, you can maximize the benefits of your DIY hand reflexology sessions, turning them into a restorative ritual that you look forward to each time.
Understanding the Basics of Hand Reflexology
Hand reflexology is a therapeutic method where specific points on the hands are manipulated to improve health and promote healing in various parts of the body. According to reflexology theory, each area on the hand corresponds to different organs and systems within the body.
By applying pressure to these reflex areas, you can influence the health of the corresponding body parts, potentially easing ailments and boosting overall well-being.
Step-by-Step Guide to DIY Hand Reflexology Techniques
Here’s how you can begin practicing hand reflexology on yourself with some basic techniques. Each method targets different areas and serves various purposes, from relieving tension to improving body functions.
1. Thumb Walking:
- How to Perform:
- Place the pad of your thumb on the area of your hand you wish to work on.
- Gently press down into the skin.
- Move your thumb forward in a small “walking” motion, inching along the hand.
- Continue this movement across different zones of the hand that correspond to areas of your body you wish to address.
- Benefits:
- This technique is excellent for navigating larger areas of the hand, such as the palm or the back of the hand, making it effective for broadly stimulating internal organs and body systems.
2. Finger Walking:
- How to Perform:
- Use your index and middle fingers to ‘walk’ along a specific line or area on the hand.
- Apply gentle pressure in a sequential, caterpillar-like motion.
- This method allows for more precise control and is ideal for smaller areas or where finer attention is needed.
- Benefits:
- Finger walking is particularly useful for detailed work on complex reflex areas like those between the bones of the hand, facilitating targeted effects on specific organs.
3. Hook and Backup:
- How to Perform:
- Press your thumb or another finger into a specific reflex point.
- Apply steady pressure to go slightly deeper.
- Gently pull the finger backward without lifting the pressure.
- Benefits:
- This technique reaches deeper layers of hand tissue, stimulating reflex points that are more deeply embedded and enhancing the impact on the corresponding internal areas.
4. Press and Rotate:
- How to Perform:
- Identify a reflex point on your hand.
- Press down firmly with your thumb.
- Slowly rotate your thumb over this point, maintaining constant pressure.
- Benefits:
- The rotating motion helps to increase blood circulation and nerve activity in the area, enhancing the reflexology effects and promoting healing in the associated body parts.
By mastering these fundamental hand reflexology techniques, you can begin to explore the benefits of this practice at home, offering yourself a way to support your health in a direct and personal manner.
Common Hand Reflex Points and Their Corresponding Benefits
Hand reflexology provides a unique approach to health, where specific points on your hands are associated with different parts of your body. By applying pressure to these points, you can potentially alleviate various ailments and improve your overall well-being. Here are some key reflex points located on the hands and the benefits they can offer:
1. The Thumb Base:
- Location and Technique:
- The base of the thumb corresponds to the head and neck area. You can apply pressure using the thumb of your opposite hand or perform gentle circular motions.
- Benefits:
- This point is especially beneficial for relieving headaches and reducing tension in the neck area. It can also be helpful in managing stress and fatigue that often accumulates in the head and neck.
2. The Index Finger Base:
- Location and Technique:
- Located at the base of the index finger, this point can be stimulated by pressing with the thumb and index finger of the opposite hand.
- Benefits:
- This reflex area is linked to the chest and respiratory system. Stimulating this point can aid in easing breathing difficulties, clearing chest congestion, and potentially providing relief from conditions like colds or bronchitis.
3. Center of the Palm:
- Location and Technique:
- The center of the palm acts as a reflex point for the stomach. Use the thumb of your opposite hand to apply a steady, firm pressure or perform a gentle rotating motion to stimulate this area.
- Benefits:
- This point is ideal for addressing issues related to digestion. It can help in soothing stomach pain, promoting better digestion, and alleviating symptoms of indigestion or bloating.
These reflex points are accessible and easy to work on, making them perfect for DIY hand reflexology sessions. By regularly stimulating these points, you can harness the potential benefits of reflexology to manage everyday ailments and enhance your health. Remember to approach reflexology with care and consult a professional if you have specific health conditions or concerns.
Tips for a Successful DIY Hand Reflexology Session
Hand reflexology is a flexible and easily accessible form of self-care that you can perform at home. To make the most out of your DIY hand reflexology sessions and ensure they are effective and enjoyable, follow these practical tips:
1. Start with Light Pressure and Adjust as Needed:
- Begin each session by applying gentle pressure to the reflex points. This helps your body to adjust without causing discomfort.
- Gradually increase the pressure as per your comfort level. It’s important to listen to your body and avoid applying too much force, which could lead to discomfort or pain.
2. Duration of Each Session:
- A standard hand reflexology session can be as short or as long as you prefer, typically lasting between 5 to 30 minutes.
- If you’re just starting out, begin with shorter sessions to see how your body responds before gradually increasing the duration.
- Even a few minutes can be beneficial, especially if you are dealing with stress or need a quick break to rejuvenate.
3. Regular Practice for Optimal Benefits:
- Consistency is key in reflexology. Aim to practice hand reflexology 2-3 times a week to maximize the health benefits.
- Regular sessions can help in maintaining improved circulation, stress relief, and better overall health.
4. Create a Relaxing Environment:
- Enhance your reflexology experience by creating a calming atmosphere. This could involve dimming the lights, playing soft music, or using aromatherapy with essential oils to help relax your mind and body.
- Make sure the room is at a comfortable temperature and that you won’t be disturbed during your session.
5. Hydrate and Reflect Post-Session:
- Drinking water after a reflexology session can help flush out toxins that are released during the process. Stay hydrated to support your body’s natural detoxification.
- Take a few minutes after your session to reflect on how you feel. This can help you better understand your body’s responses to different reflex points and tailor future sessions to your specific needs.
By following these tips, your DIY hand reflexology sessions can become a cherished part of your wellness routine, offering a simple yet effective way to enhance your health and well-being from the comfort of your home.
Safety Considerations and When to Avoid DIY Hand Reflexology
While hand reflexology is a generally safe practice that can offer numerous health benefits, there are certain situations and conditions where it should be approached with caution or avoided altogether. Being aware of these safety considerations can help prevent complications and ensure that reflexology is a beneficial addition to your wellness routine.
1. Hand Injuries or Conditions:
- Avoid practicing hand reflexology if you have any active injuries, infections, or severe conditions affecting your hands such as severe arthritis, fractures, or wounds. These conditions can be exacerbated by the pressure and manipulation involved in reflexology.
2. Acute or Severe Illnesses:
- If you are experiencing acute illnesses, such as severe infections or inflammation, reflexology might not be advisable. Wait until you have recovered or consult with your healthcare provider before starting reflexology.
3. Chronic Conditions:
- For individuals with chronic conditions such as heart disease, diabetes, or cancer, reflexology should be approached with caution. These conditions can be affected by the systemic changes that reflexology might promote, such as increased circulation and relaxation which can alter blood pressure and glucose levels.
- Always consult with a healthcare provider before beginning any new therapy, including reflexology, especially if you have any serious health conditions or are under medical treatment.
4. Pregnancy:
- Reflexology can sometimes stimulate labor, so pregnant women, especially those in high-risk categories or with complications, should consult their healthcare provider before engaging in reflexology.
5. After Surgery:
- Avoid reflexology immediately after surgery as it may affect the healing process or interfere with post-operative recovery. Always follow your doctor’s advice on when it is safe to resume such practices.
6. Varicose Veins and Blood Clot Risks:
- If you have varicose veins or a history of blood clots, consult with a healthcare provider before practicing reflexology. The pressure applied during reflexology could potentially dislodge a clot or worsen varicose veins.
Conclusion:
- Reflexology is intended to support and not replace traditional medical treatments. It’s important to use common sense and to consult healthcare professionals when considering reflexology, particularly if you have existing health issues or concerns. By adhering to these guidelines, you can enjoy the benefits of reflexology safely and effectively.
Conclusion
DIY hand reflexology is a powerful tool you can use to maintain health and relieve stress. By learning to apply these techniques, you can enjoy the benefits of reflexology from the comfort of your home.
Further Resources
For those interested in exploring more about hand reflexology and its various aspects, we recommend checking out the following resources on our website:
- Hand Reflexology: Delve deeper into the specific techniques and benefits of hand reflexology. This article provides a comprehensive overview, perfect for those looking to expand their understanding or practice at home.
- Reflexology Benefits: Discover the wide range of benefits that reflexology can offer for both physical and mental health. This resource explores how reflexology can be a key component of a holistic health regimen.
- Reflexology Cost: Learn about the factors that influence the cost of reflexology services, helping you to make informed decisions about incorporating this therapy into your health and wellness plans.
- Home: Visit our main page to learn more about Reflexology Auckland and our full range of services.
These articles provide valuable insights and detailed information to help you better understand the potential of reflexology and how you can integrate it into your health routine safely and effectively. Whether you’re new to reflexology or looking to deepen your knowledge, these resources are excellent starting points.
- How to Perform:
- Use your index and middle fingers to ‘walk’ along a specific line or area on the hand.
- Apply gentle pressure in a sequential, caterpillar-like motion.
- This method allows for more precise control and is ideal for smaller areas or where finer attention is needed.
- Benefits:
- Finger walking is particularly useful for detailed work on complex reflex areas like those between the bones of the hand, facilitating targeted effects on specific organs.
3. Hook and Backup:
- How to Perform:
- Press your thumb or another finger into a specific reflex point.
- Apply steady pressure to go slightly deeper.
- Gently pull the finger backward without lifting the pressure.
- Benefits:
- This technique reaches deeper layers of hand tissue, stimulating reflex points that are more deeply embedded and enhancing the impact on the corresponding internal areas.
4. Press and Rotate:
- How to Perform:
- Identify a reflex point on your hand.
- Press down firmly with your thumb.
- Slowly rotate your thumb over this point, maintaining constant pressure.
- Benefits:
- The rotating motion helps to increase blood circulation and nerve activity in the area, enhancing the reflexology effects and promoting healing in the associated body parts.
By mastering these fundamental hand reflexology techniques, you can begin to explore the benefits of this practice at home, offering yourself a way to support your health in a direct and personal manner.
Common Hand Reflex Points and Their Corresponding Benefits
Hand reflexology provides a unique approach to health, where specific points on your hands are associated with different parts of your body. By applying pressure to these points, you can potentially alleviate various ailments and improve your overall well-being. Here are some key reflex points located on the hands and the benefits they can offer:
1. The Thumb Base:
- Location and Technique:
- The base of the thumb corresponds to the head and neck area. You can apply pressure using the thumb of your opposite hand or perform gentle circular motions.
- Benefits:
- This point is especially beneficial for relieving headaches and reducing tension in the neck area. It can also be helpful in managing stress and fatigue that often accumulates in the head and neck.
2. The Index Finger Base:
- Location and Technique:
- Located at the base of the index finger, this point can be stimulated by pressing with the thumb and index finger of the opposite hand.
- Benefits:
- This reflex area is linked to the chest and respiratory system. Stimulating this point can aid in easing breathing difficulties, clearing chest congestion, and potentially providing relief from conditions like colds or bronchitis.
3. Center of the Palm:
- Location and Technique:
- The center of the palm acts as a reflex point for the stomach. Use the thumb of your opposite hand to apply a steady, firm pressure or perform a gentle rotating motion to stimulate this area.
- Benefits:
- This point is ideal for addressing issues related to digestion. It can help in soothing stomach pain, promoting better digestion, and alleviating symptoms of indigestion or bloating.
These reflex points are accessible and easy to work on, making them perfect for DIY hand reflexology sessions. By regularly stimulating these points, you can harness the potential benefits of reflexology to manage everyday ailments and enhance your health. Remember to approach reflexology with care and consult a professional if you have specific health conditions or concerns.
Tips for a Successful DIY Hand Reflexology Session
Hand reflexology is a flexible and easily accessible form of self-care that you can perform at home. To make the most out of your DIY hand reflexology sessions and ensure they are effective and enjoyable, follow these practical tips:
1. Start with Light Pressure and Adjust as Needed:
- Begin each session by applying gentle pressure to the reflex points. This helps your body to adjust without causing discomfort.
- Gradually increase the pressure as per your comfort level. It’s important to listen to your body and avoid applying too much force, which could lead to discomfort or pain.
2. Duration of Each Session:
- A standard hand reflexology session can be as short or as long as you prefer, typically lasting between 5 to 30 minutes.
- If you’re just starting out, begin with shorter sessions to see how your body responds before gradually increasing the duration.
- Even a few minutes can be beneficial, especially if you are dealing with stress or need a quick break to rejuvenate.
3. Regular Practice for Optimal Benefits:
- Consistency is key in reflexology. Aim to practice hand reflexology 2-3 times a week to maximize the health benefits.
- Regular sessions can help in maintaining improved circulation, stress relief, and better overall health.
4. Create a Relaxing Environment:
- Enhance your reflexology experience by creating a calming atmosphere. This could involve dimming the lights, playing soft music, or using aromatherapy with essential oils to help relax your mind and body.
- Make sure the room is at a comfortable temperature and that you won’t be disturbed during your session.
5. Hydrate and Reflect Post-Session:
- Drinking water after a reflexology session can help flush out toxins that are released during the process. Stay hydrated to support your body’s natural detoxification.
- Take a few minutes after your session to reflect on how you feel. This can help you better understand your body’s responses to different reflex points and tailor future sessions to your specific needs.
By following these tips, your DIY hand reflexology sessions can become a cherished part of your wellness routine, offering a simple yet effective way to enhance your health and well-being from the comfort of your home.
Safety Considerations and When to Avoid DIY Hand Reflexology
While hand reflexology is a generally safe practice that can offer numerous health benefits, there are certain situations and conditions where it should be approached with caution or avoided altogether. Being aware of these safety considerations can help prevent complications and ensure that reflexology is a beneficial addition to your wellness routine.
1. Hand Injuries or Conditions:
- Avoid practicing hand reflexology if you have any active injuries, infections, or severe conditions affecting your hands such as severe arthritis, fractures, or wounds. These conditions can be exacerbated by the pressure and manipulation involved in reflexology.
2. Acute or Severe Illnesses:
- If you are experiencing acute illnesses, such as severe infections or inflammation, reflexology might not be advisable. Wait until you have recovered or consult with your healthcare provider before starting reflexology.
3. Chronic Conditions:
- For individuals with chronic conditions such as heart disease, diabetes, or cancer, reflexology should be approached with caution. These conditions can be affected by the systemic changes that reflexology might promote, such as increased circulation and relaxation which can alter blood pressure and glucose levels.
- Always consult with a healthcare provider before beginning any new therapy, including reflexology, especially if you have any serious health conditions or are under medical treatment.
4. Pregnancy:
- Reflexology can sometimes stimulate labor, so pregnant women, especially those in high-risk categories or with complications, should consult their healthcare provider before engaging in reflexology.
5. After Surgery:
- Avoid reflexology immediately after surgery as it may affect the healing process or interfere with post-operative recovery. Always follow your doctor’s advice on when it is safe to resume such practices.
6. Varicose Veins and Blood Clot Risks:
- If you have varicose veins or a history of blood clots, consult with a healthcare provider before practicing reflexology. The pressure applied during reflexology could potentially dislodge a clot or worsen varicose veins.
Conclusion:
- Reflexology is intended to support and not replace traditional medical treatments. It’s important to use common sense and to consult healthcare professionals when considering reflexology, particularly if you have existing health issues or concerns. By adhering to these guidelines, you can enjoy the benefits of reflexology safely and effectively.
Conclusion
DIY hand reflexology is a powerful tool you can use to maintain health and relieve stress. By learning to apply these techniques, you can enjoy the benefits of reflexology from the comfort of your home.
Further Resources
For those interested in exploring more about hand reflexology and its various aspects, we recommend checking out the following resources on our website:
- Hand Reflexology: Delve deeper into the specific techniques and benefits of hand reflexology. This article provides a comprehensive overview, perfect for those looking to expand their understanding or practice at home.
- Reflexology Benefits: Discover the wide range of benefits that reflexology can offer for both physical and mental health. This resource explores how reflexology can be a key component of a holistic health regimen.
- Reflexology Cost: Learn about the factors that influence the cost of reflexology services, helping you to make informed decisions about incorporating this therapy into your health and wellness plans.
- Home: Visit our main page to learn more about Reflexology Auckland and our full range of services.
These articles provide valuable insights and detailed information to help you better understand the potential of reflexology and how you can integrate it into your health routine safely and effectively. Whether you’re new to reflexology or looking to deepen your knowledge, these resources are excellent starting points.
- How to Perform:
- Place the pad of your thumb on the area of your hand you wish to work on.
- Gently press down into the skin.
- Move your thumb forward in a small “walking” motion, inching along the hand.
- Continue this movement across different zones of the hand that correspond to areas of your body you wish to address.
- Benefits:
- This technique is excellent for navigating larger areas of the hand, such as the palm or the back of the hand, making it effective for broadly stimulating internal organs and body systems.
2. Finger Walking:
- How to Perform:
- Use your index and middle fingers to ‘walk’ along a specific line or area on the hand.
- Apply gentle pressure in a sequential, caterpillar-like motion.
- This method allows for more precise control and is ideal for smaller areas or where finer attention is needed.
- Benefits:
- Finger walking is particularly useful for detailed work on complex reflex areas like those between the bones of the hand, facilitating targeted effects on specific organs.
3. Hook and Backup:
- How to Perform:
- Press your thumb or another finger into a specific reflex point.
- Apply steady pressure to go slightly deeper.
- Gently pull the finger backward without lifting the pressure.
- Benefits:
- This technique reaches deeper layers of hand tissue, stimulating reflex points that are more deeply embedded and enhancing the impact on the corresponding internal areas.
4. Press and Rotate:
- How to Perform:
- Identify a reflex point on your hand.
- Press down firmly with your thumb.
- Slowly rotate your thumb over this point, maintaining constant pressure.
- Benefits:
- The rotating motion helps to increase blood circulation and nerve activity in the area, enhancing the reflexology effects and promoting healing in the associated body parts.
By mastering these fundamental hand reflexology techniques, you can begin to explore the benefits of this practice at home, offering yourself a way to support your health in a direct and personal manner.
Common Hand Reflex Points and Their Corresponding Benefits
Hand reflexology provides a unique approach to health, where specific points on your hands are associated with different parts of your body. By applying pressure to these points, you can potentially alleviate various ailments and improve your overall well-being. Here are some key reflex points located on the hands and the benefits they can offer:
1. The Thumb Base:
- Location and Technique:
- The base of the thumb corresponds to the head and neck area. You can apply pressure using the thumb of your opposite hand or perform gentle circular motions.
- Benefits:
- This point is especially beneficial for relieving headaches and reducing tension in the neck area. It can also be helpful in managing stress and fatigue that often accumulates in the head and neck.
2. The Index Finger Base:
- Location and Technique:
- Located at the base of the index finger, this point can be stimulated by pressing with the thumb and index finger of the opposite hand.
- Benefits:
- This reflex area is linked to the chest and respiratory system. Stimulating this point can aid in easing breathing difficulties, clearing chest congestion, and potentially providing relief from conditions like colds or bronchitis.
3. Center of the Palm:
- Location and Technique:
- The center of the palm acts as a reflex point for the stomach. Use the thumb of your opposite hand to apply a steady, firm pressure or perform a gentle rotating motion to stimulate this area.
- Benefits:
- This point is ideal for addressing issues related to digestion. It can help in soothing stomach pain, promoting better digestion, and alleviating symptoms of indigestion or bloating.
These reflex points are accessible and easy to work on, making them perfect for DIY hand reflexology sessions. By regularly stimulating these points, you can harness the potential benefits of reflexology to manage everyday ailments and enhance your health. Remember to approach reflexology with care and consult a professional if you have specific health conditions or concerns.
Tips for a Successful DIY Hand Reflexology Session
Hand reflexology is a flexible and easily accessible form of self-care that you can perform at home. To make the most out of your DIY hand reflexology sessions and ensure they are effective and enjoyable, follow these practical tips:
1. Start with Light Pressure and Adjust as Needed:
- Begin each session by applying gentle pressure to the reflex points. This helps your body to adjust without causing discomfort.
- Gradually increase the pressure as per your comfort level. It’s important to listen to your body and avoid applying too much force, which could lead to discomfort or pain.
2. Duration of Each Session:
- A standard hand reflexology session can be as short or as long as you prefer, typically lasting between 5 to 30 minutes.
- If you’re just starting out, begin with shorter sessions to see how your body responds before gradually increasing the duration.
- Even a few minutes can be beneficial, especially if you are dealing with stress or need a quick break to rejuvenate.
3. Regular Practice for Optimal Benefits:
- Consistency is key in reflexology. Aim to practice hand reflexology 2-3 times a week to maximize the health benefits.
- Regular sessions can help in maintaining improved circulation, stress relief, and better overall health.
4. Create a Relaxing Environment:
- Enhance your reflexology experience by creating a calming atmosphere. This could involve dimming the lights, playing soft music, or using aromatherapy with essential oils to help relax your mind and body.
- Make sure the room is at a comfortable temperature and that you won’t be disturbed during your session.
5. Hydrate and Reflect Post-Session:
- Drinking water after a reflexology session can help flush out toxins that are released during the process. Stay hydrated to support your body’s natural detoxification.
- Take a few minutes after your session to reflect on how you feel. This can help you better understand your body’s responses to different reflex points and tailor future sessions to your specific needs.
By following these tips, your DIY hand reflexology sessions can become a cherished part of your wellness routine, offering a simple yet effective way to enhance your health and well-being from the comfort of your home.
Safety Considerations and When to Avoid DIY Hand Reflexology
While hand reflexology is a generally safe practice that can offer numerous health benefits, there are certain situations and conditions where it should be approached with caution or avoided altogether. Being aware of these safety considerations can help prevent complications and ensure that reflexology is a beneficial addition to your wellness routine.
1. Hand Injuries or Conditions:
- Avoid practicing hand reflexology if you have any active injuries, infections, or severe conditions affecting your hands such as severe arthritis, fractures, or wounds. These conditions can be exacerbated by the pressure and manipulation involved in reflexology.
2. Acute or Severe Illnesses:
- If you are experiencing acute illnesses, such as severe infections or inflammation, reflexology might not be advisable. Wait until you have recovered or consult with your healthcare provider before starting reflexology.
3. Chronic Conditions:
- For individuals with chronic conditions such as heart disease, diabetes, or cancer, reflexology should be approached with caution. These conditions can be affected by the systemic changes that reflexology might promote, such as increased circulation and relaxation which can alter blood pressure and glucose levels.
- Always consult with a healthcare provider before beginning any new therapy, including reflexology, especially if you have any serious health conditions or are under medical treatment.
4. Pregnancy:
- Reflexology can sometimes stimulate labor, so pregnant women, especially those in high-risk categories or with complications, should consult their healthcare provider before engaging in reflexology.
5. After Surgery:
- Avoid reflexology immediately after surgery as it may affect the healing process or interfere with post-operative recovery. Always follow your doctor’s advice on when it is safe to resume such practices.
6. Varicose Veins and Blood Clot Risks:
- If you have varicose veins or a history of blood clots, consult with a healthcare provider before practicing reflexology. The pressure applied during reflexology could potentially dislodge a clot or worsen varicose veins.
Conclusion:
- Reflexology is intended to support and not replace traditional medical treatments. It’s important to use common sense and to consult healthcare professionals when considering reflexology, particularly if you have existing health issues or concerns. By adhering to these guidelines, you can enjoy the benefits of reflexology safely and effectively.
Conclusion
DIY hand reflexology is a powerful tool you can use to maintain health and relieve stress. By learning to apply these techniques, you can enjoy the benefits of reflexology from the comfort of your home.
Further Resources
For those interested in exploring more about hand reflexology and its various aspects, we recommend checking out the following resources on our website:
- Hand Reflexology: Delve deeper into the specific techniques and benefits of hand reflexology. This article provides a comprehensive overview, perfect for those looking to expand their understanding or practice at home.
- Reflexology Benefits: Discover the wide range of benefits that reflexology can offer for both physical and mental health. This resource explores how reflexology can be a key component of a holistic health regimen.
- Reflexology Cost: Learn about the factors that influence the cost of reflexology services, helping you to make informed decisions about incorporating this therapy into your health and wellness plans.
- Home: Visit our main page to learn more about Reflexology Auckland and our full range of services.
These articles provide valuable insights and detailed information to help you better understand the potential of reflexology and how you can integrate it into your health routine safely and effectively. Whether you’re new to reflexology or looking to deepen your knowledge, these resources are excellent starting points.
Hand reflexology is a practice rooted in ancient medicine, using pressure points on the hands believed to correspond to various parts of the body. This guide introduces you to simple DIY hand reflexology techniques that you can use at home to enhance relaxation and promote overall wellness.
Key Sections of DIY Hand Reflexology :
What You Need to Get Started
Embarking on your DIY hand reflexology journey is straightforward and requires minimal setup. Here’s what you’ll need to ensure a comfortable and effective session:
1. Your Hands:
- The primary “tool” in hand reflexology is, of course, your own hands. Clean, well-moisturized hands can make the process smoother and more comfortable.
2. Comfortable Seating:
- Choose a comfortable chair or a seat where you can relax without straining your back. Sitting upright in a supportive chair is often best, as it allows you to easily access both of your hands.
3. Optional Tools:
- Soft Mat or Pillow: While not necessary, a soft mat on your lap or a pillow can provide support, making it easier to hold your hand comfortably during the session. This can be particularly helpful if you have a longer session planned or if you find holding your arm up tiresome.
- Lotion or Hand Cream: Applying a small amount of lotion or hand cream can reduce friction and make reflexology techniques more pleasurable and less abrasive on the skin.
- Relaxing Background Music: Consider playing some soft, ambient music to enhance relaxation and create a therapeutic environment. Music or nature sounds can help in maintaining a calm mind and a focused approach.
4. Quiet and Comfortable Environment:
- Find a spot in your home that is typically quiet and free from interruptions. This could be a dedicated room or a cozy corner where you feel relaxed. The idea is to create a space that feels like a sanctuary, where stressors and external distractions are minimized.
- Good Lighting: Ensure the area is well-lit so that you can see your hands clearly without straining your eyes. Natural light is ideal, but a soft lamp can also create a warm and inviting environment.
5. Setting the Mood:
- You might want to set a timer if you have limited time to practice, so you don’t need to watch the clock. This allows you to fully immerse in the experience without worrying about time.
- Keep a glass of water nearby to stay hydrated before and after the session, as reflexology can sometimes release toxins and hydration can help flush these from your system.
By preparing your space and having these items at hand, you can maximize the benefits of your DIY hand reflexology sessions, turning them into a restorative ritual that you look forward to each time.
Understanding the Basics of Hand Reflexology
Hand reflexology is a therapeutic method where specific points on the hands are manipulated to improve health and promote healing in various parts of the body. According to reflexology theory, each area on the hand corresponds to different organs and systems within the body.
By applying pressure to these reflex areas, you can influence the health of the corresponding body parts, potentially easing ailments and boosting overall well-being.
Step-by-Step Guide to DIY Hand Reflexology Techniques
Here’s how you can begin practicing hand reflexology on yourself with some basic techniques. Each method targets different areas and serves various purposes, from relieving tension to improving body functions.
1. Thumb Walking:
- How to Perform:
- Place the pad of your thumb on the area of your hand you wish to work on.
- Gently press down into the skin.
- Move your thumb forward in a small “walking” motion, inching along the hand.
- Continue this movement across different zones of the hand that correspond to areas of your body you wish to address.
- Benefits:
- This technique is excellent for navigating larger areas of the hand, such as the palm or the back of the hand, making it effective for broadly stimulating internal organs and body systems.
2. Finger Walking:
- How to Perform:
- Use your index and middle fingers to ‘walk’ along a specific line or area on the hand.
- Apply gentle pressure in a sequential, caterpillar-like motion.
- This method allows for more precise control and is ideal for smaller areas or where finer attention is needed.
- Benefits:
- Finger walking is particularly useful for detailed work on complex reflex areas like those between the bones of the hand, facilitating targeted effects on specific organs.
3. Hook and Backup:
- How to Perform:
- Press your thumb or another finger into a specific reflex point.
- Apply steady pressure to go slightly deeper.
- Gently pull the finger backward without lifting the pressure.
- Benefits:
- This technique reaches deeper layers of hand tissue, stimulating reflex points that are more deeply embedded and enhancing the impact on the corresponding internal areas.
4. Press and Rotate:
- How to Perform:
- Identify a reflex point on your hand.
- Press down firmly with your thumb.
- Slowly rotate your thumb over this point, maintaining constant pressure.
- Benefits:
- The rotating motion helps to increase blood circulation and nerve activity in the area, enhancing the reflexology effects and promoting healing in the associated body parts.
By mastering these fundamental hand reflexology techniques, you can begin to explore the benefits of this practice at home, offering yourself a way to support your health in a direct and personal manner.
Common Hand Reflex Points and Their Corresponding Benefits
Hand reflexology provides a unique approach to health, where specific points on your hands are associated with different parts of your body. By applying pressure to these points, you can potentially alleviate various ailments and improve your overall well-being. Here are some key reflex points located on the hands and the benefits they can offer:
1. The Thumb Base:
- Location and Technique:
- The base of the thumb corresponds to the head and neck area. You can apply pressure using the thumb of your opposite hand or perform gentle circular motions.
- Benefits:
- This point is especially beneficial for relieving headaches and reducing tension in the neck area. It can also be helpful in managing stress and fatigue that often accumulates in the head and neck.
2. The Index Finger Base:
- Location and Technique:
- Located at the base of the index finger, this point can be stimulated by pressing with the thumb and index finger of the opposite hand.
- Benefits:
- This reflex area is linked to the chest and respiratory system. Stimulating this point can aid in easing breathing difficulties, clearing chest congestion, and potentially providing relief from conditions like colds or bronchitis.
3. Center of the Palm:
- Location and Technique:
- The center of the palm acts as a reflex point for the stomach. Use the thumb of your opposite hand to apply a steady, firm pressure or perform a gentle rotating motion to stimulate this area.
- Benefits:
- This point is ideal for addressing issues related to digestion. It can help in soothing stomach pain, promoting better digestion, and alleviating symptoms of indigestion or bloating.
These reflex points are accessible and easy to work on, making them perfect for DIY hand reflexology sessions. By regularly stimulating these points, you can harness the potential benefits of reflexology to manage everyday ailments and enhance your health. Remember to approach reflexology with care and consult a professional if you have specific health conditions or concerns.
Tips for a Successful DIY Hand Reflexology Session
Hand reflexology is a flexible and easily accessible form of self-care that you can perform at home. To make the most out of your DIY hand reflexology sessions and ensure they are effective and enjoyable, follow these practical tips:
1. Start with Light Pressure and Adjust as Needed:
- Begin each session by applying gentle pressure to the reflex points. This helps your body to adjust without causing discomfort.
- Gradually increase the pressure as per your comfort level. It’s important to listen to your body and avoid applying too much force, which could lead to discomfort or pain.
2. Duration of Each Session:
- A standard hand reflexology session can be as short or as long as you prefer, typically lasting between 5 to 30 minutes.
- If you’re just starting out, begin with shorter sessions to see how your body responds before gradually increasing the duration.
- Even a few minutes can be beneficial, especially if you are dealing with stress or need a quick break to rejuvenate.
3. Regular Practice for Optimal Benefits:
- Consistency is key in reflexology. Aim to practice hand reflexology 2-3 times a week to maximize the health benefits.
- Regular sessions can help in maintaining improved circulation, stress relief, and better overall health.
4. Create a Relaxing Environment:
- Enhance your reflexology experience by creating a calming atmosphere. This could involve dimming the lights, playing soft music, or using aromatherapy with essential oils to help relax your mind and body.
- Make sure the room is at a comfortable temperature and that you won’t be disturbed during your session.
5. Hydrate and Reflect Post-Session:
- Drinking water after a reflexology session can help flush out toxins that are released during the process. Stay hydrated to support your body’s natural detoxification.
- Take a few minutes after your session to reflect on how you feel. This can help you better understand your body’s responses to different reflex points and tailor future sessions to your specific needs.
By following these tips, your DIY hand reflexology sessions can become a cherished part of your wellness routine, offering a simple yet effective way to enhance your health and well-being from the comfort of your home.
Safety Considerations and When to Avoid DIY Hand Reflexology
While hand reflexology is a generally safe practice that can offer numerous health benefits, there are certain situations and conditions where it should be approached with caution or avoided altogether. Being aware of these safety considerations can help prevent complications and ensure that reflexology is a beneficial addition to your wellness routine.
1. Hand Injuries or Conditions:
- Avoid practicing hand reflexology if you have any active injuries, infections, or severe conditions affecting your hands such as severe arthritis, fractures, or wounds. These conditions can be exacerbated by the pressure and manipulation involved in reflexology.
2. Acute or Severe Illnesses:
- If you are experiencing acute illnesses, such as severe infections or inflammation, reflexology might not be advisable. Wait until you have recovered or consult with your healthcare provider before starting reflexology.
3. Chronic Conditions:
- For individuals with chronic conditions such as heart disease, diabetes, or cancer, reflexology should be approached with caution. These conditions can be affected by the systemic changes that reflexology might promote, such as increased circulation and relaxation which can alter blood pressure and glucose levels.
- Always consult with a healthcare provider before beginning any new therapy, including reflexology, especially if you have any serious health conditions or are under medical treatment.
4. Pregnancy:
- Reflexology can sometimes stimulate labor, so pregnant women, especially those in high-risk categories or with complications, should consult their healthcare provider before engaging in reflexology.
5. After Surgery:
- Avoid reflexology immediately after surgery as it may affect the healing process or interfere with post-operative recovery. Always follow your doctor’s advice on when it is safe to resume such practices.
6. Varicose Veins and Blood Clot Risks:
- If you have varicose veins or a history of blood clots, consult with a healthcare provider before practicing reflexology. The pressure applied during reflexology could potentially dislodge a clot or worsen varicose veins.
Conclusion:
- Reflexology is intended to support and not replace traditional medical treatments. It’s important to use common sense and to consult healthcare professionals when considering reflexology, particularly if you have existing health issues or concerns. By adhering to these guidelines, you can enjoy the benefits of reflexology safely and effectively.
Conclusion
DIY hand reflexology is a powerful tool you can use to maintain health and relieve stress. By learning to apply these techniques, you can enjoy the benefits of reflexology from the comfort of your home.
Further Resources
For those interested in exploring more about hand reflexology and its various aspects, we recommend checking out the following resources on our website:
- Hand Reflexology: Delve deeper into the specific techniques and benefits of hand reflexology. This article provides a comprehensive overview, perfect for those looking to expand their understanding or practice at home.
- Reflexology Benefits: Discover the wide range of benefits that reflexology can offer for both physical and mental health. This resource explores how reflexology can be a key component of a holistic health regimen.
- Reflexology Cost: Learn about the factors that influence the cost of reflexology services, helping you to make informed decisions about incorporating this therapy into your health and wellness plans.
- Home: Visit our main page to learn more about Reflexology Auckland and our full range of services.
These articles provide valuable insights and detailed information to help you better understand the potential of reflexology and how you can integrate it into your health routine safely and effectively. Whether you’re new to reflexology or looking to deepen your knowledge, these resources are excellent starting points.
- How to Perform:
- Use your index and middle fingers to ‘walk’ along a specific line or area on the hand.
- Apply gentle pressure in a sequential, caterpillar-like motion.
- This method allows for more precise control and is ideal for smaller areas or where finer attention is needed.
- Benefits:
- Finger walking is particularly useful for detailed work on complex reflex areas like those between the bones of the hand, facilitating targeted effects on specific organs.
3. Hook and Backup:
- How to Perform:
- Press your thumb or another finger into a specific reflex point.
- Apply steady pressure to go slightly deeper.
- Gently pull the finger backward without lifting the pressure.
- Benefits:
- This technique reaches deeper layers of hand tissue, stimulating reflex points that are more deeply embedded and enhancing the impact on the corresponding internal areas.
4. Press and Rotate:
- How to Perform:
- Identify a reflex point on your hand.
- Press down firmly with your thumb.
- Slowly rotate your thumb over this point, maintaining constant pressure.
- Benefits:
- The rotating motion helps to increase blood circulation and nerve activity in the area, enhancing the reflexology effects and promoting healing in the associated body parts.
By mastering these fundamental hand reflexology techniques, you can begin to explore the benefits of this practice at home, offering yourself a way to support your health in a direct and personal manner.
Common Hand Reflex Points and Their Corresponding Benefits
Hand reflexology provides a unique approach to health, where specific points on your hands are associated with different parts of your body. By applying pressure to these points, you can potentially alleviate various ailments and improve your overall well-being. Here are some key reflex points located on the hands and the benefits they can offer:
1. The Thumb Base:
- Location and Technique:
- The base of the thumb corresponds to the head and neck area. You can apply pressure using the thumb of your opposite hand or perform gentle circular motions.
- Benefits:
- This point is especially beneficial for relieving headaches and reducing tension in the neck area. It can also be helpful in managing stress and fatigue that often accumulates in the head and neck.
2. The Index Finger Base:
- Location and Technique:
- Located at the base of the index finger, this point can be stimulated by pressing with the thumb and index finger of the opposite hand.
- Benefits:
- This reflex area is linked to the chest and respiratory system. Stimulating this point can aid in easing breathing difficulties, clearing chest congestion, and potentially providing relief from conditions like colds or bronchitis.
3. Center of the Palm:
- Location and Technique:
- The center of the palm acts as a reflex point for the stomach. Use the thumb of your opposite hand to apply a steady, firm pressure or perform a gentle rotating motion to stimulate this area.
- Benefits:
- This point is ideal for addressing issues related to digestion. It can help in soothing stomach pain, promoting better digestion, and alleviating symptoms of indigestion or bloating.
These reflex points are accessible and easy to work on, making them perfect for DIY hand reflexology sessions. By regularly stimulating these points, you can harness the potential benefits of reflexology to manage everyday ailments and enhance your health. Remember to approach reflexology with care and consult a professional if you have specific health conditions or concerns.
Tips for a Successful DIY Hand Reflexology Session
Hand reflexology is a flexible and easily accessible form of self-care that you can perform at home. To make the most out of your DIY hand reflexology sessions and ensure they are effective and enjoyable, follow these practical tips:
1. Start with Light Pressure and Adjust as Needed:
- Begin each session by applying gentle pressure to the reflex points. This helps your body to adjust without causing discomfort.
- Gradually increase the pressure as per your comfort level. It’s important to listen to your body and avoid applying too much force, which could lead to discomfort or pain.
2. Duration of Each Session:
- A standard hand reflexology session can be as short or as long as you prefer, typically lasting between 5 to 30 minutes.
- If you’re just starting out, begin with shorter sessions to see how your body responds before gradually increasing the duration.
- Even a few minutes can be beneficial, especially if you are dealing with stress or need a quick break to rejuvenate.
3. Regular Practice for Optimal Benefits:
- Consistency is key in reflexology. Aim to practice hand reflexology 2-3 times a week to maximize the health benefits.
- Regular sessions can help in maintaining improved circulation, stress relief, and better overall health.
4. Create a Relaxing Environment:
- Enhance your reflexology experience by creating a calming atmosphere. This could involve dimming the lights, playing soft music, or using aromatherapy with essential oils to help relax your mind and body.
- Make sure the room is at a comfortable temperature and that you won’t be disturbed during your session.
5. Hydrate and Reflect Post-Session:
- Drinking water after a reflexology session can help flush out toxins that are released during the process. Stay hydrated to support your body’s natural detoxification.
- Take a few minutes after your session to reflect on how you feel. This can help you better understand your body’s responses to different reflex points and tailor future sessions to your specific needs.
By following these tips, your DIY hand reflexology sessions can become a cherished part of your wellness routine, offering a simple yet effective way to enhance your health and well-being from the comfort of your home.
Safety Considerations and When to Avoid DIY Hand Reflexology
While hand reflexology is a generally safe practice that can offer numerous health benefits, there are certain situations and conditions where it should be approached with caution or avoided altogether. Being aware of these safety considerations can help prevent complications and ensure that reflexology is a beneficial addition to your wellness routine.
1. Hand Injuries or Conditions:
- Avoid practicing hand reflexology if you have any active injuries, infections, or severe conditions affecting your hands such as severe arthritis, fractures, or wounds. These conditions can be exacerbated by the pressure and manipulation involved in reflexology.
2. Acute or Severe Illnesses:
- If you are experiencing acute illnesses, such as severe infections or inflammation, reflexology might not be advisable. Wait until you have recovered or consult with your healthcare provider before starting reflexology.
3. Chronic Conditions:
- For individuals with chronic conditions such as heart disease, diabetes, or cancer, reflexology should be approached with caution. These conditions can be affected by the systemic changes that reflexology might promote, such as increased circulation and relaxation which can alter blood pressure and glucose levels.
- Always consult with a healthcare provider before beginning any new therapy, including reflexology, especially if you have any serious health conditions or are under medical treatment.
4. Pregnancy:
- Reflexology can sometimes stimulate labor, so pregnant women, especially those in high-risk categories or with complications, should consult their healthcare provider before engaging in reflexology.
5. After Surgery:
- Avoid reflexology immediately after surgery as it may affect the healing process or interfere with post-operative recovery. Always follow your doctor’s advice on when it is safe to resume such practices.
6. Varicose Veins and Blood Clot Risks:
- If you have varicose veins or a history of blood clots, consult with a healthcare provider before practicing reflexology. The pressure applied during reflexology could potentially dislodge a clot or worsen varicose veins.
Conclusion:
- Reflexology is intended to support and not replace traditional medical treatments. It’s important to use common sense and to consult healthcare professionals when considering reflexology, particularly if you have existing health issues or concerns. By adhering to these guidelines, you can enjoy the benefits of reflexology safely and effectively.
Conclusion
DIY hand reflexology is a powerful tool you can use to maintain health and relieve stress. By learning to apply these techniques, you can enjoy the benefits of reflexology from the comfort of your home.
Further Resources
For those interested in exploring more about hand reflexology and its various aspects, we recommend checking out the following resources on our website:
- Hand Reflexology: Delve deeper into the specific techniques and benefits of hand reflexology. This article provides a comprehensive overview, perfect for those looking to expand their understanding or practice at home.
- Reflexology Benefits: Discover the wide range of benefits that reflexology can offer for both physical and mental health. This resource explores how reflexology can be a key component of a holistic health regimen.
- Reflexology Cost: Learn about the factors that influence the cost of reflexology services, helping you to make informed decisions about incorporating this therapy into your health and wellness plans.
- Home: Visit our main page to learn more about Reflexology Auckland and our full range of services.
These articles provide valuable insights and detailed information to help you better understand the potential of reflexology and how you can integrate it into your health routine safely and effectively. Whether you’re new to reflexology or looking to deepen your knowledge, these resources are excellent starting points.
- How to Perform:
- Place the pad of your thumb on the area of your hand you wish to work on.
- Gently press down into the skin.
- Move your thumb forward in a small “walking” motion, inching along the hand.
- Continue this movement across different zones of the hand that correspond to areas of your body you wish to address.
- Benefits:
- This technique is excellent for navigating larger areas of the hand, such as the palm or the back of the hand, making it effective for broadly stimulating internal organs and body systems.
2. Finger Walking:
- How to Perform:
- Use your index and middle fingers to ‘walk’ along a specific line or area on the hand.
- Apply gentle pressure in a sequential, caterpillar-like motion.
- This method allows for more precise control and is ideal for smaller areas or where finer attention is needed.
- Benefits:
- Finger walking is particularly useful for detailed work on complex reflex areas like those between the bones of the hand, facilitating targeted effects on specific organs.
3. Hook and Backup:
- How to Perform:
- Press your thumb or another finger into a specific reflex point.
- Apply steady pressure to go slightly deeper.
- Gently pull the finger backward without lifting the pressure.
- Benefits:
- This technique reaches deeper layers of hand tissue, stimulating reflex points that are more deeply embedded and enhancing the impact on the corresponding internal areas.
4. Press and Rotate:
- How to Perform:
- Identify a reflex point on your hand.
- Press down firmly with your thumb.
- Slowly rotate your thumb over this point, maintaining constant pressure.
- Benefits:
- The rotating motion helps to increase blood circulation and nerve activity in the area, enhancing the reflexology effects and promoting healing in the associated body parts.
By mastering these fundamental hand reflexology techniques, you can begin to explore the benefits of this practice at home, offering yourself a way to support your health in a direct and personal manner.
Common Hand Reflex Points and Their Corresponding Benefits
Hand reflexology provides a unique approach to health, where specific points on your hands are associated with different parts of your body. By applying pressure to these points, you can potentially alleviate various ailments and improve your overall well-being. Here are some key reflex points located on the hands and the benefits they can offer:
1. The Thumb Base:
- Location and Technique:
- The base of the thumb corresponds to the head and neck area. You can apply pressure using the thumb of your opposite hand or perform gentle circular motions.
- Benefits:
- This point is especially beneficial for relieving headaches and reducing tension in the neck area. It can also be helpful in managing stress and fatigue that often accumulates in the head and neck.
2. The Index Finger Base:
- Location and Technique:
- Located at the base of the index finger, this point can be stimulated by pressing with the thumb and index finger of the opposite hand.
- Benefits:
- This reflex area is linked to the chest and respiratory system. Stimulating this point can aid in easing breathing difficulties, clearing chest congestion, and potentially providing relief from conditions like colds or bronchitis.
3. Center of the Palm:
- Location and Technique:
- The center of the palm acts as a reflex point for the stomach. Use the thumb of your opposite hand to apply a steady, firm pressure or perform a gentle rotating motion to stimulate this area.
- Benefits:
- This point is ideal for addressing issues related to digestion. It can help in soothing stomach pain, promoting better digestion, and alleviating symptoms of indigestion or bloating.
These reflex points are accessible and easy to work on, making them perfect for DIY hand reflexology sessions. By regularly stimulating these points, you can harness the potential benefits of reflexology to manage everyday ailments and enhance your health. Remember to approach reflexology with care and consult a professional if you have specific health conditions or concerns.
Tips for a Successful DIY Hand Reflexology Session
Hand reflexology is a flexible and easily accessible form of self-care that you can perform at home. To make the most out of your DIY hand reflexology sessions and ensure they are effective and enjoyable, follow these practical tips:
1. Start with Light Pressure and Adjust as Needed:
- Begin each session by applying gentle pressure to the reflex points. This helps your body to adjust without causing discomfort.
- Gradually increase the pressure as per your comfort level. It’s important to listen to your body and avoid applying too much force, which could lead to discomfort or pain.
2. Duration of Each Session:
- A standard hand reflexology session can be as short or as long as you prefer, typically lasting between 5 to 30 minutes.
- If you’re just starting out, begin with shorter sessions to see how your body responds before gradually increasing the duration.
- Even a few minutes can be beneficial, especially if you are dealing with stress or need a quick break to rejuvenate.
3. Regular Practice for Optimal Benefits:
- Consistency is key in reflexology. Aim to practice hand reflexology 2-3 times a week to maximize the health benefits.
- Regular sessions can help in maintaining improved circulation, stress relief, and better overall health.
4. Create a Relaxing Environment:
- Enhance your reflexology experience by creating a calming atmosphere. This could involve dimming the lights, playing soft music, or using aromatherapy with essential oils to help relax your mind and body.
- Make sure the room is at a comfortable temperature and that you won’t be disturbed during your session.
5. Hydrate and Reflect Post-Session:
- Drinking water after a reflexology session can help flush out toxins that are released during the process. Stay hydrated to support your body’s natural detoxification.
- Take a few minutes after your session to reflect on how you feel. This can help you better understand your body’s responses to different reflex points and tailor future sessions to your specific needs.
By following these tips, your DIY hand reflexology sessions can become a cherished part of your wellness routine, offering a simple yet effective way to enhance your health and well-being from the comfort of your home.
Safety Considerations and When to Avoid DIY Hand Reflexology
While hand reflexology is a generally safe practice that can offer numerous health benefits, there are certain situations and conditions where it should be approached with caution or avoided altogether. Being aware of these safety considerations can help prevent complications and ensure that reflexology is a beneficial addition to your wellness routine.
1. Hand Injuries or Conditions:
- Avoid practicing hand reflexology if you have any active injuries, infections, or severe conditions affecting your hands such as severe arthritis, fractures, or wounds. These conditions can be exacerbated by the pressure and manipulation involved in reflexology.
2. Acute or Severe Illnesses:
- If you are experiencing acute illnesses, such as severe infections or inflammation, reflexology might not be advisable. Wait until you have recovered or consult with your healthcare provider before starting reflexology.
3. Chronic Conditions:
- For individuals with chronic conditions such as heart disease, diabetes, or cancer, reflexology should be approached with caution. These conditions can be affected by the systemic changes that reflexology might promote, such as increased circulation and relaxation which can alter blood pressure and glucose levels.
- Always consult with a healthcare provider before beginning any new therapy, including reflexology, especially if you have any serious health conditions or are under medical treatment.
4. Pregnancy:
- Reflexology can sometimes stimulate labor, so pregnant women, especially those in high-risk categories or with complications, should consult their healthcare provider before engaging in reflexology.
5. After Surgery:
- Avoid reflexology immediately after surgery as it may affect the healing process or interfere with post-operative recovery. Always follow your doctor’s advice on when it is safe to resume such practices.
6. Varicose Veins and Blood Clot Risks:
- If you have varicose veins or a history of blood clots, consult with a healthcare provider before practicing reflexology. The pressure applied during reflexology could potentially dislodge a clot or worsen varicose veins.
Conclusion:
- Reflexology is intended to support and not replace traditional medical treatments. It’s important to use common sense and to consult healthcare professionals when considering reflexology, particularly if you have existing health issues or concerns. By adhering to these guidelines, you can enjoy the benefits of reflexology safely and effectively.
Conclusion
DIY hand reflexology is a powerful tool you can use to maintain health and relieve stress. By learning to apply these techniques, you can enjoy the benefits of reflexology from the comfort of your home.
Further Resources
For those interested in exploring more about hand reflexology and its various aspects, we recommend checking out the following resources on our website:
- Hand Reflexology: Delve deeper into the specific techniques and benefits of hand reflexology. This article provides a comprehensive overview, perfect for those looking to expand their understanding or practice at home.
- Reflexology Benefits: Discover the wide range of benefits that reflexology can offer for both physical and mental health. This resource explores how reflexology can be a key component of a holistic health regimen.
- Reflexology Cost: Learn about the factors that influence the cost of reflexology services, helping you to make informed decisions about incorporating this therapy into your health and wellness plans.
- Home: Visit our main page to learn more about Reflexology Auckland and our full range of services.
These articles provide valuable insights and detailed information to help you better understand the potential of reflexology and how you can integrate it into your health routine safely and effectively. Whether you’re new to reflexology or looking to deepen your knowledge, these resources are excellent starting points.
Hand reflexology is a practice rooted in ancient medicine, using pressure points on the hands believed to correspond to various parts of the body. This guide introduces you to simple DIY hand reflexology techniques that you can use at home to enhance relaxation and promote overall wellness.
Key Sections of DIY Hand Reflexology :
What You Need to Get Started
Embarking on your DIY hand reflexology journey is straightforward and requires minimal setup. Here’s what you’ll need to ensure a comfortable and effective session:
1. Your Hands:
- The primary “tool” in hand reflexology is, of course, your own hands. Clean, well-moisturized hands can make the process smoother and more comfortable.
2. Comfortable Seating:
- Choose a comfortable chair or a seat where you can relax without straining your back. Sitting upright in a supportive chair is often best, as it allows you to easily access both of your hands.
3. Optional Tools:
- Soft Mat or Pillow: While not necessary, a soft mat on your lap or a pillow can provide support, making it easier to hold your hand comfortably during the session. This can be particularly helpful if you have a longer session planned or if you find holding your arm up tiresome.
- Lotion or Hand Cream: Applying a small amount of lotion or hand cream can reduce friction and make reflexology techniques more pleasurable and less abrasive on the skin.
- Relaxing Background Music: Consider playing some soft, ambient music to enhance relaxation and create a therapeutic environment. Music or nature sounds can help in maintaining a calm mind and a focused approach.
4. Quiet and Comfortable Environment:
- Find a spot in your home that is typically quiet and free from interruptions. This could be a dedicated room or a cozy corner where you feel relaxed. The idea is to create a space that feels like a sanctuary, where stressors and external distractions are minimized.
- Good Lighting: Ensure the area is well-lit so that you can see your hands clearly without straining your eyes. Natural light is ideal, but a soft lamp can also create a warm and inviting environment.
5. Setting the Mood:
- You might want to set a timer if you have limited time to practice, so you don’t need to watch the clock. This allows you to fully immerse in the experience without worrying about time.
- Keep a glass of water nearby to stay hydrated before and after the session, as reflexology can sometimes release toxins and hydration can help flush these from your system.
By preparing your space and having these items at hand, you can maximize the benefits of your DIY hand reflexology sessions, turning them into a restorative ritual that you look forward to each time.
Understanding the Basics of Hand Reflexology
Hand reflexology is a therapeutic method where specific points on the hands are manipulated to improve health and promote healing in various parts of the body. According to reflexology theory, each area on the hand corresponds to different organs and systems within the body.
By applying pressure to these reflex areas, you can influence the health of the corresponding body parts, potentially easing ailments and boosting overall well-being.
Step-by-Step Guide to DIY Hand Reflexology Techniques
Here’s how you can begin practicing hand reflexology on yourself with some basic techniques. Each method targets different areas and serves various purposes, from relieving tension to improving body functions.
1. Thumb Walking:
- How to Perform:
- Place the pad of your thumb on the area of your hand you wish to work on.
- Gently press down into the skin.
- Move your thumb forward in a small “walking” motion, inching along the hand.
- Continue this movement across different zones of the hand that correspond to areas of your body you wish to address.
- Benefits:
- This technique is excellent for navigating larger areas of the hand, such as the palm or the back of the hand, making it effective for broadly stimulating internal organs and body systems.
2. Finger Walking:
- How to Perform:
- Use your index and middle fingers to ‘walk’ along a specific line or area on the hand.
- Apply gentle pressure in a sequential, caterpillar-like motion.
- This method allows for more precise control and is ideal for smaller areas or where finer attention is needed.
- Benefits:
- Finger walking is particularly useful for detailed work on complex reflex areas like those between the bones of the hand, facilitating targeted effects on specific organs.
3. Hook and Backup:
- How to Perform:
- Press your thumb or another finger into a specific reflex point.
- Apply steady pressure to go slightly deeper.
- Gently pull the finger backward without lifting the pressure.
- Benefits:
- This technique reaches deeper layers of hand tissue, stimulating reflex points that are more deeply embedded and enhancing the impact on the corresponding internal areas.
4. Press and Rotate:
- How to Perform:
- Identify a reflex point on your hand.
- Press down firmly with your thumb.
- Slowly rotate your thumb over this point, maintaining constant pressure.
- Benefits:
- The rotating motion helps to increase blood circulation and nerve activity in the area, enhancing the reflexology effects and promoting healing in the associated body parts.
By mastering these fundamental hand reflexology techniques, you can begin to explore the benefits of this practice at home, offering yourself a way to support your health in a direct and personal manner.
Common Hand Reflex Points and Their Corresponding Benefits
Hand reflexology provides a unique approach to health, where specific points on your hands are associated with different parts of your body. By applying pressure to these points, you can potentially alleviate various ailments and improve your overall well-being. Here are some key reflex points located on the hands and the benefits they can offer:
1. The Thumb Base:
- Location and Technique:
- The base of the thumb corresponds to the head and neck area. You can apply pressure using the thumb of your opposite hand or perform gentle circular motions.
- Benefits:
- This point is especially beneficial for relieving headaches and reducing tension in the neck area. It can also be helpful in managing stress and fatigue that often accumulates in the head and neck.
2. The Index Finger Base:
- Location and Technique:
- Located at the base of the index finger, this point can be stimulated by pressing with the thumb and index finger of the opposite hand.
- Benefits:
- This reflex area is linked to the chest and respiratory system. Stimulating this point can aid in easing breathing difficulties, clearing chest congestion, and potentially providing relief from conditions like colds or bronchitis.
3. Center of the Palm:
- Location and Technique:
- The center of the palm acts as a reflex point for the stomach. Use the thumb of your opposite hand to apply a steady, firm pressure or perform a gentle rotating motion to stimulate this area.
- Benefits:
- This point is ideal for addressing issues related to digestion. It can help in soothing stomach pain, promoting better digestion, and alleviating symptoms of indigestion or bloating.
These reflex points are accessible and easy to work on, making them perfect for DIY hand reflexology sessions. By regularly stimulating these points, you can harness the potential benefits of reflexology to manage everyday ailments and enhance your health. Remember to approach reflexology with care and consult a professional if you have specific health conditions or concerns.
Tips for a Successful DIY Hand Reflexology Session
Hand reflexology is a flexible and easily accessible form of self-care that you can perform at home. To make the most out of your DIY hand reflexology sessions and ensure they are effective and enjoyable, follow these practical tips:
1. Start with Light Pressure and Adjust as Needed:
- Begin each session by applying gentle pressure to the reflex points. This helps your body to adjust without causing discomfort.
- Gradually increase the pressure as per your comfort level. It’s important to listen to your body and avoid applying too much force, which could lead to discomfort or pain.
2. Duration of Each Session:
- A standard hand reflexology session can be as short or as long as you prefer, typically lasting between 5 to 30 minutes.
- If you’re just starting out, begin with shorter sessions to see how your body responds before gradually increasing the duration.
- Even a few minutes can be beneficial, especially if you are dealing with stress or need a quick break to rejuvenate.
3. Regular Practice for Optimal Benefits:
- Consistency is key in reflexology. Aim to practice hand reflexology 2-3 times a week to maximize the health benefits.
- Regular sessions can help in maintaining improved circulation, stress relief, and better overall health.
4. Create a Relaxing Environment:
- Enhance your reflexology experience by creating a calming atmosphere. This could involve dimming the lights, playing soft music, or using aromatherapy with essential oils to help relax your mind and body.
- Make sure the room is at a comfortable temperature and that you won’t be disturbed during your session.
5. Hydrate and Reflect Post-Session:
- Drinking water after a reflexology session can help flush out toxins that are released during the process. Stay hydrated to support your body’s natural detoxification.
- Take a few minutes after your session to reflect on how you feel. This can help you better understand your body’s responses to different reflex points and tailor future sessions to your specific needs.
By following these tips, your DIY hand reflexology sessions can become a cherished part of your wellness routine, offering a simple yet effective way to enhance your health and well-being from the comfort of your home.
Safety Considerations and When to Avoid DIY Hand Reflexology
While hand reflexology is a generally safe practice that can offer numerous health benefits, there are certain situations and conditions where it should be approached with caution or avoided altogether. Being aware of these safety considerations can help prevent complications and ensure that reflexology is a beneficial addition to your wellness routine.
1. Hand Injuries or Conditions:
- Avoid practicing hand reflexology if you have any active injuries, infections, or severe conditions affecting your hands such as severe arthritis, fractures, or wounds. These conditions can be exacerbated by the pressure and manipulation involved in reflexology.
2. Acute or Severe Illnesses:
- If you are experiencing acute illnesses, such as severe infections or inflammation, reflexology might not be advisable. Wait until you have recovered or consult with your healthcare provider before starting reflexology.
3. Chronic Conditions:
- For individuals with chronic conditions such as heart disease, diabetes, or cancer, reflexology should be approached with caution. These conditions can be affected by the systemic changes that reflexology might promote, such as increased circulation and relaxation which can alter blood pressure and glucose levels.
- Always consult with a healthcare provider before beginning any new therapy, including reflexology, especially if you have any serious health conditions or are under medical treatment.
4. Pregnancy:
- Reflexology can sometimes stimulate labor, so pregnant women, especially those in high-risk categories or with complications, should consult their healthcare provider before engaging in reflexology.
5. After Surgery:
- Avoid reflexology immediately after surgery as it may affect the healing process or interfere with post-operative recovery. Always follow your doctor’s advice on when it is safe to resume such practices.
6. Varicose Veins and Blood Clot Risks:
- If you have varicose veins or a history of blood clots, consult with a healthcare provider before practicing reflexology. The pressure applied during reflexology could potentially dislodge a clot or worsen varicose veins.
Conclusion:
- Reflexology is intended to support and not replace traditional medical treatments. It’s important to use common sense and to consult healthcare professionals when considering reflexology, particularly if you have existing health issues or concerns. By adhering to these guidelines, you can enjoy the benefits of reflexology safely and effectively.
Conclusion
DIY hand reflexology is a powerful tool you can use to maintain health and relieve stress. By learning to apply these techniques, you can enjoy the benefits of reflexology from the comfort of your home.
Further Resources
For those interested in exploring more about hand reflexology and its various aspects, we recommend checking out the following resources on our website:
- Hand Reflexology: Delve deeper into the specific techniques and benefits of hand reflexology. This article provides a comprehensive overview, perfect for those looking to expand their understanding or practice at home.
- Reflexology Benefits: Discover the wide range of benefits that reflexology can offer for both physical and mental health. This resource explores how reflexology can be a key component of a holistic health regimen.
- Reflexology Cost: Learn about the factors that influence the cost of reflexology services, helping you to make informed decisions about incorporating this therapy into your health and wellness plans.
- Home: Visit our main page to learn more about Reflexology Auckland and our full range of services.
These articles provide valuable insights and detailed information to help you better understand the potential of reflexology and how you can integrate it into your health routine safely and effectively. Whether you’re new to reflexology or looking to deepen your knowledge, these resources are excellent starting points.
- Location and Technique:
- The base of the thumb corresponds to the head and neck area. You can apply pressure using the thumb of your opposite hand or perform gentle circular motions.
- Benefits:
- This point is especially beneficial for relieving headaches and reducing tension in the neck area. It can also be helpful in managing stress and fatigue that often accumulates in the head and neck.
2. The Index Finger Base:
- Location and Technique:
- Located at the base of the index finger, this point can be stimulated by pressing with the thumb and index finger of the opposite hand.
- Benefits:
- This reflex area is linked to the chest and respiratory system. Stimulating this point can aid in easing breathing difficulties, clearing chest congestion, and potentially providing relief from conditions like colds or bronchitis.
3. Center of the Palm:
- Location and Technique:
- The center of the palm acts as a reflex point for the stomach. Use the thumb of your opposite hand to apply a steady, firm pressure or perform a gentle rotating motion to stimulate this area.
- Benefits:
- This point is ideal for addressing issues related to digestion. It can help in soothing stomach pain, promoting better digestion, and alleviating symptoms of indigestion or bloating.
These reflex points are accessible and easy to work on, making them perfect for DIY hand reflexology sessions. By regularly stimulating these points, you can harness the potential benefits of reflexology to manage everyday ailments and enhance your health. Remember to approach reflexology with care and consult a professional if you have specific health conditions or concerns.
Tips for a Successful DIY Hand Reflexology Session
Hand reflexology is a flexible and easily accessible form of self-care that you can perform at home. To make the most out of your DIY hand reflexology sessions and ensure they are effective and enjoyable, follow these practical tips:
1. Start with Light Pressure and Adjust as Needed:
- Begin each session by applying gentle pressure to the reflex points. This helps your body to adjust without causing discomfort.
- Gradually increase the pressure as per your comfort level. It’s important to listen to your body and avoid applying too much force, which could lead to discomfort or pain.
2. Duration of Each Session:
- A standard hand reflexology session can be as short or as long as you prefer, typically lasting between 5 to 30 minutes.
- If you’re just starting out, begin with shorter sessions to see how your body responds before gradually increasing the duration.
- Even a few minutes can be beneficial, especially if you are dealing with stress or need a quick break to rejuvenate.
3. Regular Practice for Optimal Benefits:
- Consistency is key in reflexology. Aim to practice hand reflexology 2-3 times a week to maximize the health benefits.
- Regular sessions can help in maintaining improved circulation, stress relief, and better overall health.
4. Create a Relaxing Environment:
- Enhance your reflexology experience by creating a calming atmosphere. This could involve dimming the lights, playing soft music, or using aromatherapy with essential oils to help relax your mind and body.
- Make sure the room is at a comfortable temperature and that you won’t be disturbed during your session.
5. Hydrate and Reflect Post-Session:
- Drinking water after a reflexology session can help flush out toxins that are released during the process. Stay hydrated to support your body’s natural detoxification.
- Take a few minutes after your session to reflect on how you feel. This can help you better understand your body’s responses to different reflex points and tailor future sessions to your specific needs.
By following these tips, your DIY hand reflexology sessions can become a cherished part of your wellness routine, offering a simple yet effective way to enhance your health and well-being from the comfort of your home.
Safety Considerations and When to Avoid DIY Hand Reflexology
While hand reflexology is a generally safe practice that can offer numerous health benefits, there are certain situations and conditions where it should be approached with caution or avoided altogether. Being aware of these safety considerations can help prevent complications and ensure that reflexology is a beneficial addition to your wellness routine.
1. Hand Injuries or Conditions:
- Avoid practicing hand reflexology if you have any active injuries, infections, or severe conditions affecting your hands such as severe arthritis, fractures, or wounds. These conditions can be exacerbated by the pressure and manipulation involved in reflexology.
2. Acute or Severe Illnesses:
- If you are experiencing acute illnesses, such as severe infections or inflammation, reflexology might not be advisable. Wait until you have recovered or consult with your healthcare provider before starting reflexology.
3. Chronic Conditions:
- For individuals with chronic conditions such as heart disease, diabetes, or cancer, reflexology should be approached with caution. These conditions can be affected by the systemic changes that reflexology might promote, such as increased circulation and relaxation which can alter blood pressure and glucose levels.
- Always consult with a healthcare provider before beginning any new therapy, including reflexology, especially if you have any serious health conditions or are under medical treatment.
4. Pregnancy:
- Reflexology can sometimes stimulate labor, so pregnant women, especially those in high-risk categories or with complications, should consult their healthcare provider before engaging in reflexology.
5. After Surgery:
- Avoid reflexology immediately after surgery as it may affect the healing process or interfere with post-operative recovery. Always follow your doctor’s advice on when it is safe to resume such practices.
6. Varicose Veins and Blood Clot Risks:
- If you have varicose veins or a history of blood clots, consult with a healthcare provider before practicing reflexology. The pressure applied during reflexology could potentially dislodge a clot or worsen varicose veins.
Conclusion:
- Reflexology is intended to support and not replace traditional medical treatments. It’s important to use common sense and to consult healthcare professionals when considering reflexology, particularly if you have existing health issues or concerns. By adhering to these guidelines, you can enjoy the benefits of reflexology safely and effectively.
Conclusion
DIY hand reflexology is a powerful tool you can use to maintain health and relieve stress. By learning to apply these techniques, you can enjoy the benefits of reflexology from the comfort of your home.
Further Resources
For those interested in exploring more about hand reflexology and its various aspects, we recommend checking out the following resources on our website:
- Hand Reflexology: Delve deeper into the specific techniques and benefits of hand reflexology. This article provides a comprehensive overview, perfect for those looking to expand their understanding or practice at home.
- Reflexology Benefits: Discover the wide range of benefits that reflexology can offer for both physical and mental health. This resource explores how reflexology can be a key component of a holistic health regimen.
- Reflexology Cost: Learn about the factors that influence the cost of reflexology services, helping you to make informed decisions about incorporating this therapy into your health and wellness plans.
- Home: Visit our main page to learn more about Reflexology Auckland and our full range of services.
These articles provide valuable insights and detailed information to help you better understand the potential of reflexology and how you can integrate it into your health routine safely and effectively. Whether you’re new to reflexology or looking to deepen your knowledge, these resources are excellent starting points.
- How to Perform:
- Press your thumb or another finger into a specific reflex point.
- Apply steady pressure to go slightly deeper.
- Gently pull the finger backward without lifting the pressure.
- Benefits:
- This technique reaches deeper layers of hand tissue, stimulating reflex points that are more deeply embedded and enhancing the impact on the corresponding internal areas.
4. Press and Rotate:
- How to Perform:
- Identify a reflex point on your hand.
- Press down firmly with your thumb.
- Slowly rotate your thumb over this point, maintaining constant pressure.
- Benefits:
- The rotating motion helps to increase blood circulation and nerve activity in the area, enhancing the reflexology effects and promoting healing in the associated body parts.
By mastering these fundamental hand reflexology techniques, you can begin to explore the benefits of this practice at home, offering yourself a way to support your health in a direct and personal manner.
Common Hand Reflex Points and Their Corresponding Benefits
Hand reflexology provides a unique approach to health, where specific points on your hands are associated with different parts of your body. By applying pressure to these points, you can potentially alleviate various ailments and improve your overall well-being. Here are some key reflex points located on the hands and the benefits they can offer:
1. The Thumb Base:
- Location and Technique:
- The base of the thumb corresponds to the head and neck area. You can apply pressure using the thumb of your opposite hand or perform gentle circular motions.
- Benefits:
- This point is especially beneficial for relieving headaches and reducing tension in the neck area. It can also be helpful in managing stress and fatigue that often accumulates in the head and neck.
2. The Index Finger Base:
- Location and Technique:
- Located at the base of the index finger, this point can be stimulated by pressing with the thumb and index finger of the opposite hand.
- Benefits:
- This reflex area is linked to the chest and respiratory system. Stimulating this point can aid in easing breathing difficulties, clearing chest congestion, and potentially providing relief from conditions like colds or bronchitis.
3. Center of the Palm:
- Location and Technique:
- The center of the palm acts as a reflex point for the stomach. Use the thumb of your opposite hand to apply a steady, firm pressure or perform a gentle rotating motion to stimulate this area.
- Benefits:
- This point is ideal for addressing issues related to digestion. It can help in soothing stomach pain, promoting better digestion, and alleviating symptoms of indigestion or bloating.
These reflex points are accessible and easy to work on, making them perfect for DIY hand reflexology sessions. By regularly stimulating these points, you can harness the potential benefits of reflexology to manage everyday ailments and enhance your health. Remember to approach reflexology with care and consult a professional if you have specific health conditions or concerns.
Tips for a Successful DIY Hand Reflexology Session
Hand reflexology is a flexible and easily accessible form of self-care that you can perform at home. To make the most out of your DIY hand reflexology sessions and ensure they are effective and enjoyable, follow these practical tips:
1. Start with Light Pressure and Adjust as Needed:
- Begin each session by applying gentle pressure to the reflex points. This helps your body to adjust without causing discomfort.
- Gradually increase the pressure as per your comfort level. It’s important to listen to your body and avoid applying too much force, which could lead to discomfort or pain.
2. Duration of Each Session:
- A standard hand reflexology session can be as short or as long as you prefer, typically lasting between 5 to 30 minutes.
- If you’re just starting out, begin with shorter sessions to see how your body responds before gradually increasing the duration.
- Even a few minutes can be beneficial, especially if you are dealing with stress or need a quick break to rejuvenate.
3. Regular Practice for Optimal Benefits:
- Consistency is key in reflexology. Aim to practice hand reflexology 2-3 times a week to maximize the health benefits.
- Regular sessions can help in maintaining improved circulation, stress relief, and better overall health.
4. Create a Relaxing Environment:
- Enhance your reflexology experience by creating a calming atmosphere. This could involve dimming the lights, playing soft music, or using aromatherapy with essential oils to help relax your mind and body.
- Make sure the room is at a comfortable temperature and that you won’t be disturbed during your session.
5. Hydrate and Reflect Post-Session:
- Drinking water after a reflexology session can help flush out toxins that are released during the process. Stay hydrated to support your body’s natural detoxification.
- Take a few minutes after your session to reflect on how you feel. This can help you better understand your body’s responses to different reflex points and tailor future sessions to your specific needs.
By following these tips, your DIY hand reflexology sessions can become a cherished part of your wellness routine, offering a simple yet effective way to enhance your health and well-being from the comfort of your home.
Safety Considerations and When to Avoid DIY Hand Reflexology
While hand reflexology is a generally safe practice that can offer numerous health benefits, there are certain situations and conditions where it should be approached with caution or avoided altogether. Being aware of these safety considerations can help prevent complications and ensure that reflexology is a beneficial addition to your wellness routine.
1. Hand Injuries or Conditions:
- Avoid practicing hand reflexology if you have any active injuries, infections, or severe conditions affecting your hands such as severe arthritis, fractures, or wounds. These conditions can be exacerbated by the pressure and manipulation involved in reflexology.
2. Acute or Severe Illnesses:
- If you are experiencing acute illnesses, such as severe infections or inflammation, reflexology might not be advisable. Wait until you have recovered or consult with your healthcare provider before starting reflexology.
3. Chronic Conditions:
- For individuals with chronic conditions such as heart disease, diabetes, or cancer, reflexology should be approached with caution. These conditions can be affected by the systemic changes that reflexology might promote, such as increased circulation and relaxation which can alter blood pressure and glucose levels.
- Always consult with a healthcare provider before beginning any new therapy, including reflexology, especially if you have any serious health conditions or are under medical treatment.
4. Pregnancy:
- Reflexology can sometimes stimulate labor, so pregnant women, especially those in high-risk categories or with complications, should consult their healthcare provider before engaging in reflexology.
5. After Surgery:
- Avoid reflexology immediately after surgery as it may affect the healing process or interfere with post-operative recovery. Always follow your doctor’s advice on when it is safe to resume such practices.
6. Varicose Veins and Blood Clot Risks:
- If you have varicose veins or a history of blood clots, consult with a healthcare provider before practicing reflexology. The pressure applied during reflexology could potentially dislodge a clot or worsen varicose veins.
Conclusion:
- Reflexology is intended to support and not replace traditional medical treatments. It’s important to use common sense and to consult healthcare professionals when considering reflexology, particularly if you have existing health issues or concerns. By adhering to these guidelines, you can enjoy the benefits of reflexology safely and effectively.
Conclusion
DIY hand reflexology is a powerful tool you can use to maintain health and relieve stress. By learning to apply these techniques, you can enjoy the benefits of reflexology from the comfort of your home.
Further Resources
For those interested in exploring more about hand reflexology and its various aspects, we recommend checking out the following resources on our website:
- Hand Reflexology: Delve deeper into the specific techniques and benefits of hand reflexology. This article provides a comprehensive overview, perfect for those looking to expand their understanding or practice at home.
- Reflexology Benefits: Discover the wide range of benefits that reflexology can offer for both physical and mental health. This resource explores how reflexology can be a key component of a holistic health regimen.
- Reflexology Cost: Learn about the factors that influence the cost of reflexology services, helping you to make informed decisions about incorporating this therapy into your health and wellness plans.
- Home: Visit our main page to learn more about Reflexology Auckland and our full range of services.
These articles provide valuable insights and detailed information to help you better understand the potential of reflexology and how you can integrate it into your health routine safely and effectively. Whether you’re new to reflexology or looking to deepen your knowledge, these resources are excellent starting points.
- How to Perform:
- Use your index and middle fingers to ‘walk’ along a specific line or area on the hand.
- Apply gentle pressure in a sequential, caterpillar-like motion.
- This method allows for more precise control and is ideal for smaller areas or where finer attention is needed.
- Benefits:
- Finger walking is particularly useful for detailed work on complex reflex areas like those between the bones of the hand, facilitating targeted effects on specific organs.
3. Hook and Backup:
- How to Perform:
- Press your thumb or another finger into a specific reflex point.
- Apply steady pressure to go slightly deeper.
- Gently pull the finger backward without lifting the pressure.
- Benefits:
- This technique reaches deeper layers of hand tissue, stimulating reflex points that are more deeply embedded and enhancing the impact on the corresponding internal areas.
4. Press and Rotate:
- How to Perform:
- Identify a reflex point on your hand.
- Press down firmly with your thumb.
- Slowly rotate your thumb over this point, maintaining constant pressure.
- Benefits:
- The rotating motion helps to increase blood circulation and nerve activity in the area, enhancing the reflexology effects and promoting healing in the associated body parts.
By mastering these fundamental hand reflexology techniques, you can begin to explore the benefits of this practice at home, offering yourself a way to support your health in a direct and personal manner.
Common Hand Reflex Points and Their Corresponding Benefits
Hand reflexology provides a unique approach to health, where specific points on your hands are associated with different parts of your body. By applying pressure to these points, you can potentially alleviate various ailments and improve your overall well-being. Here are some key reflex points located on the hands and the benefits they can offer:
1. The Thumb Base:
- Location and Technique:
- The base of the thumb corresponds to the head and neck area. You can apply pressure using the thumb of your opposite hand or perform gentle circular motions.
- Benefits:
- This point is especially beneficial for relieving headaches and reducing tension in the neck area. It can also be helpful in managing stress and fatigue that often accumulates in the head and neck.
2. The Index Finger Base:
- Location and Technique:
- Located at the base of the index finger, this point can be stimulated by pressing with the thumb and index finger of the opposite hand.
- Benefits:
- This reflex area is linked to the chest and respiratory system. Stimulating this point can aid in easing breathing difficulties, clearing chest congestion, and potentially providing relief from conditions like colds or bronchitis.
3. Center of the Palm:
- Location and Technique:
- The center of the palm acts as a reflex point for the stomach. Use the thumb of your opposite hand to apply a steady, firm pressure or perform a gentle rotating motion to stimulate this area.
- Benefits:
- This point is ideal for addressing issues related to digestion. It can help in soothing stomach pain, promoting better digestion, and alleviating symptoms of indigestion or bloating.
These reflex points are accessible and easy to work on, making them perfect for DIY hand reflexology sessions. By regularly stimulating these points, you can harness the potential benefits of reflexology to manage everyday ailments and enhance your health. Remember to approach reflexology with care and consult a professional if you have specific health conditions or concerns.
Tips for a Successful DIY Hand Reflexology Session
Hand reflexology is a flexible and easily accessible form of self-care that you can perform at home. To make the most out of your DIY hand reflexology sessions and ensure they are effective and enjoyable, follow these practical tips:
1. Start with Light Pressure and Adjust as Needed:
- Begin each session by applying gentle pressure to the reflex points. This helps your body to adjust without causing discomfort.
- Gradually increase the pressure as per your comfort level. It’s important to listen to your body and avoid applying too much force, which could lead to discomfort or pain.
2. Duration of Each Session:
- A standard hand reflexology session can be as short or as long as you prefer, typically lasting between 5 to 30 minutes.
- If you’re just starting out, begin with shorter sessions to see how your body responds before gradually increasing the duration.
- Even a few minutes can be beneficial, especially if you are dealing with stress or need a quick break to rejuvenate.
3. Regular Practice for Optimal Benefits:
- Consistency is key in reflexology. Aim to practice hand reflexology 2-3 times a week to maximize the health benefits.
- Regular sessions can help in maintaining improved circulation, stress relief, and better overall health.
4. Create a Relaxing Environment:
- Enhance your reflexology experience by creating a calming atmosphere. This could involve dimming the lights, playing soft music, or using aromatherapy with essential oils to help relax your mind and body.
- Make sure the room is at a comfortable temperature and that you won’t be disturbed during your session.
5. Hydrate and Reflect Post-Session:
- Drinking water after a reflexology session can help flush out toxins that are released during the process. Stay hydrated to support your body’s natural detoxification.
- Take a few minutes after your session to reflect on how you feel. This can help you better understand your body’s responses to different reflex points and tailor future sessions to your specific needs.
By following these tips, your DIY hand reflexology sessions can become a cherished part of your wellness routine, offering a simple yet effective way to enhance your health and well-being from the comfort of your home.
Safety Considerations and When to Avoid DIY Hand Reflexology
While hand reflexology is a generally safe practice that can offer numerous health benefits, there are certain situations and conditions where it should be approached with caution or avoided altogether. Being aware of these safety considerations can help prevent complications and ensure that reflexology is a beneficial addition to your wellness routine.
1. Hand Injuries or Conditions:
- Avoid practicing hand reflexology if you have any active injuries, infections, or severe conditions affecting your hands such as severe arthritis, fractures, or wounds. These conditions can be exacerbated by the pressure and manipulation involved in reflexology.
2. Acute or Severe Illnesses:
- If you are experiencing acute illnesses, such as severe infections or inflammation, reflexology might not be advisable. Wait until you have recovered or consult with your healthcare provider before starting reflexology.
3. Chronic Conditions:
- For individuals with chronic conditions such as heart disease, diabetes, or cancer, reflexology should be approached with caution. These conditions can be affected by the systemic changes that reflexology might promote, such as increased circulation and relaxation which can alter blood pressure and glucose levels.
- Always consult with a healthcare provider before beginning any new therapy, including reflexology, especially if you have any serious health conditions or are under medical treatment.
4. Pregnancy:
- Reflexology can sometimes stimulate labor, so pregnant women, especially those in high-risk categories or with complications, should consult their healthcare provider before engaging in reflexology.
5. After Surgery:
- Avoid reflexology immediately after surgery as it may affect the healing process or interfere with post-operative recovery. Always follow your doctor’s advice on when it is safe to resume such practices.
6. Varicose Veins and Blood Clot Risks:
- If you have varicose veins or a history of blood clots, consult with a healthcare provider before practicing reflexology. The pressure applied during reflexology could potentially dislodge a clot or worsen varicose veins.
Conclusion:
- Reflexology is intended to support and not replace traditional medical treatments. It’s important to use common sense and to consult healthcare professionals when considering reflexology, particularly if you have existing health issues or concerns. By adhering to these guidelines, you can enjoy the benefits of reflexology safely and effectively.
Conclusion
DIY hand reflexology is a powerful tool you can use to maintain health and relieve stress. By learning to apply these techniques, you can enjoy the benefits of reflexology from the comfort of your home.
Further Resources
For those interested in exploring more about hand reflexology and its various aspects, we recommend checking out the following resources on our website:
- Hand Reflexology: Delve deeper into the specific techniques and benefits of hand reflexology. This article provides a comprehensive overview, perfect for those looking to expand their understanding or practice at home.
- Reflexology Benefits: Discover the wide range of benefits that reflexology can offer for both physical and mental health. This resource explores how reflexology can be a key component of a holistic health regimen.
- Reflexology Cost: Learn about the factors that influence the cost of reflexology services, helping you to make informed decisions about incorporating this therapy into your health and wellness plans.
- Home: Visit our main page to learn more about Reflexology Auckland and our full range of services.
These articles provide valuable insights and detailed information to help you better understand the potential of reflexology and how you can integrate it into your health routine safely and effectively. Whether you’re new to reflexology or looking to deepen your knowledge, these resources are excellent starting points.
- How to Perform:
- Place the pad of your thumb on the area of your hand you wish to work on.
- Gently press down into the skin.
- Move your thumb forward in a small “walking” motion, inching along the hand.
- Continue this movement across different zones of the hand that correspond to areas of your body you wish to address.
- Benefits:
- This technique is excellent for navigating larger areas of the hand, such as the palm or the back of the hand, making it effective for broadly stimulating internal organs and body systems.
2. Finger Walking:
- How to Perform:
- Use your index and middle fingers to ‘walk’ along a specific line or area on the hand.
- Apply gentle pressure in a sequential, caterpillar-like motion.
- This method allows for more precise control and is ideal for smaller areas or where finer attention is needed.
- Benefits:
- Finger walking is particularly useful for detailed work on complex reflex areas like those between the bones of the hand, facilitating targeted effects on specific organs.
3. Hook and Backup:
- How to Perform:
- Press your thumb or another finger into a specific reflex point.
- Apply steady pressure to go slightly deeper.
- Gently pull the finger backward without lifting the pressure.
- Benefits:
- This technique reaches deeper layers of hand tissue, stimulating reflex points that are more deeply embedded and enhancing the impact on the corresponding internal areas.
4. Press and Rotate:
- How to Perform:
- Identify a reflex point on your hand.
- Press down firmly with your thumb.
- Slowly rotate your thumb over this point, maintaining constant pressure.
- Benefits:
- The rotating motion helps to increase blood circulation and nerve activity in the area, enhancing the reflexology effects and promoting healing in the associated body parts.
By mastering these fundamental hand reflexology techniques, you can begin to explore the benefits of this practice at home, offering yourself a way to support your health in a direct and personal manner.
Common Hand Reflex Points and Their Corresponding Benefits
Hand reflexology provides a unique approach to health, where specific points on your hands are associated with different parts of your body. By applying pressure to these points, you can potentially alleviate various ailments and improve your overall well-being. Here are some key reflex points located on the hands and the benefits they can offer:
1. The Thumb Base:
- Location and Technique:
- The base of the thumb corresponds to the head and neck area. You can apply pressure using the thumb of your opposite hand or perform gentle circular motions.
- Benefits:
- This point is especially beneficial for relieving headaches and reducing tension in the neck area. It can also be helpful in managing stress and fatigue that often accumulates in the head and neck.
2. The Index Finger Base:
- Location and Technique:
- Located at the base of the index finger, this point can be stimulated by pressing with the thumb and index finger of the opposite hand.
- Benefits:
- This reflex area is linked to the chest and respiratory system. Stimulating this point can aid in easing breathing difficulties, clearing chest congestion, and potentially providing relief from conditions like colds or bronchitis.
3. Center of the Palm:
- Location and Technique:
- The center of the palm acts as a reflex point for the stomach. Use the thumb of your opposite hand to apply a steady, firm pressure or perform a gentle rotating motion to stimulate this area.
- Benefits:
- This point is ideal for addressing issues related to digestion. It can help in soothing stomach pain, promoting better digestion, and alleviating symptoms of indigestion or bloating.
These reflex points are accessible and easy to work on, making them perfect for DIY hand reflexology sessions. By regularly stimulating these points, you can harness the potential benefits of reflexology to manage everyday ailments and enhance your health. Remember to approach reflexology with care and consult a professional if you have specific health conditions or concerns.
Tips for a Successful DIY Hand Reflexology Session
Hand reflexology is a flexible and easily accessible form of self-care that you can perform at home. To make the most out of your DIY hand reflexology sessions and ensure they are effective and enjoyable, follow these practical tips:
1. Start with Light Pressure and Adjust as Needed:
- Begin each session by applying gentle pressure to the reflex points. This helps your body to adjust without causing discomfort.
- Gradually increase the pressure as per your comfort level. It’s important to listen to your body and avoid applying too much force, which could lead to discomfort or pain.
2. Duration of Each Session:
- A standard hand reflexology session can be as short or as long as you prefer, typically lasting between 5 to 30 minutes.
- If you’re just starting out, begin with shorter sessions to see how your body responds before gradually increasing the duration.
- Even a few minutes can be beneficial, especially if you are dealing with stress or need a quick break to rejuvenate.
3. Regular Practice for Optimal Benefits:
- Consistency is key in reflexology. Aim to practice hand reflexology 2-3 times a week to maximize the health benefits.
- Regular sessions can help in maintaining improved circulation, stress relief, and better overall health.
4. Create a Relaxing Environment:
- Enhance your reflexology experience by creating a calming atmosphere. This could involve dimming the lights, playing soft music, or using aromatherapy with essential oils to help relax your mind and body.
- Make sure the room is at a comfortable temperature and that you won’t be disturbed during your session.
5. Hydrate and Reflect Post-Session:
- Drinking water after a reflexology session can help flush out toxins that are released during the process. Stay hydrated to support your body’s natural detoxification.
- Take a few minutes after your session to reflect on how you feel. This can help you better understand your body’s responses to different reflex points and tailor future sessions to your specific needs.
By following these tips, your DIY hand reflexology sessions can become a cherished part of your wellness routine, offering a simple yet effective way to enhance your health and well-being from the comfort of your home.
Safety Considerations and When to Avoid DIY Hand Reflexology
While hand reflexology is a generally safe practice that can offer numerous health benefits, there are certain situations and conditions where it should be approached with caution or avoided altogether. Being aware of these safety considerations can help prevent complications and ensure that reflexology is a beneficial addition to your wellness routine.
1. Hand Injuries or Conditions:
- Avoid practicing hand reflexology if you have any active injuries, infections, or severe conditions affecting your hands such as severe arthritis, fractures, or wounds. These conditions can be exacerbated by the pressure and manipulation involved in reflexology.
2. Acute or Severe Illnesses:
- If you are experiencing acute illnesses, such as severe infections or inflammation, reflexology might not be advisable. Wait until you have recovered or consult with your healthcare provider before starting reflexology.
3. Chronic Conditions:
- For individuals with chronic conditions such as heart disease, diabetes, or cancer, reflexology should be approached with caution. These conditions can be affected by the systemic changes that reflexology might promote, such as increased circulation and relaxation which can alter blood pressure and glucose levels.
- Always consult with a healthcare provider before beginning any new therapy, including reflexology, especially if you have any serious health conditions or are under medical treatment.
4. Pregnancy:
- Reflexology can sometimes stimulate labor, so pregnant women, especially those in high-risk categories or with complications, should consult their healthcare provider before engaging in reflexology.
5. After Surgery:
- Avoid reflexology immediately after surgery as it may affect the healing process or interfere with post-operative recovery. Always follow your doctor’s advice on when it is safe to resume such practices.
6. Varicose Veins and Blood Clot Risks:
- If you have varicose veins or a history of blood clots, consult with a healthcare provider before practicing reflexology. The pressure applied during reflexology could potentially dislodge a clot or worsen varicose veins.
Conclusion:
- Reflexology is intended to support and not replace traditional medical treatments. It’s important to use common sense and to consult healthcare professionals when considering reflexology, particularly if you have existing health issues or concerns. By adhering to these guidelines, you can enjoy the benefits of reflexology safely and effectively.
Conclusion
DIY hand reflexology is a powerful tool you can use to maintain health and relieve stress. By learning to apply these techniques, you can enjoy the benefits of reflexology from the comfort of your home.
Further Resources
For those interested in exploring more about hand reflexology and its various aspects, we recommend checking out the following resources on our website:
- Hand Reflexology: Delve deeper into the specific techniques and benefits of hand reflexology. This article provides a comprehensive overview, perfect for those looking to expand their understanding or practice at home.
- Reflexology Benefits: Discover the wide range of benefits that reflexology can offer for both physical and mental health. This resource explores how reflexology can be a key component of a holistic health regimen.
- Reflexology Cost: Learn about the factors that influence the cost of reflexology services, helping you to make informed decisions about incorporating this therapy into your health and wellness plans.
- Home: Visit our main page to learn more about Reflexology Auckland and our full range of services.
These articles provide valuable insights and detailed information to help you better understand the potential of reflexology and how you can integrate it into your health routine safely and effectively. Whether you’re new to reflexology or looking to deepen your knowledge, these resources are excellent starting points.
Hand reflexology is a practice rooted in ancient medicine, using pressure points on the hands believed to correspond to various parts of the body. This guide introduces you to simple DIY hand reflexology techniques that you can use at home to enhance relaxation and promote overall wellness.
Key Sections of DIY Hand Reflexology :
What You Need to Get Started
Embarking on your DIY hand reflexology journey is straightforward and requires minimal setup. Here’s what you’ll need to ensure a comfortable and effective session:
1. Your Hands:
- The primary “tool” in hand reflexology is, of course, your own hands. Clean, well-moisturized hands can make the process smoother and more comfortable.
2. Comfortable Seating:
- Choose a comfortable chair or a seat where you can relax without straining your back. Sitting upright in a supportive chair is often best, as it allows you to easily access both of your hands.
3. Optional Tools:
- Soft Mat or Pillow: While not necessary, a soft mat on your lap or a pillow can provide support, making it easier to hold your hand comfortably during the session. This can be particularly helpful if you have a longer session planned or if you find holding your arm up tiresome.
- Lotion or Hand Cream: Applying a small amount of lotion or hand cream can reduce friction and make reflexology techniques more pleasurable and less abrasive on the skin.
- Relaxing Background Music: Consider playing some soft, ambient music to enhance relaxation and create a therapeutic environment. Music or nature sounds can help in maintaining a calm mind and a focused approach.
4. Quiet and Comfortable Environment:
- Find a spot in your home that is typically quiet and free from interruptions. This could be a dedicated room or a cozy corner where you feel relaxed. The idea is to create a space that feels like a sanctuary, where stressors and external distractions are minimized.
- Good Lighting: Ensure the area is well-lit so that you can see your hands clearly without straining your eyes. Natural light is ideal, but a soft lamp can also create a warm and inviting environment.
5. Setting the Mood:
- You might want to set a timer if you have limited time to practice, so you don’t need to watch the clock. This allows you to fully immerse in the experience without worrying about time.
- Keep a glass of water nearby to stay hydrated before and after the session, as reflexology can sometimes release toxins and hydration can help flush these from your system.
By preparing your space and having these items at hand, you can maximize the benefits of your DIY hand reflexology sessions, turning them into a restorative ritual that you look forward to each time.
Understanding the Basics of Hand Reflexology
Hand reflexology is a therapeutic method where specific points on the hands are manipulated to improve health and promote healing in various parts of the body. According to reflexology theory, each area on the hand corresponds to different organs and systems within the body.
By applying pressure to these reflex areas, you can influence the health of the corresponding body parts, potentially easing ailments and boosting overall well-being.
Step-by-Step Guide to DIY Hand Reflexology Techniques
Here’s how you can begin practicing hand reflexology on yourself with some basic techniques. Each method targets different areas and serves various purposes, from relieving tension to improving body functions.
1. Thumb Walking:
- How to Perform:
- Place the pad of your thumb on the area of your hand you wish to work on.
- Gently press down into the skin.
- Move your thumb forward in a small “walking” motion, inching along the hand.
- Continue this movement across different zones of the hand that correspond to areas of your body you wish to address.
- Benefits:
- This technique is excellent for navigating larger areas of the hand, such as the palm or the back of the hand, making it effective for broadly stimulating internal organs and body systems.
2. Finger Walking:
- How to Perform:
- Use your index and middle fingers to ‘walk’ along a specific line or area on the hand.
- Apply gentle pressure in a sequential, caterpillar-like motion.
- This method allows for more precise control and is ideal for smaller areas or where finer attention is needed.
- Benefits:
- Finger walking is particularly useful for detailed work on complex reflex areas like those between the bones of the hand, facilitating targeted effects on specific organs.
3. Hook and Backup:
- How to Perform:
- Press your thumb or another finger into a specific reflex point.
- Apply steady pressure to go slightly deeper.
- Gently pull the finger backward without lifting the pressure.
- Benefits:
- This technique reaches deeper layers of hand tissue, stimulating reflex points that are more deeply embedded and enhancing the impact on the corresponding internal areas.
4. Press and Rotate:
- How to Perform:
- Identify a reflex point on your hand.
- Press down firmly with your thumb.
- Slowly rotate your thumb over this point, maintaining constant pressure.
- Benefits:
- The rotating motion helps to increase blood circulation and nerve activity in the area, enhancing the reflexology effects and promoting healing in the associated body parts.
By mastering these fundamental hand reflexology techniques, you can begin to explore the benefits of this practice at home, offering yourself a way to support your health in a direct and personal manner.
Common Hand Reflex Points and Their Corresponding Benefits
Hand reflexology provides a unique approach to health, where specific points on your hands are associated with different parts of your body. By applying pressure to these points, you can potentially alleviate various ailments and improve your overall well-being. Here are some key reflex points located on the hands and the benefits they can offer:
1. The Thumb Base:
- Location and Technique:
- The base of the thumb corresponds to the head and neck area. You can apply pressure using the thumb of your opposite hand or perform gentle circular motions.
- Benefits:
- This point is especially beneficial for relieving headaches and reducing tension in the neck area. It can also be helpful in managing stress and fatigue that often accumulates in the head and neck.
2. The Index Finger Base:
- Location and Technique:
- Located at the base of the index finger, this point can be stimulated by pressing with the thumb and index finger of the opposite hand.
- Benefits:
- This reflex area is linked to the chest and respiratory system. Stimulating this point can aid in easing breathing difficulties, clearing chest congestion, and potentially providing relief from conditions like colds or bronchitis.
3. Center of the Palm:
- Location and Technique:
- The center of the palm acts as a reflex point for the stomach. Use the thumb of your opposite hand to apply a steady, firm pressure or perform a gentle rotating motion to stimulate this area.
- Benefits:
- This point is ideal for addressing issues related to digestion. It can help in soothing stomach pain, promoting better digestion, and alleviating symptoms of indigestion or bloating.
These reflex points are accessible and easy to work on, making them perfect for DIY hand reflexology sessions. By regularly stimulating these points, you can harness the potential benefits of reflexology to manage everyday ailments and enhance your health. Remember to approach reflexology with care and consult a professional if you have specific health conditions or concerns.
Tips for a Successful DIY Hand Reflexology Session
Hand reflexology is a flexible and easily accessible form of self-care that you can perform at home. To make the most out of your DIY hand reflexology sessions and ensure they are effective and enjoyable, follow these practical tips:
1. Start with Light Pressure and Adjust as Needed:
- Begin each session by applying gentle pressure to the reflex points. This helps your body to adjust without causing discomfort.
- Gradually increase the pressure as per your comfort level. It’s important to listen to your body and avoid applying too much force, which could lead to discomfort or pain.
2. Duration of Each Session:
- A standard hand reflexology session can be as short or as long as you prefer, typically lasting between 5 to 30 minutes.
- If you’re just starting out, begin with shorter sessions to see how your body responds before gradually increasing the duration.
- Even a few minutes can be beneficial, especially if you are dealing with stress or need a quick break to rejuvenate.
3. Regular Practice for Optimal Benefits:
- Consistency is key in reflexology. Aim to practice hand reflexology 2-3 times a week to maximize the health benefits.
- Regular sessions can help in maintaining improved circulation, stress relief, and better overall health.
4. Create a Relaxing Environment:
- Enhance your reflexology experience by creating a calming atmosphere. This could involve dimming the lights, playing soft music, or using aromatherapy with essential oils to help relax your mind and body.
- Make sure the room is at a comfortable temperature and that you won’t be disturbed during your session.
5. Hydrate and Reflect Post-Session:
- Drinking water after a reflexology session can help flush out toxins that are released during the process. Stay hydrated to support your body’s natural detoxification.
- Take a few minutes after your session to reflect on how you feel. This can help you better understand your body’s responses to different reflex points and tailor future sessions to your specific needs.
By following these tips, your DIY hand reflexology sessions can become a cherished part of your wellness routine, offering a simple yet effective way to enhance your health and well-being from the comfort of your home.
Safety Considerations and When to Avoid DIY Hand Reflexology
While hand reflexology is a generally safe practice that can offer numerous health benefits, there are certain situations and conditions where it should be approached with caution or avoided altogether. Being aware of these safety considerations can help prevent complications and ensure that reflexology is a beneficial addition to your wellness routine.
1. Hand Injuries or Conditions:
- Avoid practicing hand reflexology if you have any active injuries, infections, or severe conditions affecting your hands such as severe arthritis, fractures, or wounds. These conditions can be exacerbated by the pressure and manipulation involved in reflexology.
2. Acute or Severe Illnesses:
- If you are experiencing acute illnesses, such as severe infections or inflammation, reflexology might not be advisable. Wait until you have recovered or consult with your healthcare provider before starting reflexology.
3. Chronic Conditions:
- For individuals with chronic conditions such as heart disease, diabetes, or cancer, reflexology should be approached with caution. These conditions can be affected by the systemic changes that reflexology might promote, such as increased circulation and relaxation which can alter blood pressure and glucose levels.
- Always consult with a healthcare provider before beginning any new therapy, including reflexology, especially if you have any serious health conditions or are under medical treatment.
4. Pregnancy:
- Reflexology can sometimes stimulate labor, so pregnant women, especially those in high-risk categories or with complications, should consult their healthcare provider before engaging in reflexology.
5. After Surgery:
- Avoid reflexology immediately after surgery as it may affect the healing process or interfere with post-operative recovery. Always follow your doctor’s advice on when it is safe to resume such practices.
6. Varicose Veins and Blood Clot Risks:
- If you have varicose veins or a history of blood clots, consult with a healthcare provider before practicing reflexology. The pressure applied during reflexology could potentially dislodge a clot or worsen varicose veins.
Conclusion:
- Reflexology is intended to support and not replace traditional medical treatments. It’s important to use common sense and to consult healthcare professionals when considering reflexology, particularly if you have existing health issues or concerns. By adhering to these guidelines, you can enjoy the benefits of reflexology safely and effectively.
Conclusion
DIY hand reflexology is a powerful tool you can use to maintain health and relieve stress. By learning to apply these techniques, you can enjoy the benefits of reflexology from the comfort of your home.
Further Resources
For those interested in exploring more about hand reflexology and its various aspects, we recommend checking out the following resources on our website:
- Hand Reflexology: Delve deeper into the specific techniques and benefits of hand reflexology. This article provides a comprehensive overview, perfect for those looking to expand their understanding or practice at home.
- Reflexology Benefits: Discover the wide range of benefits that reflexology can offer for both physical and mental health. This resource explores how reflexology can be a key component of a holistic health regimen.
- Reflexology Cost: Learn about the factors that influence the cost of reflexology services, helping you to make informed decisions about incorporating this therapy into your health and wellness plans.
- Home: Visit our main page to learn more about Reflexology Auckland and our full range of services.
These articles provide valuable insights and detailed information to help you better understand the potential of reflexology and how you can integrate it into your health routine safely and effectively. Whether you’re new to reflexology or looking to deepen your knowledge, these resources are excellent starting points.
- How to Perform:
- Press your thumb or another finger into a specific reflex point.
- Apply steady pressure to go slightly deeper.
- Gently pull the finger backward without lifting the pressure.
- Benefits:
- This technique reaches deeper layers of hand tissue, stimulating reflex points that are more deeply embedded and enhancing the impact on the corresponding internal areas.
4. Press and Rotate:
- How to Perform:
- Identify a reflex point on your hand.
- Press down firmly with your thumb.
- Slowly rotate your thumb over this point, maintaining constant pressure.
- Benefits:
- The rotating motion helps to increase blood circulation and nerve activity in the area, enhancing the reflexology effects and promoting healing in the associated body parts.
By mastering these fundamental hand reflexology techniques, you can begin to explore the benefits of this practice at home, offering yourself a way to support your health in a direct and personal manner.
Common Hand Reflex Points and Their Corresponding Benefits
Hand reflexology provides a unique approach to health, where specific points on your hands are associated with different parts of your body. By applying pressure to these points, you can potentially alleviate various ailments and improve your overall well-being. Here are some key reflex points located on the hands and the benefits they can offer:
1. The Thumb Base:
- Location and Technique:
- The base of the thumb corresponds to the head and neck area. You can apply pressure using the thumb of your opposite hand or perform gentle circular motions.
- Benefits:
- This point is especially beneficial for relieving headaches and reducing tension in the neck area. It can also be helpful in managing stress and fatigue that often accumulates in the head and neck.
2. The Index Finger Base:
- Location and Technique:
- Located at the base of the index finger, this point can be stimulated by pressing with the thumb and index finger of the opposite hand.
- Benefits:
- This reflex area is linked to the chest and respiratory system. Stimulating this point can aid in easing breathing difficulties, clearing chest congestion, and potentially providing relief from conditions like colds or bronchitis.
3. Center of the Palm:
- Location and Technique:
- The center of the palm acts as a reflex point for the stomach. Use the thumb of your opposite hand to apply a steady, firm pressure or perform a gentle rotating motion to stimulate this area.
- Benefits:
- This point is ideal for addressing issues related to digestion. It can help in soothing stomach pain, promoting better digestion, and alleviating symptoms of indigestion or bloating.
These reflex points are accessible and easy to work on, making them perfect for DIY hand reflexology sessions. By regularly stimulating these points, you can harness the potential benefits of reflexology to manage everyday ailments and enhance your health. Remember to approach reflexology with care and consult a professional if you have specific health conditions or concerns.
Tips for a Successful DIY Hand Reflexology Session
Hand reflexology is a flexible and easily accessible form of self-care that you can perform at home. To make the most out of your DIY hand reflexology sessions and ensure they are effective and enjoyable, follow these practical tips:
1. Start with Light Pressure and Adjust as Needed:
- Begin each session by applying gentle pressure to the reflex points. This helps your body to adjust without causing discomfort.
- Gradually increase the pressure as per your comfort level. It’s important to listen to your body and avoid applying too much force, which could lead to discomfort or pain.
2. Duration of Each Session:
- A standard hand reflexology session can be as short or as long as you prefer, typically lasting between 5 to 30 minutes.
- If you’re just starting out, begin with shorter sessions to see how your body responds before gradually increasing the duration.
- Even a few minutes can be beneficial, especially if you are dealing with stress or need a quick break to rejuvenate.
3. Regular Practice for Optimal Benefits:
- Consistency is key in reflexology. Aim to practice hand reflexology 2-3 times a week to maximize the health benefits.
- Regular sessions can help in maintaining improved circulation, stress relief, and better overall health.
4. Create a Relaxing Environment:
- Enhance your reflexology experience by creating a calming atmosphere. This could involve dimming the lights, playing soft music, or using aromatherapy with essential oils to help relax your mind and body.
- Make sure the room is at a comfortable temperature and that you won’t be disturbed during your session.
5. Hydrate and Reflect Post-Session:
- Drinking water after a reflexology session can help flush out toxins that are released during the process. Stay hydrated to support your body’s natural detoxification.
- Take a few minutes after your session to reflect on how you feel. This can help you better understand your body’s responses to different reflex points and tailor future sessions to your specific needs.
By following these tips, your DIY hand reflexology sessions can become a cherished part of your wellness routine, offering a simple yet effective way to enhance your health and well-being from the comfort of your home.
Safety Considerations and When to Avoid DIY Hand Reflexology
While hand reflexology is a generally safe practice that can offer numerous health benefits, there are certain situations and conditions where it should be approached with caution or avoided altogether. Being aware of these safety considerations can help prevent complications and ensure that reflexology is a beneficial addition to your wellness routine.
1. Hand Injuries or Conditions:
- Avoid practicing hand reflexology if you have any active injuries, infections, or severe conditions affecting your hands such as severe arthritis, fractures, or wounds. These conditions can be exacerbated by the pressure and manipulation involved in reflexology.
2. Acute or Severe Illnesses:
- If you are experiencing acute illnesses, such as severe infections or inflammation, reflexology might not be advisable. Wait until you have recovered or consult with your healthcare provider before starting reflexology.
3. Chronic Conditions:
- For individuals with chronic conditions such as heart disease, diabetes, or cancer, reflexology should be approached with caution. These conditions can be affected by the systemic changes that reflexology might promote, such as increased circulation and relaxation which can alter blood pressure and glucose levels.
- Always consult with a healthcare provider before beginning any new therapy, including reflexology, especially if you have any serious health conditions or are under medical treatment.
4. Pregnancy:
- Reflexology can sometimes stimulate labor, so pregnant women, especially those in high-risk categories or with complications, should consult their healthcare provider before engaging in reflexology.
5. After Surgery:
- Avoid reflexology immediately after surgery as it may affect the healing process or interfere with post-operative recovery. Always follow your doctor’s advice on when it is safe to resume such practices.
6. Varicose Veins and Blood Clot Risks:
- If you have varicose veins or a history of blood clots, consult with a healthcare provider before practicing reflexology. The pressure applied during reflexology could potentially dislodge a clot or worsen varicose veins.
Conclusion:
- Reflexology is intended to support and not replace traditional medical treatments. It’s important to use common sense and to consult healthcare professionals when considering reflexology, particularly if you have existing health issues or concerns. By adhering to these guidelines, you can enjoy the benefits of reflexology safely and effectively.
Conclusion
DIY hand reflexology is a powerful tool you can use to maintain health and relieve stress. By learning to apply these techniques, you can enjoy the benefits of reflexology from the comfort of your home.
Further Resources
For those interested in exploring more about hand reflexology and its various aspects, we recommend checking out the following resources on our website:
- Hand Reflexology: Delve deeper into the specific techniques and benefits of hand reflexology. This article provides a comprehensive overview, perfect for those looking to expand their understanding or practice at home.
- Reflexology Benefits: Discover the wide range of benefits that reflexology can offer for both physical and mental health. This resource explores how reflexology can be a key component of a holistic health regimen.
- Reflexology Cost: Learn about the factors that influence the cost of reflexology services, helping you to make informed decisions about incorporating this therapy into your health and wellness plans.
- Home: Visit our main page to learn more about Reflexology Auckland and our full range of services.
These articles provide valuable insights and detailed information to help you better understand the potential of reflexology and how you can integrate it into your health routine safely and effectively. Whether you’re new to reflexology or looking to deepen your knowledge, these resources are excellent starting points.
- How to Perform:
- Use your index and middle fingers to ‘walk’ along a specific line or area on the hand.
- Apply gentle pressure in a sequential, caterpillar-like motion.
- This method allows for more precise control and is ideal for smaller areas or where finer attention is needed.
- Benefits:
- Finger walking is particularly useful for detailed work on complex reflex areas like those between the bones of the hand, facilitating targeted effects on specific organs.
3. Hook and Backup:
- How to Perform:
- Press your thumb or another finger into a specific reflex point.
- Apply steady pressure to go slightly deeper.
- Gently pull the finger backward without lifting the pressure.
- Benefits:
- This technique reaches deeper layers of hand tissue, stimulating reflex points that are more deeply embedded and enhancing the impact on the corresponding internal areas.
4. Press and Rotate:
- How to Perform:
- Identify a reflex point on your hand.
- Press down firmly with your thumb.
- Slowly rotate your thumb over this point, maintaining constant pressure.
- Benefits:
- The rotating motion helps to increase blood circulation and nerve activity in the area, enhancing the reflexology effects and promoting healing in the associated body parts.
By mastering these fundamental hand reflexology techniques, you can begin to explore the benefits of this practice at home, offering yourself a way to support your health in a direct and personal manner.
Common Hand Reflex Points and Their Corresponding Benefits
Hand reflexology provides a unique approach to health, where specific points on your hands are associated with different parts of your body. By applying pressure to these points, you can potentially alleviate various ailments and improve your overall well-being. Here are some key reflex points located on the hands and the benefits they can offer:
1. The Thumb Base:
- Location and Technique:
- The base of the thumb corresponds to the head and neck area. You can apply pressure using the thumb of your opposite hand or perform gentle circular motions.
- Benefits:
- This point is especially beneficial for relieving headaches and reducing tension in the neck area. It can also be helpful in managing stress and fatigue that often accumulates in the head and neck.
2. The Index Finger Base:
- Location and Technique:
- Located at the base of the index finger, this point can be stimulated by pressing with the thumb and index finger of the opposite hand.
- Benefits:
- This reflex area is linked to the chest and respiratory system. Stimulating this point can aid in easing breathing difficulties, clearing chest congestion, and potentially providing relief from conditions like colds or bronchitis.
3. Center of the Palm:
- Location and Technique:
- The center of the palm acts as a reflex point for the stomach. Use the thumb of your opposite hand to apply a steady, firm pressure or perform a gentle rotating motion to stimulate this area.
- Benefits:
- This point is ideal for addressing issues related to digestion. It can help in soothing stomach pain, promoting better digestion, and alleviating symptoms of indigestion or bloating.
These reflex points are accessible and easy to work on, making them perfect for DIY hand reflexology sessions. By regularly stimulating these points, you can harness the potential benefits of reflexology to manage everyday ailments and enhance your health. Remember to approach reflexology with care and consult a professional if you have specific health conditions or concerns.
Tips for a Successful DIY Hand Reflexology Session
Hand reflexology is a flexible and easily accessible form of self-care that you can perform at home. To make the most out of your DIY hand reflexology sessions and ensure they are effective and enjoyable, follow these practical tips:
1. Start with Light Pressure and Adjust as Needed:
- Begin each session by applying gentle pressure to the reflex points. This helps your body to adjust without causing discomfort.
- Gradually increase the pressure as per your comfort level. It’s important to listen to your body and avoid applying too much force, which could lead to discomfort or pain.
2. Duration of Each Session:
- A standard hand reflexology session can be as short or as long as you prefer, typically lasting between 5 to 30 minutes.
- If you’re just starting out, begin with shorter sessions to see how your body responds before gradually increasing the duration.
- Even a few minutes can be beneficial, especially if you are dealing with stress or need a quick break to rejuvenate.
3. Regular Practice for Optimal Benefits:
- Consistency is key in reflexology. Aim to practice hand reflexology 2-3 times a week to maximize the health benefits.
- Regular sessions can help in maintaining improved circulation, stress relief, and better overall health.
4. Create a Relaxing Environment:
- Enhance your reflexology experience by creating a calming atmosphere. This could involve dimming the lights, playing soft music, or using aromatherapy with essential oils to help relax your mind and body.
- Make sure the room is at a comfortable temperature and that you won’t be disturbed during your session.
5. Hydrate and Reflect Post-Session:
- Drinking water after a reflexology session can help flush out toxins that are released during the process. Stay hydrated to support your body’s natural detoxification.
- Take a few minutes after your session to reflect on how you feel. This can help you better understand your body’s responses to different reflex points and tailor future sessions to your specific needs.
By following these tips, your DIY hand reflexology sessions can become a cherished part of your wellness routine, offering a simple yet effective way to enhance your health and well-being from the comfort of your home.
Safety Considerations and When to Avoid DIY Hand Reflexology
While hand reflexology is a generally safe practice that can offer numerous health benefits, there are certain situations and conditions where it should be approached with caution or avoided altogether. Being aware of these safety considerations can help prevent complications and ensure that reflexology is a beneficial addition to your wellness routine.
1. Hand Injuries or Conditions:
- Avoid practicing hand reflexology if you have any active injuries, infections, or severe conditions affecting your hands such as severe arthritis, fractures, or wounds. These conditions can be exacerbated by the pressure and manipulation involved in reflexology.
2. Acute or Severe Illnesses:
- If you are experiencing acute illnesses, such as severe infections or inflammation, reflexology might not be advisable. Wait until you have recovered or consult with your healthcare provider before starting reflexology.
3. Chronic Conditions:
- For individuals with chronic conditions such as heart disease, diabetes, or cancer, reflexology should be approached with caution. These conditions can be affected by the systemic changes that reflexology might promote, such as increased circulation and relaxation which can alter blood pressure and glucose levels.
- Always consult with a healthcare provider before beginning any new therapy, including reflexology, especially if you have any serious health conditions or are under medical treatment.
4. Pregnancy:
- Reflexology can sometimes stimulate labor, so pregnant women, especially those in high-risk categories or with complications, should consult their healthcare provider before engaging in reflexology.
5. After Surgery:
- Avoid reflexology immediately after surgery as it may affect the healing process or interfere with post-operative recovery. Always follow your doctor’s advice on when it is safe to resume such practices.
6. Varicose Veins and Blood Clot Risks:
- If you have varicose veins or a history of blood clots, consult with a healthcare provider before practicing reflexology. The pressure applied during reflexology could potentially dislodge a clot or worsen varicose veins.
Conclusion:
- Reflexology is intended to support and not replace traditional medical treatments. It’s important to use common sense and to consult healthcare professionals when considering reflexology, particularly if you have existing health issues or concerns. By adhering to these guidelines, you can enjoy the benefits of reflexology safely and effectively.
Conclusion
DIY hand reflexology is a powerful tool you can use to maintain health and relieve stress. By learning to apply these techniques, you can enjoy the benefits of reflexology from the comfort of your home.
Further Resources
For those interested in exploring more about hand reflexology and its various aspects, we recommend checking out the following resources on our website:
- Hand Reflexology: Delve deeper into the specific techniques and benefits of hand reflexology. This article provides a comprehensive overview, perfect for those looking to expand their understanding or practice at home.
- Reflexology Benefits: Discover the wide range of benefits that reflexology can offer for both physical and mental health. This resource explores how reflexology can be a key component of a holistic health regimen.
- Reflexology Cost: Learn about the factors that influence the cost of reflexology services, helping you to make informed decisions about incorporating this therapy into your health and wellness plans.
- Home: Visit our main page to learn more about Reflexology Auckland and our full range of services.
These articles provide valuable insights and detailed information to help you better understand the potential of reflexology and how you can integrate it into your health routine safely and effectively. Whether you’re new to reflexology or looking to deepen your knowledge, these resources are excellent starting points.
- How to Perform:
- Place the pad of your thumb on the area of your hand you wish to work on.
- Gently press down into the skin.
- Move your thumb forward in a small “walking” motion, inching along the hand.
- Continue this movement across different zones of the hand that correspond to areas of your body you wish to address.
- Benefits:
- This technique is excellent for navigating larger areas of the hand, such as the palm or the back of the hand, making it effective for broadly stimulating internal organs and body systems.
2. Finger Walking:
- How to Perform:
- Use your index and middle fingers to ‘walk’ along a specific line or area on the hand.
- Apply gentle pressure in a sequential, caterpillar-like motion.
- This method allows for more precise control and is ideal for smaller areas or where finer attention is needed.
- Benefits:
- Finger walking is particularly useful for detailed work on complex reflex areas like those between the bones of the hand, facilitating targeted effects on specific organs.
3. Hook and Backup:
- How to Perform:
- Press your thumb or another finger into a specific reflex point.
- Apply steady pressure to go slightly deeper.
- Gently pull the finger backward without lifting the pressure.
- Benefits:
- This technique reaches deeper layers of hand tissue, stimulating reflex points that are more deeply embedded and enhancing the impact on the corresponding internal areas.
4. Press and Rotate:
- How to Perform:
- Identify a reflex point on your hand.
- Press down firmly with your thumb.
- Slowly rotate your thumb over this point, maintaining constant pressure.
- Benefits:
- The rotating motion helps to increase blood circulation and nerve activity in the area, enhancing the reflexology effects and promoting healing in the associated body parts.
By mastering these fundamental hand reflexology techniques, you can begin to explore the benefits of this practice at home, offering yourself a way to support your health in a direct and personal manner.
Common Hand Reflex Points and Their Corresponding Benefits
Hand reflexology provides a unique approach to health, where specific points on your hands are associated with different parts of your body. By applying pressure to these points, you can potentially alleviate various ailments and improve your overall well-being. Here are some key reflex points located on the hands and the benefits they can offer:
1. The Thumb Base:
- Location and Technique:
- The base of the thumb corresponds to the head and neck area. You can apply pressure using the thumb of your opposite hand or perform gentle circular motions.
- Benefits:
- This point is especially beneficial for relieving headaches and reducing tension in the neck area. It can also be helpful in managing stress and fatigue that often accumulates in the head and neck.
2. The Index Finger Base:
- Location and Technique:
- Located at the base of the index finger, this point can be stimulated by pressing with the thumb and index finger of the opposite hand.
- Benefits:
- This reflex area is linked to the chest and respiratory system. Stimulating this point can aid in easing breathing difficulties, clearing chest congestion, and potentially providing relief from conditions like colds or bronchitis.
3. Center of the Palm:
- Location and Technique:
- The center of the palm acts as a reflex point for the stomach. Use the thumb of your opposite hand to apply a steady, firm pressure or perform a gentle rotating motion to stimulate this area.
- Benefits:
- This point is ideal for addressing issues related to digestion. It can help in soothing stomach pain, promoting better digestion, and alleviating symptoms of indigestion or bloating.
These reflex points are accessible and easy to work on, making them perfect for DIY hand reflexology sessions. By regularly stimulating these points, you can harness the potential benefits of reflexology to manage everyday ailments and enhance your health. Remember to approach reflexology with care and consult a professional if you have specific health conditions or concerns.
Tips for a Successful DIY Hand Reflexology Session
Hand reflexology is a flexible and easily accessible form of self-care that you can perform at home. To make the most out of your DIY hand reflexology sessions and ensure they are effective and enjoyable, follow these practical tips:
1. Start with Light Pressure and Adjust as Needed:
- Begin each session by applying gentle pressure to the reflex points. This helps your body to adjust without causing discomfort.
- Gradually increase the pressure as per your comfort level. It’s important to listen to your body and avoid applying too much force, which could lead to discomfort or pain.
2. Duration of Each Session:
- A standard hand reflexology session can be as short or as long as you prefer, typically lasting between 5 to 30 minutes.
- If you’re just starting out, begin with shorter sessions to see how your body responds before gradually increasing the duration.
- Even a few minutes can be beneficial, especially if you are dealing with stress or need a quick break to rejuvenate.
3. Regular Practice for Optimal Benefits:
- Consistency is key in reflexology. Aim to practice hand reflexology 2-3 times a week to maximize the health benefits.
- Regular sessions can help in maintaining improved circulation, stress relief, and better overall health.
4. Create a Relaxing Environment:
- Enhance your reflexology experience by creating a calming atmosphere. This could involve dimming the lights, playing soft music, or using aromatherapy with essential oils to help relax your mind and body.
- Make sure the room is at a comfortable temperature and that you won’t be disturbed during your session.
5. Hydrate and Reflect Post-Session:
- Drinking water after a reflexology session can help flush out toxins that are released during the process. Stay hydrated to support your body’s natural detoxification.
- Take a few minutes after your session to reflect on how you feel. This can help you better understand your body’s responses to different reflex points and tailor future sessions to your specific needs.
By following these tips, your DIY hand reflexology sessions can become a cherished part of your wellness routine, offering a simple yet effective way to enhance your health and well-being from the comfort of your home.
Safety Considerations and When to Avoid DIY Hand Reflexology
While hand reflexology is a generally safe practice that can offer numerous health benefits, there are certain situations and conditions where it should be approached with caution or avoided altogether. Being aware of these safety considerations can help prevent complications and ensure that reflexology is a beneficial addition to your wellness routine.
1. Hand Injuries or Conditions:
- Avoid practicing hand reflexology if you have any active injuries, infections, or severe conditions affecting your hands such as severe arthritis, fractures, or wounds. These conditions can be exacerbated by the pressure and manipulation involved in reflexology.
2. Acute or Severe Illnesses:
- If you are experiencing acute illnesses, such as severe infections or inflammation, reflexology might not be advisable. Wait until you have recovered or consult with your healthcare provider before starting reflexology.
3. Chronic Conditions:
- For individuals with chronic conditions such as heart disease, diabetes, or cancer, reflexology should be approached with caution. These conditions can be affected by the systemic changes that reflexology might promote, such as increased circulation and relaxation which can alter blood pressure and glucose levels.
- Always consult with a healthcare provider before beginning any new therapy, including reflexology, especially if you have any serious health conditions or are under medical treatment.
4. Pregnancy:
- Reflexology can sometimes stimulate labor, so pregnant women, especially those in high-risk categories or with complications, should consult their healthcare provider before engaging in reflexology.
5. After Surgery:
- Avoid reflexology immediately after surgery as it may affect the healing process or interfere with post-operative recovery. Always follow your doctor’s advice on when it is safe to resume such practices.
6. Varicose Veins and Blood Clot Risks:
- If you have varicose veins or a history of blood clots, consult with a healthcare provider before practicing reflexology. The pressure applied during reflexology could potentially dislodge a clot or worsen varicose veins.
Conclusion:
- Reflexology is intended to support and not replace traditional medical treatments. It’s important to use common sense and to consult healthcare professionals when considering reflexology, particularly if you have existing health issues or concerns. By adhering to these guidelines, you can enjoy the benefits of reflexology safely and effectively.
Conclusion
DIY hand reflexology is a powerful tool you can use to maintain health and relieve stress. By learning to apply these techniques, you can enjoy the benefits of reflexology from the comfort of your home.
Further Resources
For those interested in exploring more about hand reflexology and its various aspects, we recommend checking out the following resources on our website:
- Hand Reflexology: Delve deeper into the specific techniques and benefits of hand reflexology. This article provides a comprehensive overview, perfect for those looking to expand their understanding or practice at home.
- Reflexology Benefits: Discover the wide range of benefits that reflexology can offer for both physical and mental health. This resource explores how reflexology can be a key component of a holistic health regimen.
- Reflexology Cost: Learn about the factors that influence the cost of reflexology services, helping you to make informed decisions about incorporating this therapy into your health and wellness plans.
- Home: Visit our main page to learn more about Reflexology Auckland and our full range of services.
These articles provide valuable insights and detailed information to help you better understand the potential of reflexology and how you can integrate it into your health routine safely and effectively. Whether you’re new to reflexology or looking to deepen your knowledge, these resources are excellent starting points.
Hand reflexology is a practice rooted in ancient medicine, using pressure points on the hands believed to correspond to various parts of the body. This guide introduces you to simple DIY hand reflexology techniques that you can use at home to enhance relaxation and promote overall wellness.
Key Sections of DIY Hand Reflexology :
What You Need to Get Started
Embarking on your DIY hand reflexology journey is straightforward and requires minimal setup. Here’s what you’ll need to ensure a comfortable and effective session:
1. Your Hands:
- The primary “tool” in hand reflexology is, of course, your own hands. Clean, well-moisturized hands can make the process smoother and more comfortable.
2. Comfortable Seating:
- Choose a comfortable chair or a seat where you can relax without straining your back. Sitting upright in a supportive chair is often best, as it allows you to easily access both of your hands.
3. Optional Tools:
- Soft Mat or Pillow: While not necessary, a soft mat on your lap or a pillow can provide support, making it easier to hold your hand comfortably during the session. This can be particularly helpful if you have a longer session planned or if you find holding your arm up tiresome.
- Lotion or Hand Cream: Applying a small amount of lotion or hand cream can reduce friction and make reflexology techniques more pleasurable and less abrasive on the skin.
- Relaxing Background Music: Consider playing some soft, ambient music to enhance relaxation and create a therapeutic environment. Music or nature sounds can help in maintaining a calm mind and a focused approach.
4. Quiet and Comfortable Environment:
- Find a spot in your home that is typically quiet and free from interruptions. This could be a dedicated room or a cozy corner where you feel relaxed. The idea is to create a space that feels like a sanctuary, where stressors and external distractions are minimized.
- Good Lighting: Ensure the area is well-lit so that you can see your hands clearly without straining your eyes. Natural light is ideal, but a soft lamp can also create a warm and inviting environment.
5. Setting the Mood:
- You might want to set a timer if you have limited time to practice, so you don’t need to watch the clock. This allows you to fully immerse in the experience without worrying about time.
- Keep a glass of water nearby to stay hydrated before and after the session, as reflexology can sometimes release toxins and hydration can help flush these from your system.
By preparing your space and having these items at hand, you can maximize the benefits of your DIY hand reflexology sessions, turning them into a restorative ritual that you look forward to each time.
Understanding the Basics of Hand Reflexology
Hand reflexology is a therapeutic method where specific points on the hands are manipulated to improve health and promote healing in various parts of the body. According to reflexology theory, each area on the hand corresponds to different organs and systems within the body.
By applying pressure to these reflex areas, you can influence the health of the corresponding body parts, potentially easing ailments and boosting overall well-being.
Step-by-Step Guide to DIY Hand Reflexology Techniques
Here’s how you can begin practicing hand reflexology on yourself with some basic techniques. Each method targets different areas and serves various purposes, from relieving tension to improving body functions.
1. Thumb Walking:
- How to Perform:
- Place the pad of your thumb on the area of your hand you wish to work on.
- Gently press down into the skin.
- Move your thumb forward in a small “walking” motion, inching along the hand.
- Continue this movement across different zones of the hand that correspond to areas of your body you wish to address.
- Benefits:
- This technique is excellent for navigating larger areas of the hand, such as the palm or the back of the hand, making it effective for broadly stimulating internal organs and body systems.
2. Finger Walking:
- How to Perform:
- Use your index and middle fingers to ‘walk’ along a specific line or area on the hand.
- Apply gentle pressure in a sequential, caterpillar-like motion.
- This method allows for more precise control and is ideal for smaller areas or where finer attention is needed.
- Benefits:
- Finger walking is particularly useful for detailed work on complex reflex areas like those between the bones of the hand, facilitating targeted effects on specific organs.
3. Hook and Backup:
- How to Perform:
- Press your thumb or another finger into a specific reflex point.
- Apply steady pressure to go slightly deeper.
- Gently pull the finger backward without lifting the pressure.
- Benefits:
- This technique reaches deeper layers of hand tissue, stimulating reflex points that are more deeply embedded and enhancing the impact on the corresponding internal areas.
4. Press and Rotate:
- How to Perform:
- Identify a reflex point on your hand.
- Press down firmly with your thumb.
- Slowly rotate your thumb over this point, maintaining constant pressure.
- Benefits:
- The rotating motion helps to increase blood circulation and nerve activity in the area, enhancing the reflexology effects and promoting healing in the associated body parts.
By mastering these fundamental hand reflexology techniques, you can begin to explore the benefits of this practice at home, offering yourself a way to support your health in a direct and personal manner.
Common Hand Reflex Points and Their Corresponding Benefits
Hand reflexology provides a unique approach to health, where specific points on your hands are associated with different parts of your body. By applying pressure to these points, you can potentially alleviate various ailments and improve your overall well-being. Here are some key reflex points located on the hands and the benefits they can offer:
1. The Thumb Base:
- Location and Technique:
- The base of the thumb corresponds to the head and neck area. You can apply pressure using the thumb of your opposite hand or perform gentle circular motions.
- Benefits:
- This point is especially beneficial for relieving headaches and reducing tension in the neck area. It can also be helpful in managing stress and fatigue that often accumulates in the head and neck.
2. The Index Finger Base:
- Location and Technique:
- Located at the base of the index finger, this point can be stimulated by pressing with the thumb and index finger of the opposite hand.
- Benefits:
- This reflex area is linked to the chest and respiratory system. Stimulating this point can aid in easing breathing difficulties, clearing chest congestion, and potentially providing relief from conditions like colds or bronchitis.
3. Center of the Palm:
- Location and Technique:
- The center of the palm acts as a reflex point for the stomach. Use the thumb of your opposite hand to apply a steady, firm pressure or perform a gentle rotating motion to stimulate this area.
- Benefits:
- This point is ideal for addressing issues related to digestion. It can help in soothing stomach pain, promoting better digestion, and alleviating symptoms of indigestion or bloating.
These reflex points are accessible and easy to work on, making them perfect for DIY hand reflexology sessions. By regularly stimulating these points, you can harness the potential benefits of reflexology to manage everyday ailments and enhance your health. Remember to approach reflexology with care and consult a professional if you have specific health conditions or concerns.
Tips for a Successful DIY Hand Reflexology Session
Hand reflexology is a flexible and easily accessible form of self-care that you can perform at home. To make the most out of your DIY hand reflexology sessions and ensure they are effective and enjoyable, follow these practical tips:
1. Start with Light Pressure and Adjust as Needed:
- Begin each session by applying gentle pressure to the reflex points. This helps your body to adjust without causing discomfort.
- Gradually increase the pressure as per your comfort level. It’s important to listen to your body and avoid applying too much force, which could lead to discomfort or pain.
2. Duration of Each Session:
- A standard hand reflexology session can be as short or as long as you prefer, typically lasting between 5 to 30 minutes.
- If you’re just starting out, begin with shorter sessions to see how your body responds before gradually increasing the duration.
- Even a few minutes can be beneficial, especially if you are dealing with stress or need a quick break to rejuvenate.
3. Regular Practice for Optimal Benefits:
- Consistency is key in reflexology. Aim to practice hand reflexology 2-3 times a week to maximize the health benefits.
- Regular sessions can help in maintaining improved circulation, stress relief, and better overall health.
4. Create a Relaxing Environment:
- Enhance your reflexology experience by creating a calming atmosphere. This could involve dimming the lights, playing soft music, or using aromatherapy with essential oils to help relax your mind and body.
- Make sure the room is at a comfortable temperature and that you won’t be disturbed during your session.
5. Hydrate and Reflect Post-Session:
- Drinking water after a reflexology session can help flush out toxins that are released during the process. Stay hydrated to support your body’s natural detoxification.
- Take a few minutes after your session to reflect on how you feel. This can help you better understand your body’s responses to different reflex points and tailor future sessions to your specific needs.
By following these tips, your DIY hand reflexology sessions can become a cherished part of your wellness routine, offering a simple yet effective way to enhance your health and well-being from the comfort of your home.
Safety Considerations and When to Avoid DIY Hand Reflexology
While hand reflexology is a generally safe practice that can offer numerous health benefits, there are certain situations and conditions where it should be approached with caution or avoided altogether. Being aware of these safety considerations can help prevent complications and ensure that reflexology is a beneficial addition to your wellness routine.
1. Hand Injuries or Conditions:
- Avoid practicing hand reflexology if you have any active injuries, infections, or severe conditions affecting your hands such as severe arthritis, fractures, or wounds. These conditions can be exacerbated by the pressure and manipulation involved in reflexology.
2. Acute or Severe Illnesses:
- If you are experiencing acute illnesses, such as severe infections or inflammation, reflexology might not be advisable. Wait until you have recovered or consult with your healthcare provider before starting reflexology.
3. Chronic Conditions:
- For individuals with chronic conditions such as heart disease, diabetes, or cancer, reflexology should be approached with caution. These conditions can be affected by the systemic changes that reflexology might promote, such as increased circulation and relaxation which can alter blood pressure and glucose levels.
- Always consult with a healthcare provider before beginning any new therapy, including reflexology, especially if you have any serious health conditions or are under medical treatment.
4. Pregnancy:
- Reflexology can sometimes stimulate labor, so pregnant women, especially those in high-risk categories or with complications, should consult their healthcare provider before engaging in reflexology.
5. After Surgery:
- Avoid reflexology immediately after surgery as it may affect the healing process or interfere with post-operative recovery. Always follow your doctor’s advice on when it is safe to resume such practices.
6. Varicose Veins and Blood Clot Risks:
- If you have varicose veins or a history of blood clots, consult with a healthcare provider before practicing reflexology. The pressure applied during reflexology could potentially dislodge a clot or worsen varicose veins.
Conclusion:
- Reflexology is intended to support and not replace traditional medical treatments. It’s important to use common sense and to consult healthcare professionals when considering reflexology, particularly if you have existing health issues or concerns. By adhering to these guidelines, you can enjoy the benefits of reflexology safely and effectively.
Conclusion
DIY hand reflexology is a powerful tool you can use to maintain health and relieve stress. By learning to apply these techniques, you can enjoy the benefits of reflexology from the comfort of your home.
Further Resources
For those interested in exploring more about hand reflexology and its various aspects, we recommend checking out the following resources on our website:
- Hand Reflexology: Delve deeper into the specific techniques and benefits of hand reflexology. This article provides a comprehensive overview, perfect for those looking to expand their understanding or practice at home.
- Reflexology Benefits: Discover the wide range of benefits that reflexology can offer for both physical and mental health. This resource explores how reflexology can be a key component of a holistic health regimen.
- Reflexology Cost: Learn about the factors that influence the cost of reflexology services, helping you to make informed decisions about incorporating this therapy into your health and wellness plans.
- Home: Visit our main page to learn more about Reflexology Auckland and our full range of services.
These articles provide valuable insights and detailed information to help you better understand the potential of reflexology and how you can integrate it into your health routine safely and effectively. Whether you’re new to reflexology or looking to deepen your knowledge, these resources are excellent starting points.
- Location and Technique:
- The base of the thumb corresponds to the head and neck area. You can apply pressure using the thumb of your opposite hand or perform gentle circular motions.
- Benefits:
- This point is especially beneficial for relieving headaches and reducing tension in the neck area. It can also be helpful in managing stress and fatigue that often accumulates in the head and neck.
2. The Index Finger Base:
- Location and Technique:
- Located at the base of the index finger, this point can be stimulated by pressing with the thumb and index finger of the opposite hand.
- Benefits:
- This reflex area is linked to the chest and respiratory system. Stimulating this point can aid in easing breathing difficulties, clearing chest congestion, and potentially providing relief from conditions like colds or bronchitis.
3. Center of the Palm:
- Location and Technique:
- The center of the palm acts as a reflex point for the stomach. Use the thumb of your opposite hand to apply a steady, firm pressure or perform a gentle rotating motion to stimulate this area.
- Benefits:
- This point is ideal for addressing issues related to digestion. It can help in soothing stomach pain, promoting better digestion, and alleviating symptoms of indigestion or bloating.
These reflex points are accessible and easy to work on, making them perfect for DIY hand reflexology sessions. By regularly stimulating these points, you can harness the potential benefits of reflexology to manage everyday ailments and enhance your health. Remember to approach reflexology with care and consult a professional if you have specific health conditions or concerns.
Tips for a Successful DIY Hand Reflexology Session
Hand reflexology is a flexible and easily accessible form of self-care that you can perform at home. To make the most out of your DIY hand reflexology sessions and ensure they are effective and enjoyable, follow these practical tips:
1. Start with Light Pressure and Adjust as Needed:
- Begin each session by applying gentle pressure to the reflex points. This helps your body to adjust without causing discomfort.
- Gradually increase the pressure as per your comfort level. It’s important to listen to your body and avoid applying too much force, which could lead to discomfort or pain.
2. Duration of Each Session:
- A standard hand reflexology session can be as short or as long as you prefer, typically lasting between 5 to 30 minutes.
- If you’re just starting out, begin with shorter sessions to see how your body responds before gradually increasing the duration.
- Even a few minutes can be beneficial, especially if you are dealing with stress or need a quick break to rejuvenate.
3. Regular Practice for Optimal Benefits:
- Consistency is key in reflexology. Aim to practice hand reflexology 2-3 times a week to maximize the health benefits.
- Regular sessions can help in maintaining improved circulation, stress relief, and better overall health.
4. Create a Relaxing Environment:
- Enhance your reflexology experience by creating a calming atmosphere. This could involve dimming the lights, playing soft music, or using aromatherapy with essential oils to help relax your mind and body.
- Make sure the room is at a comfortable temperature and that you won’t be disturbed during your session.
5. Hydrate and Reflect Post-Session:
- Drinking water after a reflexology session can help flush out toxins that are released during the process. Stay hydrated to support your body’s natural detoxification.
- Take a few minutes after your session to reflect on how you feel. This can help you better understand your body’s responses to different reflex points and tailor future sessions to your specific needs.
By following these tips, your DIY hand reflexology sessions can become a cherished part of your wellness routine, offering a simple yet effective way to enhance your health and well-being from the comfort of your home.
Safety Considerations and When to Avoid DIY Hand Reflexology
While hand reflexology is a generally safe practice that can offer numerous health benefits, there are certain situations and conditions where it should be approached with caution or avoided altogether. Being aware of these safety considerations can help prevent complications and ensure that reflexology is a beneficial addition to your wellness routine.
1. Hand Injuries or Conditions:
- Avoid practicing hand reflexology if you have any active injuries, infections, or severe conditions affecting your hands such as severe arthritis, fractures, or wounds. These conditions can be exacerbated by the pressure and manipulation involved in reflexology.
2. Acute or Severe Illnesses:
- If you are experiencing acute illnesses, such as severe infections or inflammation, reflexology might not be advisable. Wait until you have recovered or consult with your healthcare provider before starting reflexology.
3. Chronic Conditions:
- For individuals with chronic conditions such as heart disease, diabetes, or cancer, reflexology should be approached with caution. These conditions can be affected by the systemic changes that reflexology might promote, such as increased circulation and relaxation which can alter blood pressure and glucose levels.
- Always consult with a healthcare provider before beginning any new therapy, including reflexology, especially if you have any serious health conditions or are under medical treatment.
4. Pregnancy:
- Reflexology can sometimes stimulate labor, so pregnant women, especially those in high-risk categories or with complications, should consult their healthcare provider before engaging in reflexology.
5. After Surgery:
- Avoid reflexology immediately after surgery as it may affect the healing process or interfere with post-operative recovery. Always follow your doctor’s advice on when it is safe to resume such practices.
6. Varicose Veins and Blood Clot Risks:
- If you have varicose veins or a history of blood clots, consult with a healthcare provider before practicing reflexology. The pressure applied during reflexology could potentially dislodge a clot or worsen varicose veins.
Conclusion:
- Reflexology is intended to support and not replace traditional medical treatments. It’s important to use common sense and to consult healthcare professionals when considering reflexology, particularly if you have existing health issues or concerns. By adhering to these guidelines, you can enjoy the benefits of reflexology safely and effectively.
Conclusion
DIY hand reflexology is a powerful tool you can use to maintain health and relieve stress. By learning to apply these techniques, you can enjoy the benefits of reflexology from the comfort of your home.
Further Resources
For those interested in exploring more about hand reflexology and its various aspects, we recommend checking out the following resources on our website:
- Hand Reflexology: Delve deeper into the specific techniques and benefits of hand reflexology. This article provides a comprehensive overview, perfect for those looking to expand their understanding or practice at home.
- Reflexology Benefits: Discover the wide range of benefits that reflexology can offer for both physical and mental health. This resource explores how reflexology can be a key component of a holistic health regimen.
- Reflexology Cost: Learn about the factors that influence the cost of reflexology services, helping you to make informed decisions about incorporating this therapy into your health and wellness plans.
- Home: Visit our main page to learn more about Reflexology Auckland and our full range of services.
These articles provide valuable insights and detailed information to help you better understand the potential of reflexology and how you can integrate it into your health routine safely and effectively. Whether you’re new to reflexology or looking to deepen your knowledge, these resources are excellent starting points.
- How to Perform:
- Identify a reflex point on your hand.
- Press down firmly with your thumb.
- Slowly rotate your thumb over this point, maintaining constant pressure.
- Benefits:
- The rotating motion helps to increase blood circulation and nerve activity in the area, enhancing the reflexology effects and promoting healing in the associated body parts.
By mastering these fundamental hand reflexology techniques, you can begin to explore the benefits of this practice at home, offering yourself a way to support your health in a direct and personal manner.
Common Hand Reflex Points and Their Corresponding Benefits
Hand reflexology provides a unique approach to health, where specific points on your hands are associated with different parts of your body. By applying pressure to these points, you can potentially alleviate various ailments and improve your overall well-being. Here are some key reflex points located on the hands and the benefits they can offer:
1. The Thumb Base:
- Location and Technique:
- The base of the thumb corresponds to the head and neck area. You can apply pressure using the thumb of your opposite hand or perform gentle circular motions.
- Benefits:
- This point is especially beneficial for relieving headaches and reducing tension in the neck area. It can also be helpful in managing stress and fatigue that often accumulates in the head and neck.
2. The Index Finger Base:
- Location and Technique:
- Located at the base of the index finger, this point can be stimulated by pressing with the thumb and index finger of the opposite hand.
- Benefits:
- This reflex area is linked to the chest and respiratory system. Stimulating this point can aid in easing breathing difficulties, clearing chest congestion, and potentially providing relief from conditions like colds or bronchitis.
3. Center of the Palm:
- Location and Technique:
- The center of the palm acts as a reflex point for the stomach. Use the thumb of your opposite hand to apply a steady, firm pressure or perform a gentle rotating motion to stimulate this area.
- Benefits:
- This point is ideal for addressing issues related to digestion. It can help in soothing stomach pain, promoting better digestion, and alleviating symptoms of indigestion or bloating.
These reflex points are accessible and easy to work on, making them perfect for DIY hand reflexology sessions. By regularly stimulating these points, you can harness the potential benefits of reflexology to manage everyday ailments and enhance your health. Remember to approach reflexology with care and consult a professional if you have specific health conditions or concerns.
Tips for a Successful DIY Hand Reflexology Session
Hand reflexology is a flexible and easily accessible form of self-care that you can perform at home. To make the most out of your DIY hand reflexology sessions and ensure they are effective and enjoyable, follow these practical tips:
1. Start with Light Pressure and Adjust as Needed:
- Begin each session by applying gentle pressure to the reflex points. This helps your body to adjust without causing discomfort.
- Gradually increase the pressure as per your comfort level. It’s important to listen to your body and avoid applying too much force, which could lead to discomfort or pain.
2. Duration of Each Session:
- A standard hand reflexology session can be as short or as long as you prefer, typically lasting between 5 to 30 minutes.
- If you’re just starting out, begin with shorter sessions to see how your body responds before gradually increasing the duration.
- Even a few minutes can be beneficial, especially if you are dealing with stress or need a quick break to rejuvenate.
3. Regular Practice for Optimal Benefits:
- Consistency is key in reflexology. Aim to practice hand reflexology 2-3 times a week to maximize the health benefits.
- Regular sessions can help in maintaining improved circulation, stress relief, and better overall health.
4. Create a Relaxing Environment:
- Enhance your reflexology experience by creating a calming atmosphere. This could involve dimming the lights, playing soft music, or using aromatherapy with essential oils to help relax your mind and body.
- Make sure the room is at a comfortable temperature and that you won’t be disturbed during your session.
5. Hydrate and Reflect Post-Session:
- Drinking water after a reflexology session can help flush out toxins that are released during the process. Stay hydrated to support your body’s natural detoxification.
- Take a few minutes after your session to reflect on how you feel. This can help you better understand your body’s responses to different reflex points and tailor future sessions to your specific needs.
By following these tips, your DIY hand reflexology sessions can become a cherished part of your wellness routine, offering a simple yet effective way to enhance your health and well-being from the comfort of your home.
Safety Considerations and When to Avoid DIY Hand Reflexology
While hand reflexology is a generally safe practice that can offer numerous health benefits, there are certain situations and conditions where it should be approached with caution or avoided altogether. Being aware of these safety considerations can help prevent complications and ensure that reflexology is a beneficial addition to your wellness routine.
1. Hand Injuries or Conditions:
- Avoid practicing hand reflexology if you have any active injuries, infections, or severe conditions affecting your hands such as severe arthritis, fractures, or wounds. These conditions can be exacerbated by the pressure and manipulation involved in reflexology.
2. Acute or Severe Illnesses:
- If you are experiencing acute illnesses, such as severe infections or inflammation, reflexology might not be advisable. Wait until you have recovered or consult with your healthcare provider before starting reflexology.
3. Chronic Conditions:
- For individuals with chronic conditions such as heart disease, diabetes, or cancer, reflexology should be approached with caution. These conditions can be affected by the systemic changes that reflexology might promote, such as increased circulation and relaxation which can alter blood pressure and glucose levels.
- Always consult with a healthcare provider before beginning any new therapy, including reflexology, especially if you have any serious health conditions or are under medical treatment.
4. Pregnancy:
- Reflexology can sometimes stimulate labor, so pregnant women, especially those in high-risk categories or with complications, should consult their healthcare provider before engaging in reflexology.
5. After Surgery:
- Avoid reflexology immediately after surgery as it may affect the healing process or interfere with post-operative recovery. Always follow your doctor’s advice on when it is safe to resume such practices.
6. Varicose Veins and Blood Clot Risks:
- If you have varicose veins or a history of blood clots, consult with a healthcare provider before practicing reflexology. The pressure applied during reflexology could potentially dislodge a clot or worsen varicose veins.
Conclusion:
- Reflexology is intended to support and not replace traditional medical treatments. It’s important to use common sense and to consult healthcare professionals when considering reflexology, particularly if you have existing health issues or concerns. By adhering to these guidelines, you can enjoy the benefits of reflexology safely and effectively.
Conclusion
DIY hand reflexology is a powerful tool you can use to maintain health and relieve stress. By learning to apply these techniques, you can enjoy the benefits of reflexology from the comfort of your home.
Further Resources
For those interested in exploring more about hand reflexology and its various aspects, we recommend checking out the following resources on our website:
- Hand Reflexology: Delve deeper into the specific techniques and benefits of hand reflexology. This article provides a comprehensive overview, perfect for those looking to expand their understanding or practice at home.
- Reflexology Benefits: Discover the wide range of benefits that reflexology can offer for both physical and mental health. This resource explores how reflexology can be a key component of a holistic health regimen.
- Reflexology Cost: Learn about the factors that influence the cost of reflexology services, helping you to make informed decisions about incorporating this therapy into your health and wellness plans.
- Home: Visit our main page to learn more about Reflexology Auckland and our full range of services.
These articles provide valuable insights and detailed information to help you better understand the potential of reflexology and how you can integrate it into your health routine safely and effectively. Whether you’re new to reflexology or looking to deepen your knowledge, these resources are excellent starting points.
- How to Perform:
- Press your thumb or another finger into a specific reflex point.
- Apply steady pressure to go slightly deeper.
- Gently pull the finger backward without lifting the pressure.
- Benefits:
- This technique reaches deeper layers of hand tissue, stimulating reflex points that are more deeply embedded and enhancing the impact on the corresponding internal areas.
4. Press and Rotate:
- How to Perform:
- Identify a reflex point on your hand.
- Press down firmly with your thumb.
- Slowly rotate your thumb over this point, maintaining constant pressure.
- Benefits:
- The rotating motion helps to increase blood circulation and nerve activity in the area, enhancing the reflexology effects and promoting healing in the associated body parts.
By mastering these fundamental hand reflexology techniques, you can begin to explore the benefits of this practice at home, offering yourself a way to support your health in a direct and personal manner.
Common Hand Reflex Points and Their Corresponding Benefits
Hand reflexology provides a unique approach to health, where specific points on your hands are associated with different parts of your body. By applying pressure to these points, you can potentially alleviate various ailments and improve your overall well-being. Here are some key reflex points located on the hands and the benefits they can offer:
1. The Thumb Base:
- Location and Technique:
- The base of the thumb corresponds to the head and neck area. You can apply pressure using the thumb of your opposite hand or perform gentle circular motions.
- Benefits:
- This point is especially beneficial for relieving headaches and reducing tension in the neck area. It can also be helpful in managing stress and fatigue that often accumulates in the head and neck.
2. The Index Finger Base:
- Location and Technique:
- Located at the base of the index finger, this point can be stimulated by pressing with the thumb and index finger of the opposite hand.
- Benefits:
- This reflex area is linked to the chest and respiratory system. Stimulating this point can aid in easing breathing difficulties, clearing chest congestion, and potentially providing relief from conditions like colds or bronchitis.
3. Center of the Palm:
- Location and Technique:
- The center of the palm acts as a reflex point for the stomach. Use the thumb of your opposite hand to apply a steady, firm pressure or perform a gentle rotating motion to stimulate this area.
- Benefits:
- This point is ideal for addressing issues related to digestion. It can help in soothing stomach pain, promoting better digestion, and alleviating symptoms of indigestion or bloating.
These reflex points are accessible and easy to work on, making them perfect for DIY hand reflexology sessions. By regularly stimulating these points, you can harness the potential benefits of reflexology to manage everyday ailments and enhance your health. Remember to approach reflexology with care and consult a professional if you have specific health conditions or concerns.
Tips for a Successful DIY Hand Reflexology Session
Hand reflexology is a flexible and easily accessible form of self-care that you can perform at home. To make the most out of your DIY hand reflexology sessions and ensure they are effective and enjoyable, follow these practical tips:
1. Start with Light Pressure and Adjust as Needed:
- Begin each session by applying gentle pressure to the reflex points. This helps your body to adjust without causing discomfort.
- Gradually increase the pressure as per your comfort level. It’s important to listen to your body and avoid applying too much force, which could lead to discomfort or pain.
2. Duration of Each Session:
- A standard hand reflexology session can be as short or as long as you prefer, typically lasting between 5 to 30 minutes.
- If you’re just starting out, begin with shorter sessions to see how your body responds before gradually increasing the duration.
- Even a few minutes can be beneficial, especially if you are dealing with stress or need a quick break to rejuvenate.
3. Regular Practice for Optimal Benefits:
- Consistency is key in reflexology. Aim to practice hand reflexology 2-3 times a week to maximize the health benefits.
- Regular sessions can help in maintaining improved circulation, stress relief, and better overall health.
4. Create a Relaxing Environment:
- Enhance your reflexology experience by creating a calming atmosphere. This could involve dimming the lights, playing soft music, or using aromatherapy with essential oils to help relax your mind and body.
- Make sure the room is at a comfortable temperature and that you won’t be disturbed during your session.
5. Hydrate and Reflect Post-Session:
- Drinking water after a reflexology session can help flush out toxins that are released during the process. Stay hydrated to support your body’s natural detoxification.
- Take a few minutes after your session to reflect on how you feel. This can help you better understand your body’s responses to different reflex points and tailor future sessions to your specific needs.
By following these tips, your DIY hand reflexology sessions can become a cherished part of your wellness routine, offering a simple yet effective way to enhance your health and well-being from the comfort of your home.
Safety Considerations and When to Avoid DIY Hand Reflexology
While hand reflexology is a generally safe practice that can offer numerous health benefits, there are certain situations and conditions where it should be approached with caution or avoided altogether. Being aware of these safety considerations can help prevent complications and ensure that reflexology is a beneficial addition to your wellness routine.
1. Hand Injuries or Conditions:
- Avoid practicing hand reflexology if you have any active injuries, infections, or severe conditions affecting your hands such as severe arthritis, fractures, or wounds. These conditions can be exacerbated by the pressure and manipulation involved in reflexology.
2. Acute or Severe Illnesses:
- If you are experiencing acute illnesses, such as severe infections or inflammation, reflexology might not be advisable. Wait until you have recovered or consult with your healthcare provider before starting reflexology.
3. Chronic Conditions:
- For individuals with chronic conditions such as heart disease, diabetes, or cancer, reflexology should be approached with caution. These conditions can be affected by the systemic changes that reflexology might promote, such as increased circulation and relaxation which can alter blood pressure and glucose levels.
- Always consult with a healthcare provider before beginning any new therapy, including reflexology, especially if you have any serious health conditions or are under medical treatment.
4. Pregnancy:
- Reflexology can sometimes stimulate labor, so pregnant women, especially those in high-risk categories or with complications, should consult their healthcare provider before engaging in reflexology.
5. After Surgery:
- Avoid reflexology immediately after surgery as it may affect the healing process or interfere with post-operative recovery. Always follow your doctor’s advice on when it is safe to resume such practices.
6. Varicose Veins and Blood Clot Risks:
- If you have varicose veins or a history of blood clots, consult with a healthcare provider before practicing reflexology. The pressure applied during reflexology could potentially dislodge a clot or worsen varicose veins.
Conclusion:
- Reflexology is intended to support and not replace traditional medical treatments. It’s important to use common sense and to consult healthcare professionals when considering reflexology, particularly if you have existing health issues or concerns. By adhering to these guidelines, you can enjoy the benefits of reflexology safely and effectively.
Conclusion
DIY hand reflexology is a powerful tool you can use to maintain health and relieve stress. By learning to apply these techniques, you can enjoy the benefits of reflexology from the comfort of your home.
Further Resources
For those interested in exploring more about hand reflexology and its various aspects, we recommend checking out the following resources on our website:
- Hand Reflexology: Delve deeper into the specific techniques and benefits of hand reflexology. This article provides a comprehensive overview, perfect for those looking to expand their understanding or practice at home.
- Reflexology Benefits: Discover the wide range of benefits that reflexology can offer for both physical and mental health. This resource explores how reflexology can be a key component of a holistic health regimen.
- Reflexology Cost: Learn about the factors that influence the cost of reflexology services, helping you to make informed decisions about incorporating this therapy into your health and wellness plans.
- Home: Visit our main page to learn more about Reflexology Auckland and our full range of services.
These articles provide valuable insights and detailed information to help you better understand the potential of reflexology and how you can integrate it into your health routine safely and effectively. Whether you’re new to reflexology or looking to deepen your knowledge, these resources are excellent starting points.
- How to Perform:
- Use your index and middle fingers to ‘walk’ along a specific line or area on the hand.
- Apply gentle pressure in a sequential, caterpillar-like motion.
- This method allows for more precise control and is ideal for smaller areas or where finer attention is needed.
- Benefits:
- Finger walking is particularly useful for detailed work on complex reflex areas like those between the bones of the hand, facilitating targeted effects on specific organs.
3. Hook and Backup:
- How to Perform:
- Press your thumb or another finger into a specific reflex point.
- Apply steady pressure to go slightly deeper.
- Gently pull the finger backward without lifting the pressure.
- Benefits:
- This technique reaches deeper layers of hand tissue, stimulating reflex points that are more deeply embedded and enhancing the impact on the corresponding internal areas.
4. Press and Rotate:
- How to Perform:
- Identify a reflex point on your hand.
- Press down firmly with your thumb.
- Slowly rotate your thumb over this point, maintaining constant pressure.
- Benefits:
- The rotating motion helps to increase blood circulation and nerve activity in the area, enhancing the reflexology effects and promoting healing in the associated body parts.
By mastering these fundamental hand reflexology techniques, you can begin to explore the benefits of this practice at home, offering yourself a way to support your health in a direct and personal manner.
Common Hand Reflex Points and Their Corresponding Benefits
Hand reflexology provides a unique approach to health, where specific points on your hands are associated with different parts of your body. By applying pressure to these points, you can potentially alleviate various ailments and improve your overall well-being. Here are some key reflex points located on the hands and the benefits they can offer:
1. The Thumb Base:
- Location and Technique:
- The base of the thumb corresponds to the head and neck area. You can apply pressure using the thumb of your opposite hand or perform gentle circular motions.
- Benefits:
- This point is especially beneficial for relieving headaches and reducing tension in the neck area. It can also be helpful in managing stress and fatigue that often accumulates in the head and neck.
2. The Index Finger Base:
- Location and Technique:
- Located at the base of the index finger, this point can be stimulated by pressing with the thumb and index finger of the opposite hand.
- Benefits:
- This reflex area is linked to the chest and respiratory system. Stimulating this point can aid in easing breathing difficulties, clearing chest congestion, and potentially providing relief from conditions like colds or bronchitis.
3. Center of the Palm:
- Location and Technique:
- The center of the palm acts as a reflex point for the stomach. Use the thumb of your opposite hand to apply a steady, firm pressure or perform a gentle rotating motion to stimulate this area.
- Benefits:
- This point is ideal for addressing issues related to digestion. It can help in soothing stomach pain, promoting better digestion, and alleviating symptoms of indigestion or bloating.
These reflex points are accessible and easy to work on, making them perfect for DIY hand reflexology sessions. By regularly stimulating these points, you can harness the potential benefits of reflexology to manage everyday ailments and enhance your health. Remember to approach reflexology with care and consult a professional if you have specific health conditions or concerns.
Tips for a Successful DIY Hand Reflexology Session
Hand reflexology is a flexible and easily accessible form of self-care that you can perform at home. To make the most out of your DIY hand reflexology sessions and ensure they are effective and enjoyable, follow these practical tips:
1. Start with Light Pressure and Adjust as Needed:
- Begin each session by applying gentle pressure to the reflex points. This helps your body to adjust without causing discomfort.
- Gradually increase the pressure as per your comfort level. It’s important to listen to your body and avoid applying too much force, which could lead to discomfort or pain.
2. Duration of Each Session:
- A standard hand reflexology session can be as short or as long as you prefer, typically lasting between 5 to 30 minutes.
- If you’re just starting out, begin with shorter sessions to see how your body responds before gradually increasing the duration.
- Even a few minutes can be beneficial, especially if you are dealing with stress or need a quick break to rejuvenate.
3. Regular Practice for Optimal Benefits:
- Consistency is key in reflexology. Aim to practice hand reflexology 2-3 times a week to maximize the health benefits.
- Regular sessions can help in maintaining improved circulation, stress relief, and better overall health.
4. Create a Relaxing Environment:
- Enhance your reflexology experience by creating a calming atmosphere. This could involve dimming the lights, playing soft music, or using aromatherapy with essential oils to help relax your mind and body.
- Make sure the room is at a comfortable temperature and that you won’t be disturbed during your session.
5. Hydrate and Reflect Post-Session:
- Drinking water after a reflexology session can help flush out toxins that are released during the process. Stay hydrated to support your body’s natural detoxification.
- Take a few minutes after your session to reflect on how you feel. This can help you better understand your body’s responses to different reflex points and tailor future sessions to your specific needs.
By following these tips, your DIY hand reflexology sessions can become a cherished part of your wellness routine, offering a simple yet effective way to enhance your health and well-being from the comfort of your home.
Safety Considerations and When to Avoid DIY Hand Reflexology
While hand reflexology is a generally safe practice that can offer numerous health benefits, there are certain situations and conditions where it should be approached with caution or avoided altogether. Being aware of these safety considerations can help prevent complications and ensure that reflexology is a beneficial addition to your wellness routine.
1. Hand Injuries or Conditions:
- Avoid practicing hand reflexology if you have any active injuries, infections, or severe conditions affecting your hands such as severe arthritis, fractures, or wounds. These conditions can be exacerbated by the pressure and manipulation involved in reflexology.
2. Acute or Severe Illnesses:
- If you are experiencing acute illnesses, such as severe infections or inflammation, reflexology might not be advisable. Wait until you have recovered or consult with your healthcare provider before starting reflexology.
3. Chronic Conditions:
- For individuals with chronic conditions such as heart disease, diabetes, or cancer, reflexology should be approached with caution. These conditions can be affected by the systemic changes that reflexology might promote, such as increased circulation and relaxation which can alter blood pressure and glucose levels.
- Always consult with a healthcare provider before beginning any new therapy, including reflexology, especially if you have any serious health conditions or are under medical treatment.
4. Pregnancy:
- Reflexology can sometimes stimulate labor, so pregnant women, especially those in high-risk categories or with complications, should consult their healthcare provider before engaging in reflexology.
5. After Surgery:
- Avoid reflexology immediately after surgery as it may affect the healing process or interfere with post-operative recovery. Always follow your doctor’s advice on when it is safe to resume such practices.
6. Varicose Veins and Blood Clot Risks:
- If you have varicose veins or a history of blood clots, consult with a healthcare provider before practicing reflexology. The pressure applied during reflexology could potentially dislodge a clot or worsen varicose veins.
Conclusion:
- Reflexology is intended to support and not replace traditional medical treatments. It’s important to use common sense and to consult healthcare professionals when considering reflexology, particularly if you have existing health issues or concerns. By adhering to these guidelines, you can enjoy the benefits of reflexology safely and effectively.
Conclusion
DIY hand reflexology is a powerful tool you can use to maintain health and relieve stress. By learning to apply these techniques, you can enjoy the benefits of reflexology from the comfort of your home.
Further Resources
For those interested in exploring more about hand reflexology and its various aspects, we recommend checking out the following resources on our website:
- Hand Reflexology: Delve deeper into the specific techniques and benefits of hand reflexology. This article provides a comprehensive overview, perfect for those looking to expand their understanding or practice at home.
- Reflexology Benefits: Discover the wide range of benefits that reflexology can offer for both physical and mental health. This resource explores how reflexology can be a key component of a holistic health regimen.
- Reflexology Cost: Learn about the factors that influence the cost of reflexology services, helping you to make informed decisions about incorporating this therapy into your health and wellness plans.
- Home: Visit our main page to learn more about Reflexology Auckland and our full range of services.
These articles provide valuable insights and detailed information to help you better understand the potential of reflexology and how you can integrate it into your health routine safely and effectively. Whether you’re new to reflexology or looking to deepen your knowledge, these resources are excellent starting points.
- How to Perform:
- Place the pad of your thumb on the area of your hand you wish to work on.
- Gently press down into the skin.
- Move your thumb forward in a small “walking” motion, inching along the hand.
- Continue this movement across different zones of the hand that correspond to areas of your body you wish to address.
- Benefits:
- This technique is excellent for navigating larger areas of the hand, such as the palm or the back of the hand, making it effective for broadly stimulating internal organs and body systems.
2. Finger Walking:
- How to Perform:
- Use your index and middle fingers to ‘walk’ along a specific line or area on the hand.
- Apply gentle pressure in a sequential, caterpillar-like motion.
- This method allows for more precise control and is ideal for smaller areas or where finer attention is needed.
- Benefits:
- Finger walking is particularly useful for detailed work on complex reflex areas like those between the bones of the hand, facilitating targeted effects on specific organs.
3. Hook and Backup:
- How to Perform:
- Press your thumb or another finger into a specific reflex point.
- Apply steady pressure to go slightly deeper.
- Gently pull the finger backward without lifting the pressure.
- Benefits:
- This technique reaches deeper layers of hand tissue, stimulating reflex points that are more deeply embedded and enhancing the impact on the corresponding internal areas.
4. Press and Rotate:
- How to Perform:
- Identify a reflex point on your hand.
- Press down firmly with your thumb.
- Slowly rotate your thumb over this point, maintaining constant pressure.
- Benefits:
- The rotating motion helps to increase blood circulation and nerve activity in the area, enhancing the reflexology effects and promoting healing in the associated body parts.
By mastering these fundamental hand reflexology techniques, you can begin to explore the benefits of this practice at home, offering yourself a way to support your health in a direct and personal manner.
Common Hand Reflex Points and Their Corresponding Benefits
Hand reflexology provides a unique approach to health, where specific points on your hands are associated with different parts of your body. By applying pressure to these points, you can potentially alleviate various ailments and improve your overall well-being. Here are some key reflex points located on the hands and the benefits they can offer:
1. The Thumb Base:
- Location and Technique:
- The base of the thumb corresponds to the head and neck area. You can apply pressure using the thumb of your opposite hand or perform gentle circular motions.
- Benefits:
- This point is especially beneficial for relieving headaches and reducing tension in the neck area. It can also be helpful in managing stress and fatigue that often accumulates in the head and neck.
2. The Index Finger Base:
- Location and Technique:
- Located at the base of the index finger, this point can be stimulated by pressing with the thumb and index finger of the opposite hand.
- Benefits:
- This reflex area is linked to the chest and respiratory system. Stimulating this point can aid in easing breathing difficulties, clearing chest congestion, and potentially providing relief from conditions like colds or bronchitis.
3. Center of the Palm:
- Location and Technique:
- The center of the palm acts as a reflex point for the stomach. Use the thumb of your opposite hand to apply a steady, firm pressure or perform a gentle rotating motion to stimulate this area.
- Benefits:
- This point is ideal for addressing issues related to digestion. It can help in soothing stomach pain, promoting better digestion, and alleviating symptoms of indigestion or bloating.
These reflex points are accessible and easy to work on, making them perfect for DIY hand reflexology sessions. By regularly stimulating these points, you can harness the potential benefits of reflexology to manage everyday ailments and enhance your health. Remember to approach reflexology with care and consult a professional if you have specific health conditions or concerns.
Tips for a Successful DIY Hand Reflexology Session
Hand reflexology is a flexible and easily accessible form of self-care that you can perform at home. To make the most out of your DIY hand reflexology sessions and ensure they are effective and enjoyable, follow these practical tips:
1. Start with Light Pressure and Adjust as Needed:
- Begin each session by applying gentle pressure to the reflex points. This helps your body to adjust without causing discomfort.
- Gradually increase the pressure as per your comfort level. It’s important to listen to your body and avoid applying too much force, which could lead to discomfort or pain.
2. Duration of Each Session:
- A standard hand reflexology session can be as short or as long as you prefer, typically lasting between 5 to 30 minutes.
- If you’re just starting out, begin with shorter sessions to see how your body responds before gradually increasing the duration.
- Even a few minutes can be beneficial, especially if you are dealing with stress or need a quick break to rejuvenate.
3. Regular Practice for Optimal Benefits:
- Consistency is key in reflexology. Aim to practice hand reflexology 2-3 times a week to maximize the health benefits.
- Regular sessions can help in maintaining improved circulation, stress relief, and better overall health.
4. Create a Relaxing Environment:
- Enhance your reflexology experience by creating a calming atmosphere. This could involve dimming the lights, playing soft music, or using aromatherapy with essential oils to help relax your mind and body.
- Make sure the room is at a comfortable temperature and that you won’t be disturbed during your session.
5. Hydrate and Reflect Post-Session:
- Drinking water after a reflexology session can help flush out toxins that are released during the process. Stay hydrated to support your body’s natural detoxification.
- Take a few minutes after your session to reflect on how you feel. This can help you better understand your body’s responses to different reflex points and tailor future sessions to your specific needs.
By following these tips, your DIY hand reflexology sessions can become a cherished part of your wellness routine, offering a simple yet effective way to enhance your health and well-being from the comfort of your home.
Safety Considerations and When to Avoid DIY Hand Reflexology
While hand reflexology is a generally safe practice that can offer numerous health benefits, there are certain situations and conditions where it should be approached with caution or avoided altogether. Being aware of these safety considerations can help prevent complications and ensure that reflexology is a beneficial addition to your wellness routine.
1. Hand Injuries or Conditions:
- Avoid practicing hand reflexology if you have any active injuries, infections, or severe conditions affecting your hands such as severe arthritis, fractures, or wounds. These conditions can be exacerbated by the pressure and manipulation involved in reflexology.
2. Acute or Severe Illnesses:
- If you are experiencing acute illnesses, such as severe infections or inflammation, reflexology might not be advisable. Wait until you have recovered or consult with your healthcare provider before starting reflexology.
3. Chronic Conditions:
- For individuals with chronic conditions such as heart disease, diabetes, or cancer, reflexology should be approached with caution. These conditions can be affected by the systemic changes that reflexology might promote, such as increased circulation and relaxation which can alter blood pressure and glucose levels.
- Always consult with a healthcare provider before beginning any new therapy, including reflexology, especially if you have any serious health conditions or are under medical treatment.
4. Pregnancy:
- Reflexology can sometimes stimulate labor, so pregnant women, especially those in high-risk categories or with complications, should consult their healthcare provider before engaging in reflexology.
5. After Surgery:
- Avoid reflexology immediately after surgery as it may affect the healing process or interfere with post-operative recovery. Always follow your doctor’s advice on when it is safe to resume such practices.
6. Varicose Veins and Blood Clot Risks:
- If you have varicose veins or a history of blood clots, consult with a healthcare provider before practicing reflexology. The pressure applied during reflexology could potentially dislodge a clot or worsen varicose veins.
Conclusion:
- Reflexology is intended to support and not replace traditional medical treatments. It’s important to use common sense and to consult healthcare professionals when considering reflexology, particularly if you have existing health issues or concerns. By adhering to these guidelines, you can enjoy the benefits of reflexology safely and effectively.
Conclusion
DIY hand reflexology is a powerful tool you can use to maintain health and relieve stress. By learning to apply these techniques, you can enjoy the benefits of reflexology from the comfort of your home.
Further Resources
For those interested in exploring more about hand reflexology and its various aspects, we recommend checking out the following resources on our website:
- Hand Reflexology: Delve deeper into the specific techniques and benefits of hand reflexology. This article provides a comprehensive overview, perfect for those looking to expand their understanding or practice at home.
- Reflexology Benefits: Discover the wide range of benefits that reflexology can offer for both physical and mental health. This resource explores how reflexology can be a key component of a holistic health regimen.
- Reflexology Cost: Learn about the factors that influence the cost of reflexology services, helping you to make informed decisions about incorporating this therapy into your health and wellness plans.
- Home: Visit our main page to learn more about Reflexology Auckland and our full range of services.
These articles provide valuable insights and detailed information to help you better understand the potential of reflexology and how you can integrate it into your health routine safely and effectively. Whether you’re new to reflexology or looking to deepen your knowledge, these resources are excellent starting points.
Hand reflexology is a practice rooted in ancient medicine, using pressure points on the hands believed to correspond to various parts of the body. This guide introduces you to simple DIY hand reflexology techniques that you can use at home to enhance relaxation and promote overall wellness.
Key Sections of DIY Hand Reflexology :
What You Need to Get Started
Embarking on your DIY hand reflexology journey is straightforward and requires minimal setup. Here’s what you’ll need to ensure a comfortable and effective session:
1. Your Hands:
- The primary “tool” in hand reflexology is, of course, your own hands. Clean, well-moisturized hands can make the process smoother and more comfortable.
2. Comfortable Seating:
- Choose a comfortable chair or a seat where you can relax without straining your back. Sitting upright in a supportive chair is often best, as it allows you to easily access both of your hands.
3. Optional Tools:
- Soft Mat or Pillow: While not necessary, a soft mat on your lap or a pillow can provide support, making it easier to hold your hand comfortably during the session. This can be particularly helpful if you have a longer session planned or if you find holding your arm up tiresome.
- Lotion or Hand Cream: Applying a small amount of lotion or hand cream can reduce friction and make reflexology techniques more pleasurable and less abrasive on the skin.
- Relaxing Background Music: Consider playing some soft, ambient music to enhance relaxation and create a therapeutic environment. Music or nature sounds can help in maintaining a calm mind and a focused approach.
4. Quiet and Comfortable Environment:
- Find a spot in your home that is typically quiet and free from interruptions. This could be a dedicated room or a cozy corner where you feel relaxed. The idea is to create a space that feels like a sanctuary, where stressors and external distractions are minimized.
- Good Lighting: Ensure the area is well-lit so that you can see your hands clearly without straining your eyes. Natural light is ideal, but a soft lamp can also create a warm and inviting environment.
5. Setting the Mood:
- You might want to set a timer if you have limited time to practice, so you don’t need to watch the clock. This allows you to fully immerse in the experience without worrying about time.
- Keep a glass of water nearby to stay hydrated before and after the session, as reflexology can sometimes release toxins and hydration can help flush these from your system.
By preparing your space and having these items at hand, you can maximize the benefits of your DIY hand reflexology sessions, turning them into a restorative ritual that you look forward to each time.
Understanding the Basics of Hand Reflexology
Hand reflexology is a therapeutic method where specific points on the hands are manipulated to improve health and promote healing in various parts of the body. According to reflexology theory, each area on the hand corresponds to different organs and systems within the body.
By applying pressure to these reflex areas, you can influence the health of the corresponding body parts, potentially easing ailments and boosting overall well-being.
Step-by-Step Guide to DIY Hand Reflexology Techniques
Here’s how you can begin practicing hand reflexology on yourself with some basic techniques. Each method targets different areas and serves various purposes, from relieving tension to improving body functions.
1. Thumb Walking:
- How to Perform:
- Place the pad of your thumb on the area of your hand you wish to work on.
- Gently press down into the skin.
- Move your thumb forward in a small “walking” motion, inching along the hand.
- Continue this movement across different zones of the hand that correspond to areas of your body you wish to address.
- Benefits:
- This technique is excellent for navigating larger areas of the hand, such as the palm or the back of the hand, making it effective for broadly stimulating internal organs and body systems.
2. Finger Walking:
- How to Perform:
- Use your index and middle fingers to ‘walk’ along a specific line or area on the hand.
- Apply gentle pressure in a sequential, caterpillar-like motion.
- This method allows for more precise control and is ideal for smaller areas or where finer attention is needed.
- Benefits:
- Finger walking is particularly useful for detailed work on complex reflex areas like those between the bones of the hand, facilitating targeted effects on specific organs.
3. Hook and Backup:
- How to Perform:
- Press your thumb or another finger into a specific reflex point.
- Apply steady pressure to go slightly deeper.
- Gently pull the finger backward without lifting the pressure.
- Benefits:
- This technique reaches deeper layers of hand tissue, stimulating reflex points that are more deeply embedded and enhancing the impact on the corresponding internal areas.
4. Press and Rotate:
- How to Perform:
- Identify a reflex point on your hand.
- Press down firmly with your thumb.
- Slowly rotate your thumb over this point, maintaining constant pressure.
- Benefits:
- The rotating motion helps to increase blood circulation and nerve activity in the area, enhancing the reflexology effects and promoting healing in the associated body parts.
By mastering these fundamental hand reflexology techniques, you can begin to explore the benefits of this practice at home, offering yourself a way to support your health in a direct and personal manner.
Common Hand Reflex Points and Their Corresponding Benefits
Hand reflexology provides a unique approach to health, where specific points on your hands are associated with different parts of your body. By applying pressure to these points, you can potentially alleviate various ailments and improve your overall well-being. Here are some key reflex points located on the hands and the benefits they can offer:
1. The Thumb Base:
- Location and Technique:
- The base of the thumb corresponds to the head and neck area. You can apply pressure using the thumb of your opposite hand or perform gentle circular motions.
- Benefits:
- This point is especially beneficial for relieving headaches and reducing tension in the neck area. It can also be helpful in managing stress and fatigue that often accumulates in the head and neck.
2. The Index Finger Base:
- Location and Technique:
- Located at the base of the index finger, this point can be stimulated by pressing with the thumb and index finger of the opposite hand.
- Benefits:
- This reflex area is linked to the chest and respiratory system. Stimulating this point can aid in easing breathing difficulties, clearing chest congestion, and potentially providing relief from conditions like colds or bronchitis.
3. Center of the Palm:
- Location and Technique:
- The center of the palm acts as a reflex point for the stomach. Use the thumb of your opposite hand to apply a steady, firm pressure or perform a gentle rotating motion to stimulate this area.
- Benefits:
- This point is ideal for addressing issues related to digestion. It can help in soothing stomach pain, promoting better digestion, and alleviating symptoms of indigestion or bloating.
These reflex points are accessible and easy to work on, making them perfect for DIY hand reflexology sessions. By regularly stimulating these points, you can harness the potential benefits of reflexology to manage everyday ailments and enhance your health. Remember to approach reflexology with care and consult a professional if you have specific health conditions or concerns.
Tips for a Successful DIY Hand Reflexology Session
Hand reflexology is a flexible and easily accessible form of self-care that you can perform at home. To make the most out of your DIY hand reflexology sessions and ensure they are effective and enjoyable, follow these practical tips:
1. Start with Light Pressure and Adjust as Needed:
- Begin each session by applying gentle pressure to the reflex points. This helps your body to adjust without causing discomfort.
- Gradually increase the pressure as per your comfort level. It’s important to listen to your body and avoid applying too much force, which could lead to discomfort or pain.
2. Duration of Each Session:
- A standard hand reflexology session can be as short or as long as you prefer, typically lasting between 5 to 30 minutes.
- If you’re just starting out, begin with shorter sessions to see how your body responds before gradually increasing the duration.
- Even a few minutes can be beneficial, especially if you are dealing with stress or need a quick break to rejuvenate.
3. Regular Practice for Optimal Benefits:
- Consistency is key in reflexology. Aim to practice hand reflexology 2-3 times a week to maximize the health benefits.
- Regular sessions can help in maintaining improved circulation, stress relief, and better overall health.
4. Create a Relaxing Environment:
- Enhance your reflexology experience by creating a calming atmosphere. This could involve dimming the lights, playing soft music, or using aromatherapy with essential oils to help relax your mind and body.
- Make sure the room is at a comfortable temperature and that you won’t be disturbed during your session.
5. Hydrate and Reflect Post-Session:
- Drinking water after a reflexology session can help flush out toxins that are released during the process. Stay hydrated to support your body’s natural detoxification.
- Take a few minutes after your session to reflect on how you feel. This can help you better understand your body’s responses to different reflex points and tailor future sessions to your specific needs.
By following these tips, your DIY hand reflexology sessions can become a cherished part of your wellness routine, offering a simple yet effective way to enhance your health and well-being from the comfort of your home.
Safety Considerations and When to Avoid DIY Hand Reflexology
While hand reflexology is a generally safe practice that can offer numerous health benefits, there are certain situations and conditions where it should be approached with caution or avoided altogether. Being aware of these safety considerations can help prevent complications and ensure that reflexology is a beneficial addition to your wellness routine.
1. Hand Injuries or Conditions:
- Avoid practicing hand reflexology if you have any active injuries, infections, or severe conditions affecting your hands such as severe arthritis, fractures, or wounds. These conditions can be exacerbated by the pressure and manipulation involved in reflexology.
2. Acute or Severe Illnesses:
- If you are experiencing acute illnesses, such as severe infections or inflammation, reflexology might not be advisable. Wait until you have recovered or consult with your healthcare provider before starting reflexology.
3. Chronic Conditions:
- For individuals with chronic conditions such as heart disease, diabetes, or cancer, reflexology should be approached with caution. These conditions can be affected by the systemic changes that reflexology might promote, such as increased circulation and relaxation which can alter blood pressure and glucose levels.
- Always consult with a healthcare provider before beginning any new therapy, including reflexology, especially if you have any serious health conditions or are under medical treatment.
4. Pregnancy:
- Reflexology can sometimes stimulate labor, so pregnant women, especially those in high-risk categories or with complications, should consult their healthcare provider before engaging in reflexology.
5. After Surgery:
- Avoid reflexology immediately after surgery as it may affect the healing process or interfere with post-operative recovery. Always follow your doctor’s advice on when it is safe to resume such practices.
6. Varicose Veins and Blood Clot Risks:
- If you have varicose veins or a history of blood clots, consult with a healthcare provider before practicing reflexology. The pressure applied during reflexology could potentially dislodge a clot or worsen varicose veins.
Conclusion:
- Reflexology is intended to support and not replace traditional medical treatments. It’s important to use common sense and to consult healthcare professionals when considering reflexology, particularly if you have existing health issues or concerns. By adhering to these guidelines, you can enjoy the benefits of reflexology safely and effectively.
Conclusion
DIY hand reflexology is a powerful tool you can use to maintain health and relieve stress. By learning to apply these techniques, you can enjoy the benefits of reflexology from the comfort of your home.
Further Resources
For those interested in exploring more about hand reflexology and its various aspects, we recommend checking out the following resources on our website:
- Hand Reflexology: Delve deeper into the specific techniques and benefits of hand reflexology. This article provides a comprehensive overview, perfect for those looking to expand their understanding or practice at home.
- Reflexology Benefits: Discover the wide range of benefits that reflexology can offer for both physical and mental health. This resource explores how reflexology can be a key component of a holistic health regimen.
- Reflexology Cost: Learn about the factors that influence the cost of reflexology services, helping you to make informed decisions about incorporating this therapy into your health and wellness plans.
- Home: Visit our main page to learn more about Reflexology Auckland and our full range of services.
These articles provide valuable insights and detailed information to help you better understand the potential of reflexology and how you can integrate it into your health routine safely and effectively. Whether you’re new to reflexology or looking to deepen your knowledge, these resources are excellent starting points.